Reviving Ancient Power Tools
A brief summary on a weekend project I undertook to fix an old power tool from another generation.

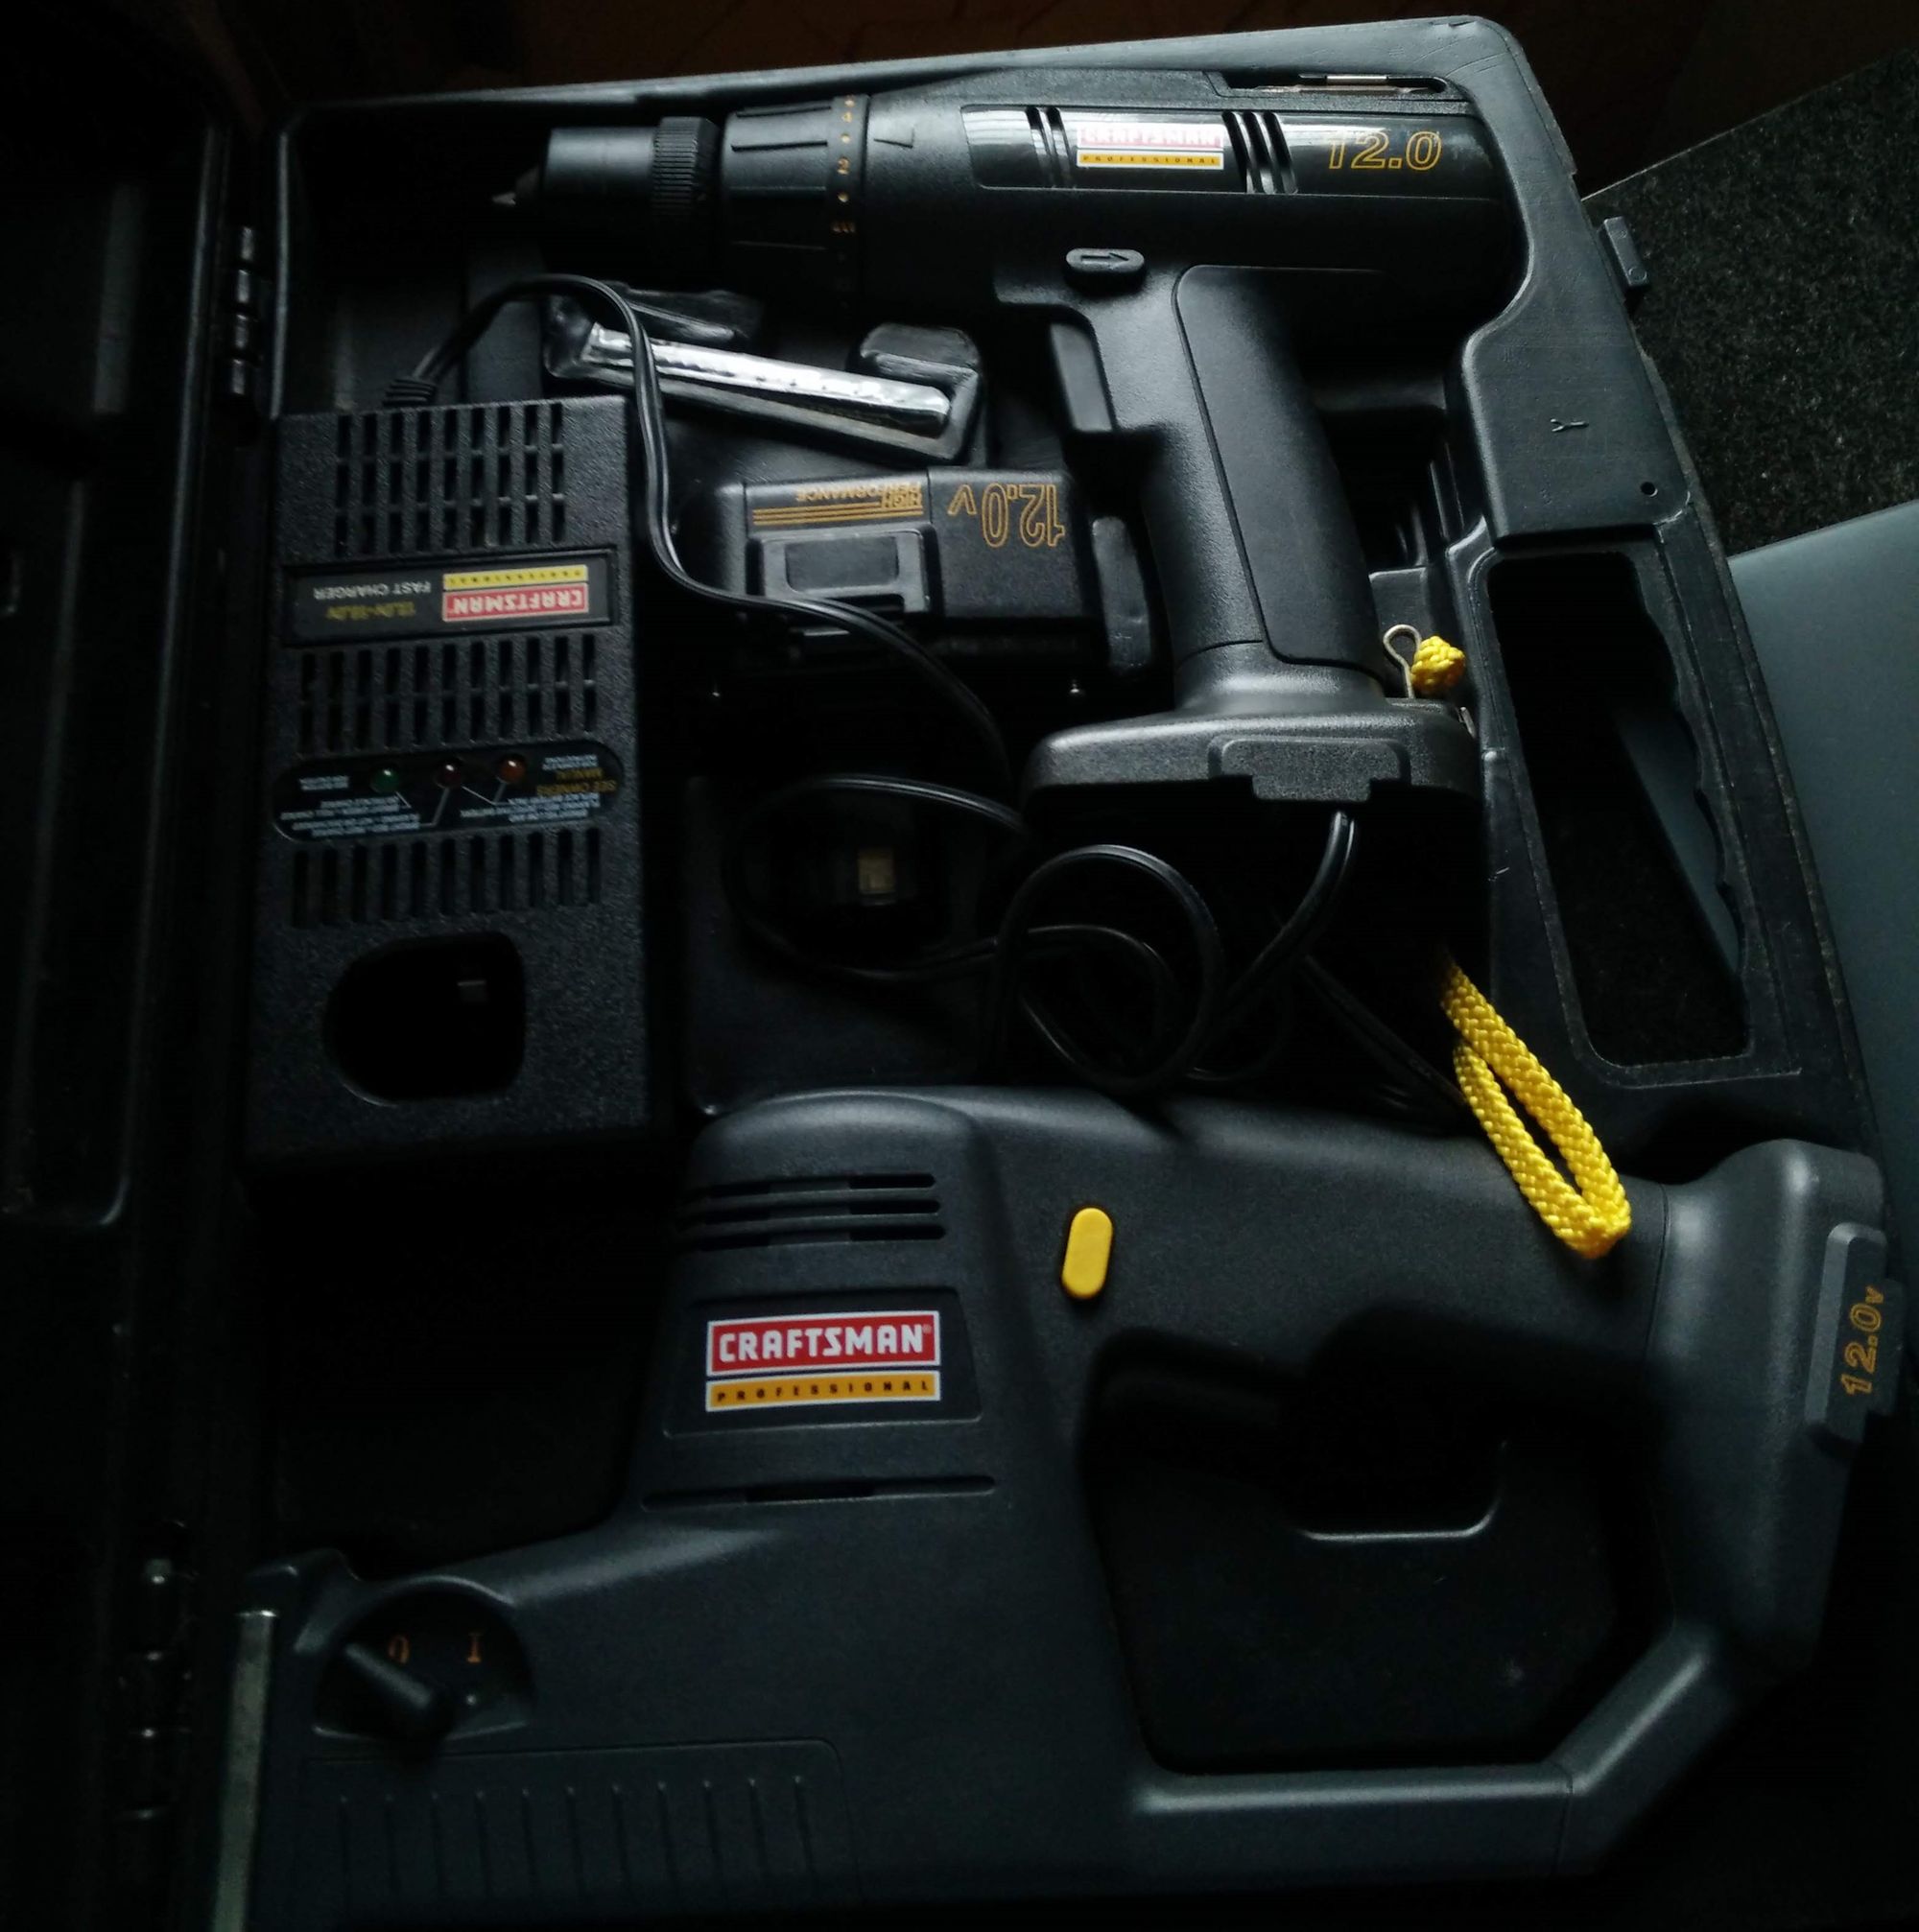
During the pandemic, a cleanup of some old boxes led to the discovery of an old tool box. This interesting Craftsman hard box had a backstory and was in pristine condition for its age. Turns out my dad bought this tool kit back with him from the states in the year 2000. The folks at the airport thought he was a skilled carpenter, bringing back such equipment... He's just an enthusiast who loves his tools.
The tools barely saw any action and 20 years later, the dying Ni-Cd batteries lasted a maximum of 5 mins before going flat. These batteries powered a cordless drill gun and a reciprocating saw.
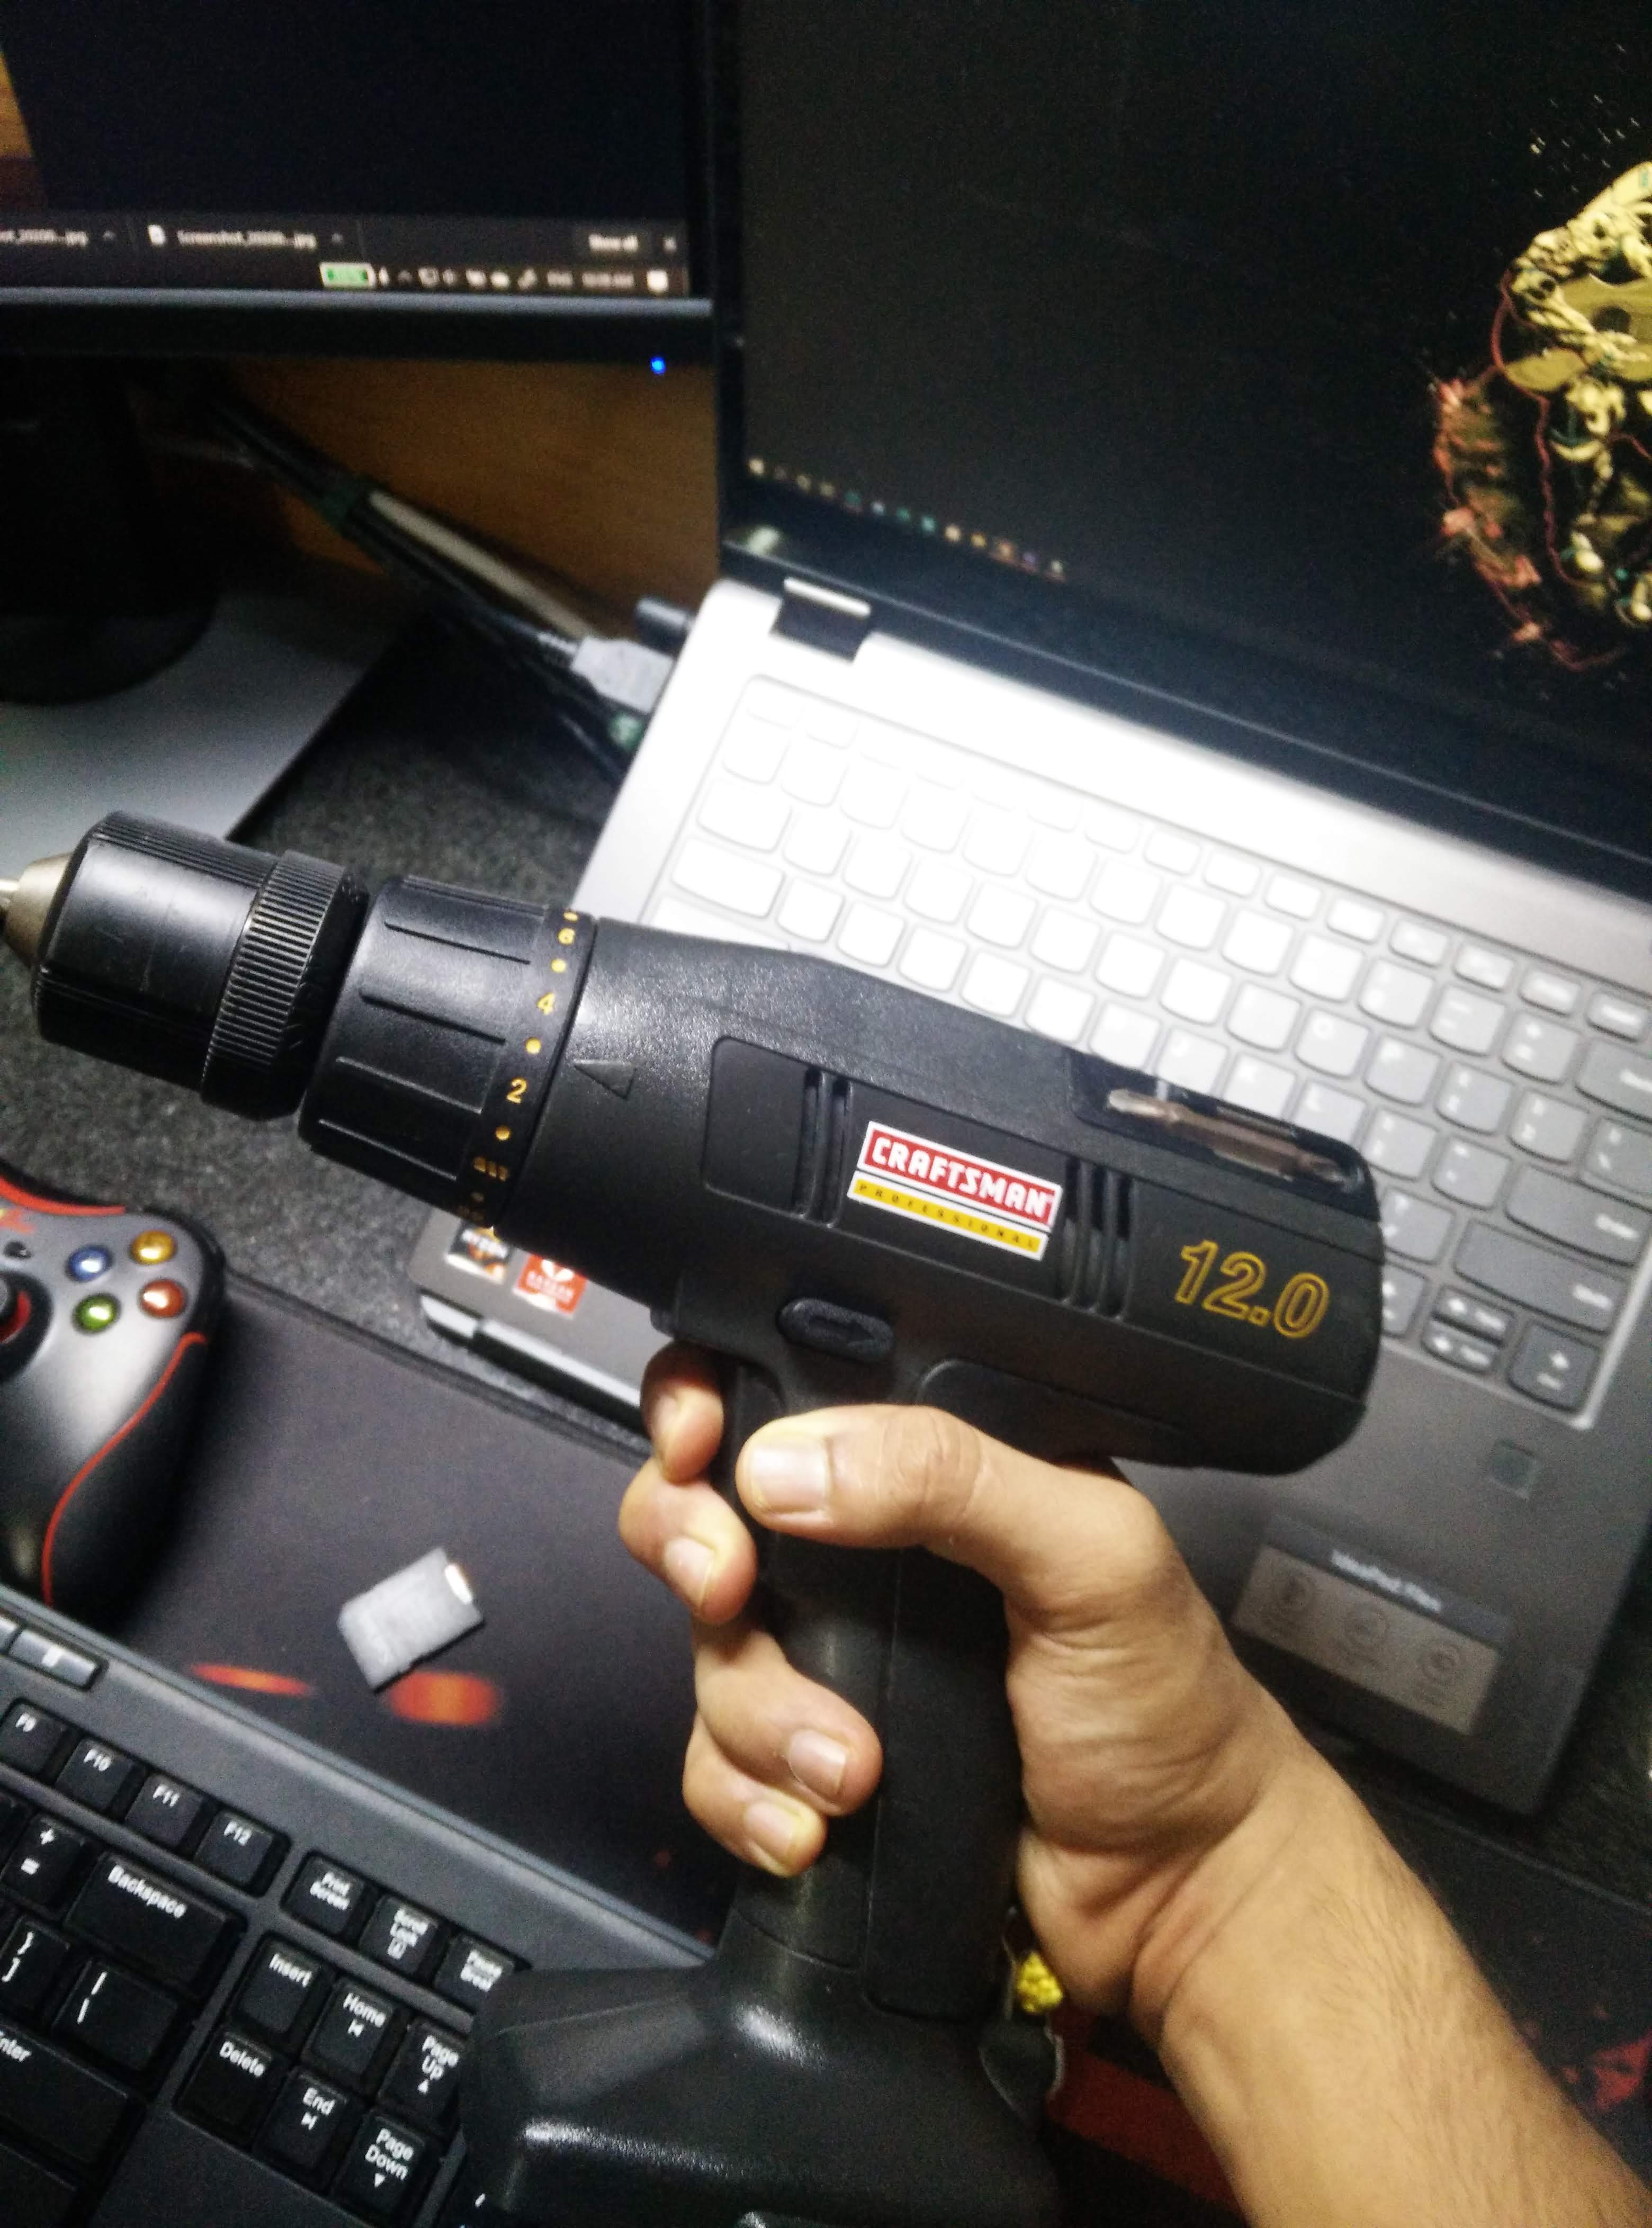
The unique feature of the drill gun was its clutch. It is not easy to find drill guns with a clutch, where I stay. This clutch allows to set a torque level for screws. This avoids over tightening and stripping of the screw head. It was capable of drilling into walls, wood and metal with the right bits and fully closed clutch. The reciprocating saw can chew through 2x4 lumber with a breeze.
I set myself on a mission to get this working again, with the best engineering practices and replacement possible.
Battery Science
Solid discoveries
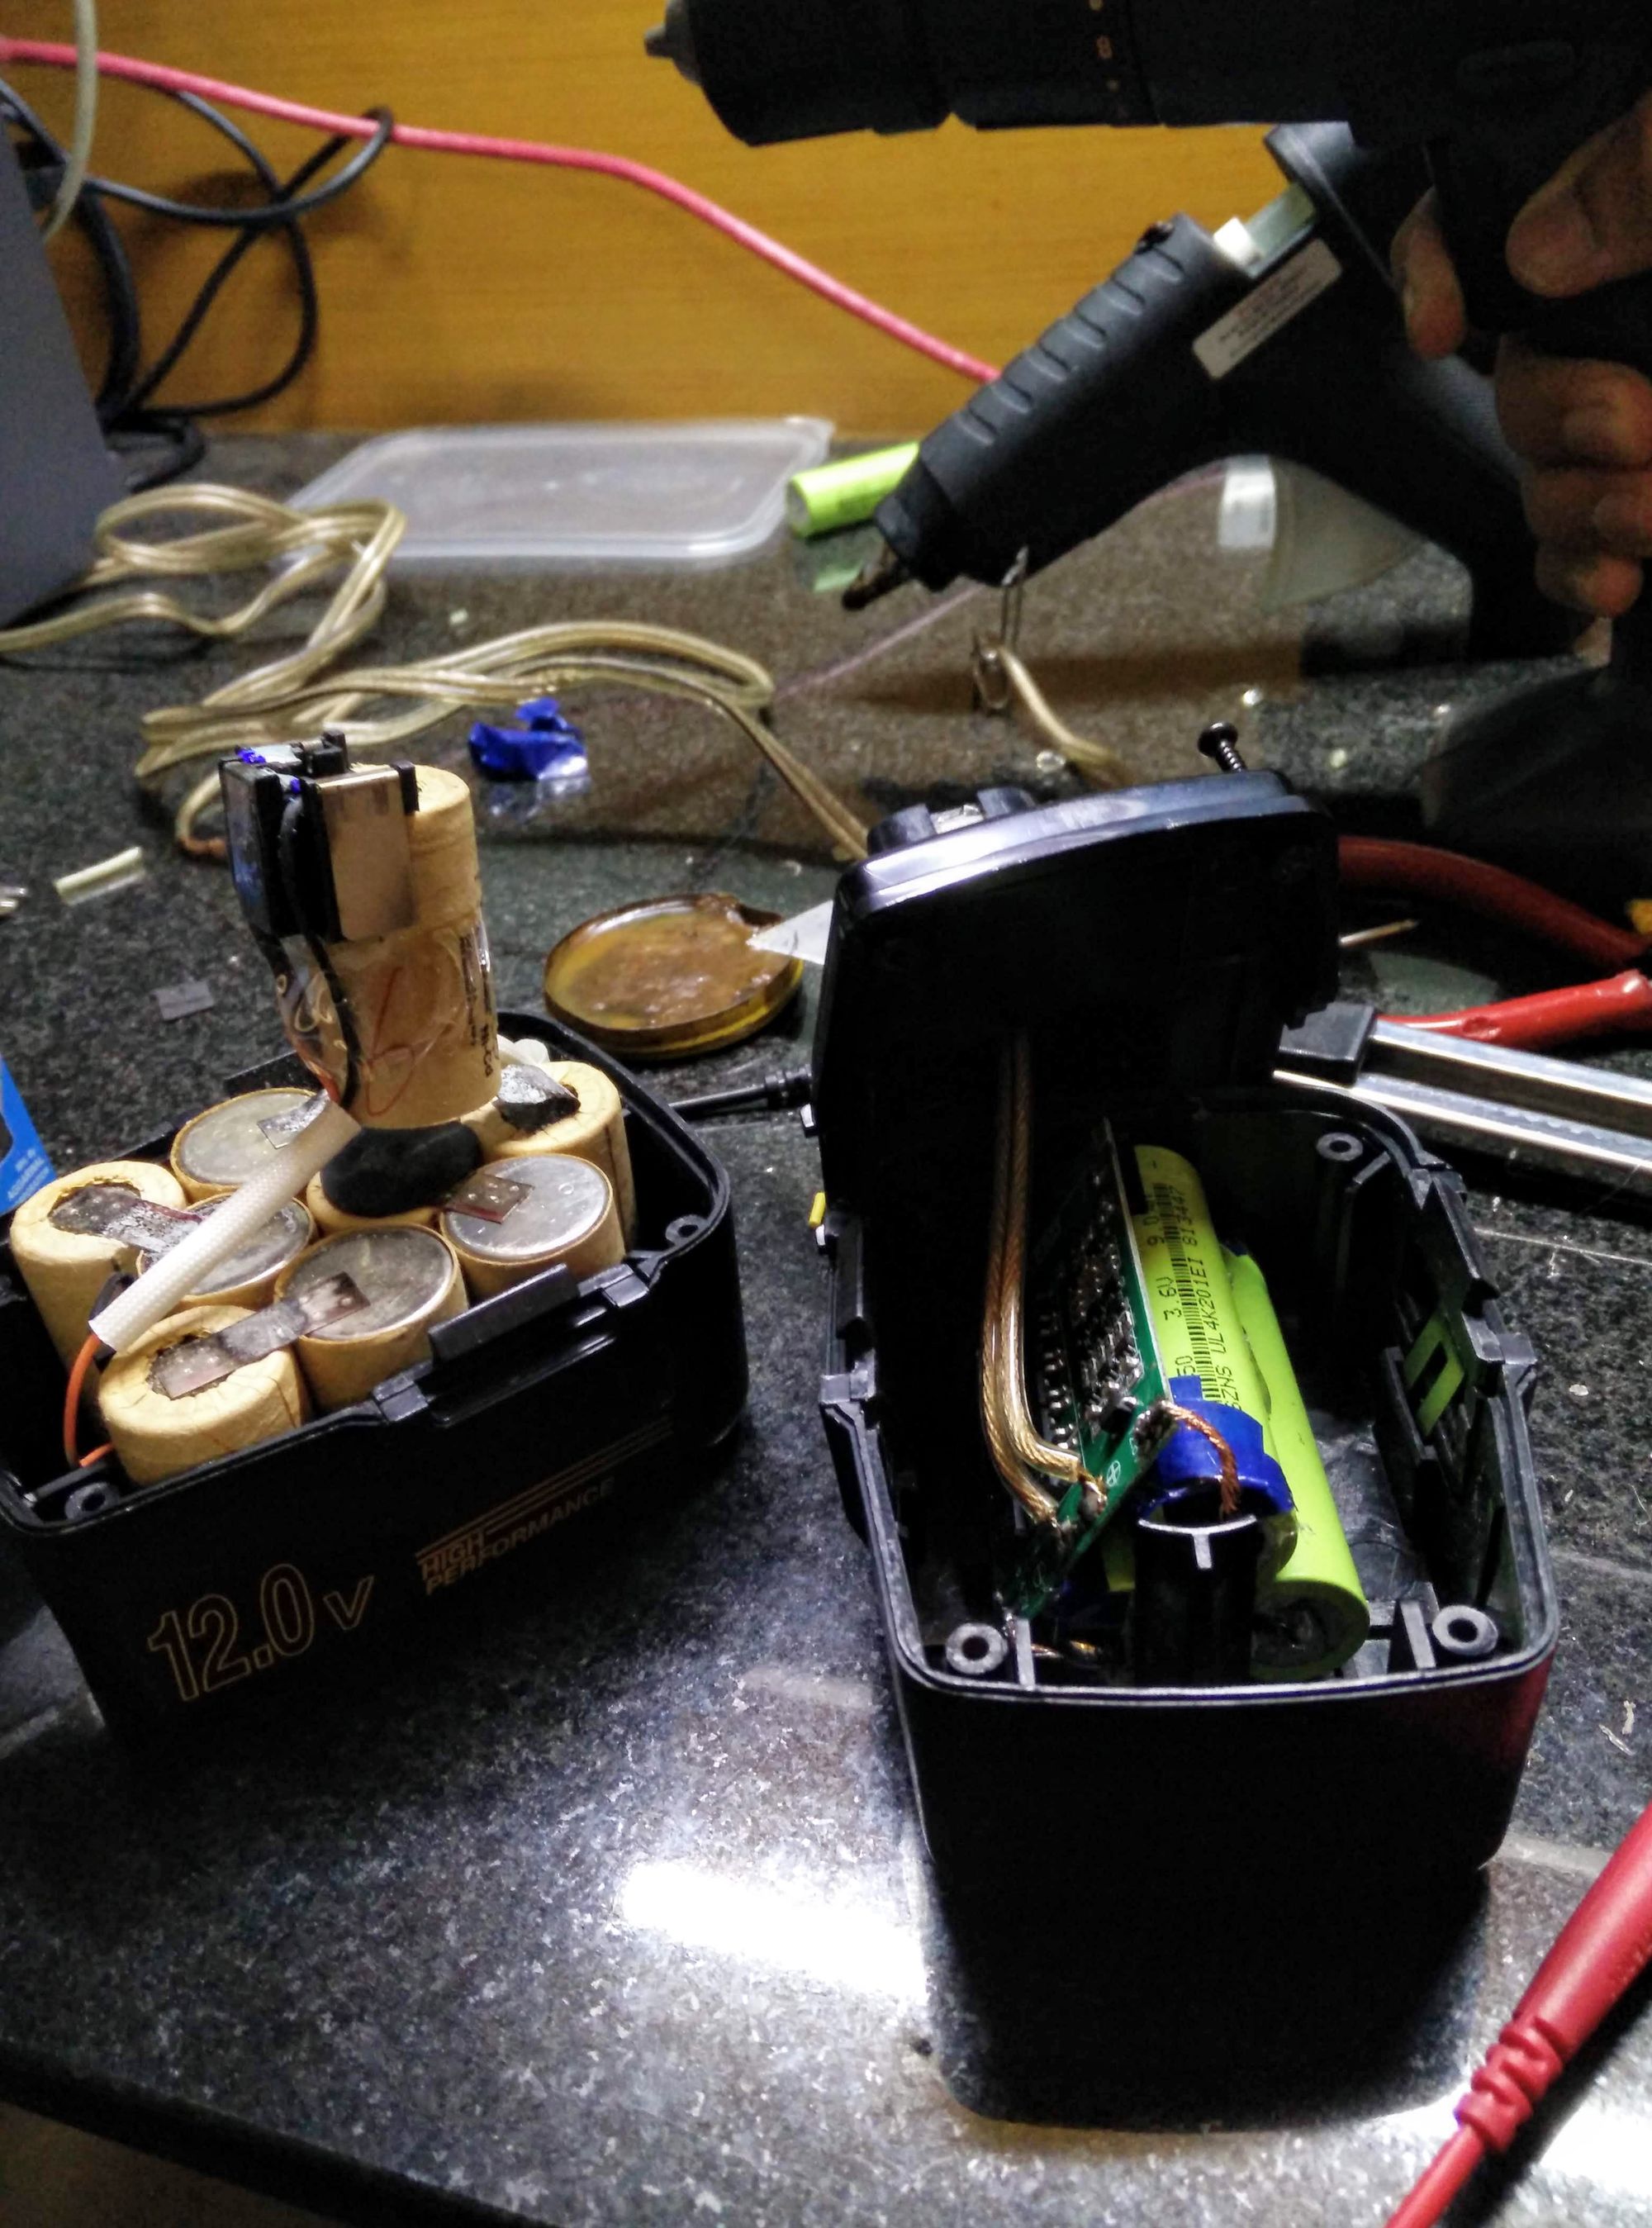
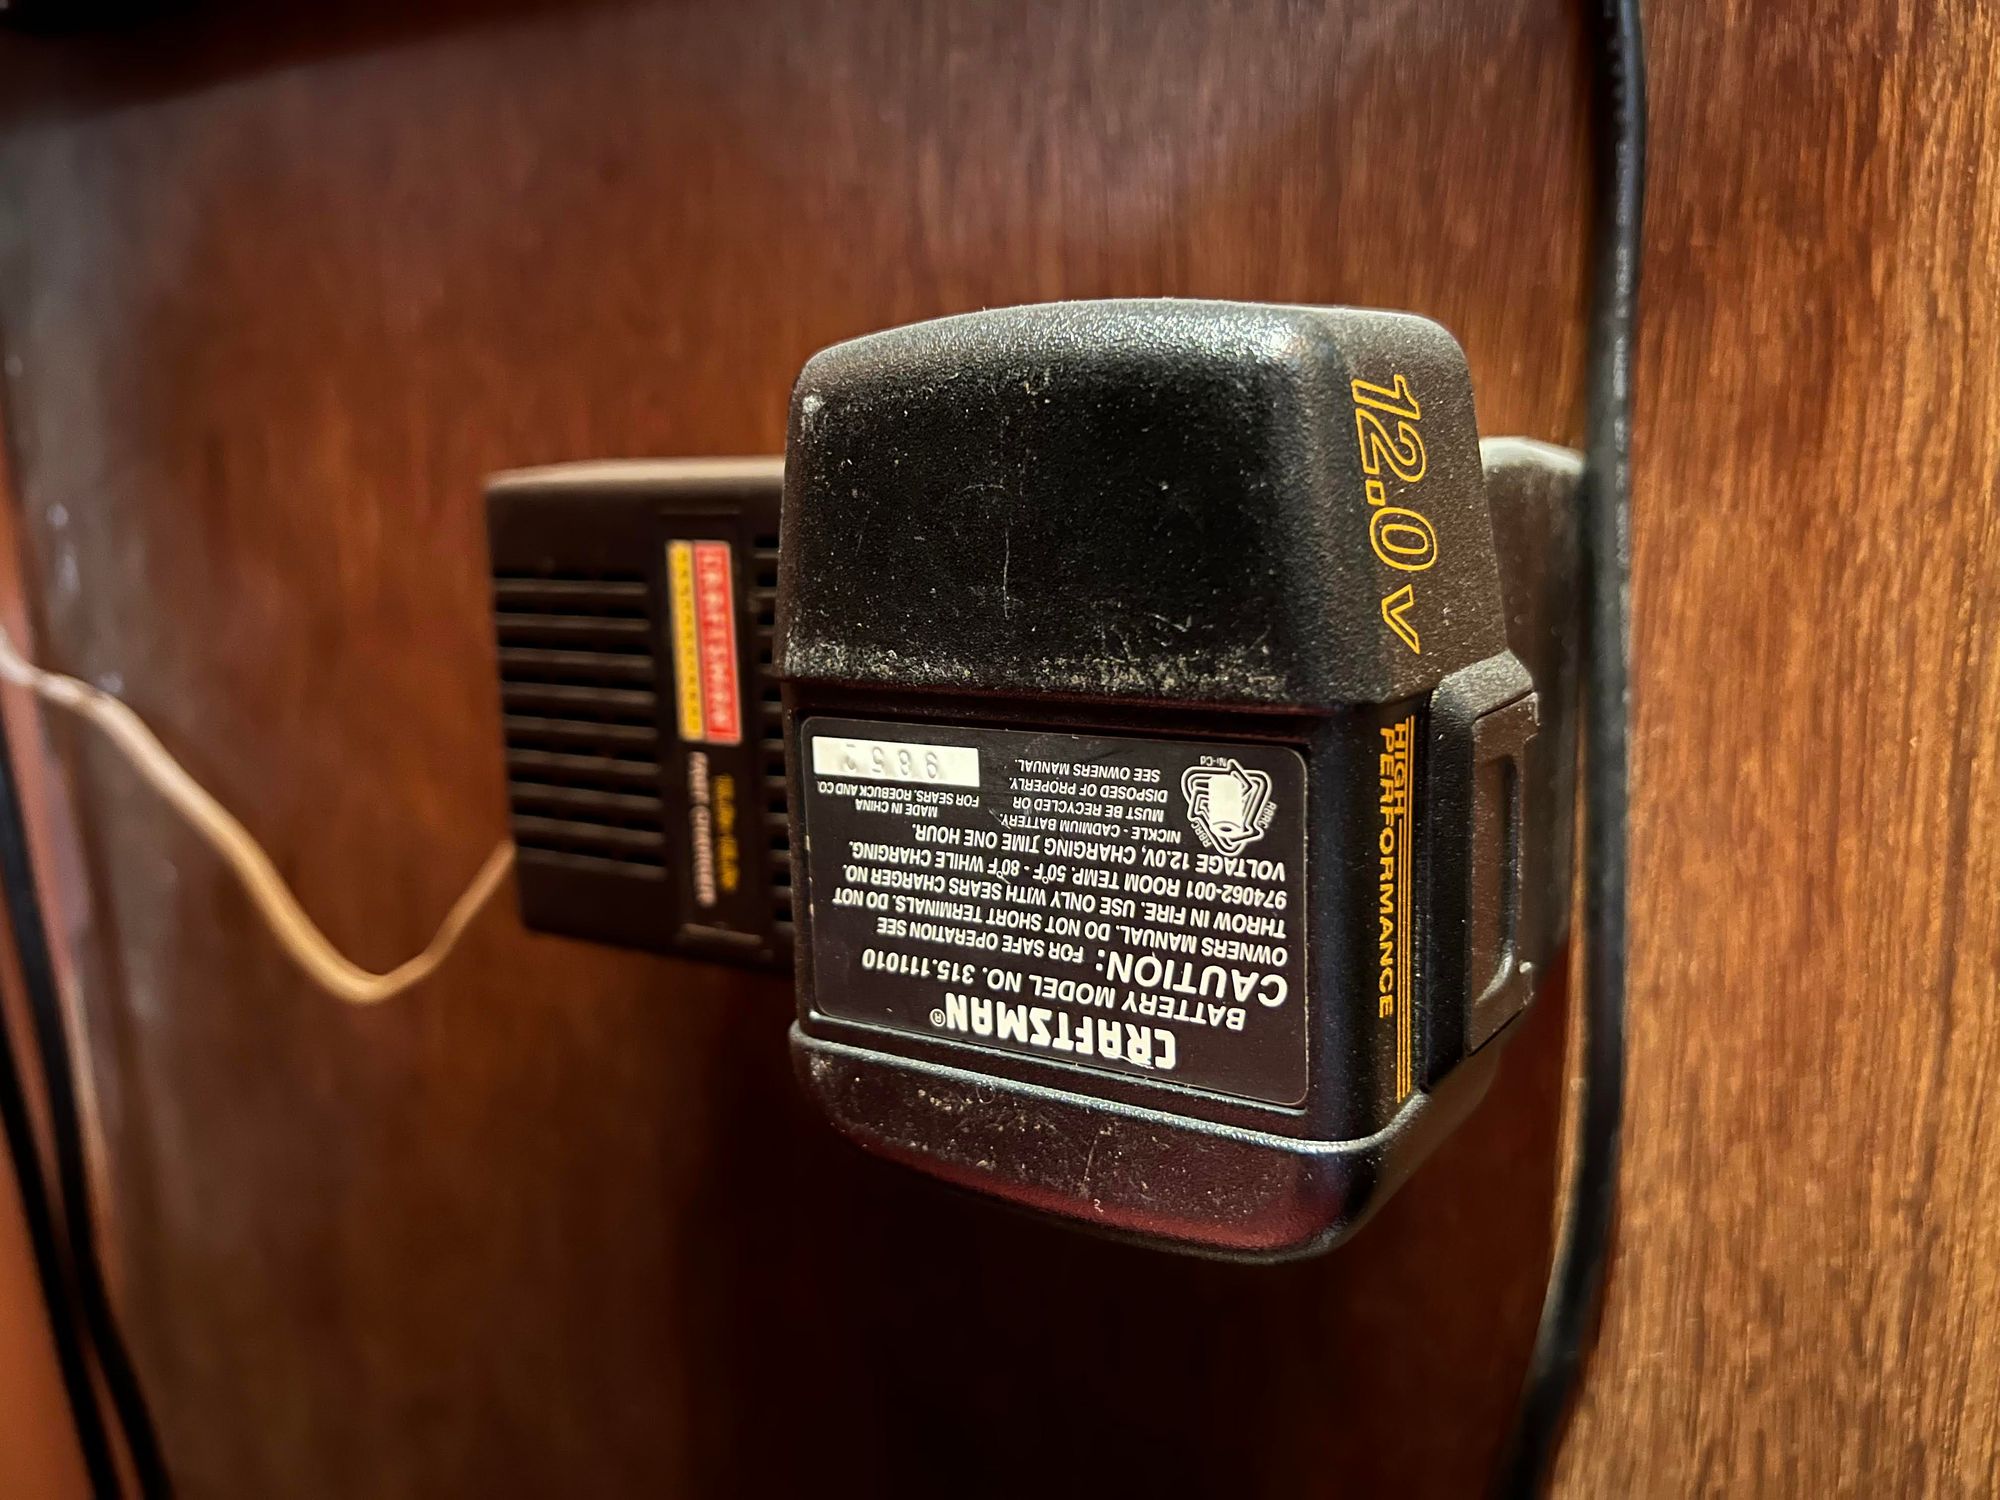
The Craftsman's battery pack employed the use of Ni-Cd Cells. It was the popular choice, as Lithium based cells were expensive at the time and found only in high end equipment. The battery pack consisted of 10 Ni-Cd cells in series with a thermistor to measure temperature during charging. The nominal voltage of each cell is about 1.2V. This adds up to 12v to form the battery.
Power tools pull a lot of current on startup, and Ni-Cd cells have a favorable discharging curve. They maintain their voltage steadily until full discharge. A key problem of Nickel based cells is memory effect. This meant you had to follow complete charge and discharge cycles to prolong its life. Something that doesn't sit with newer battery technologies.
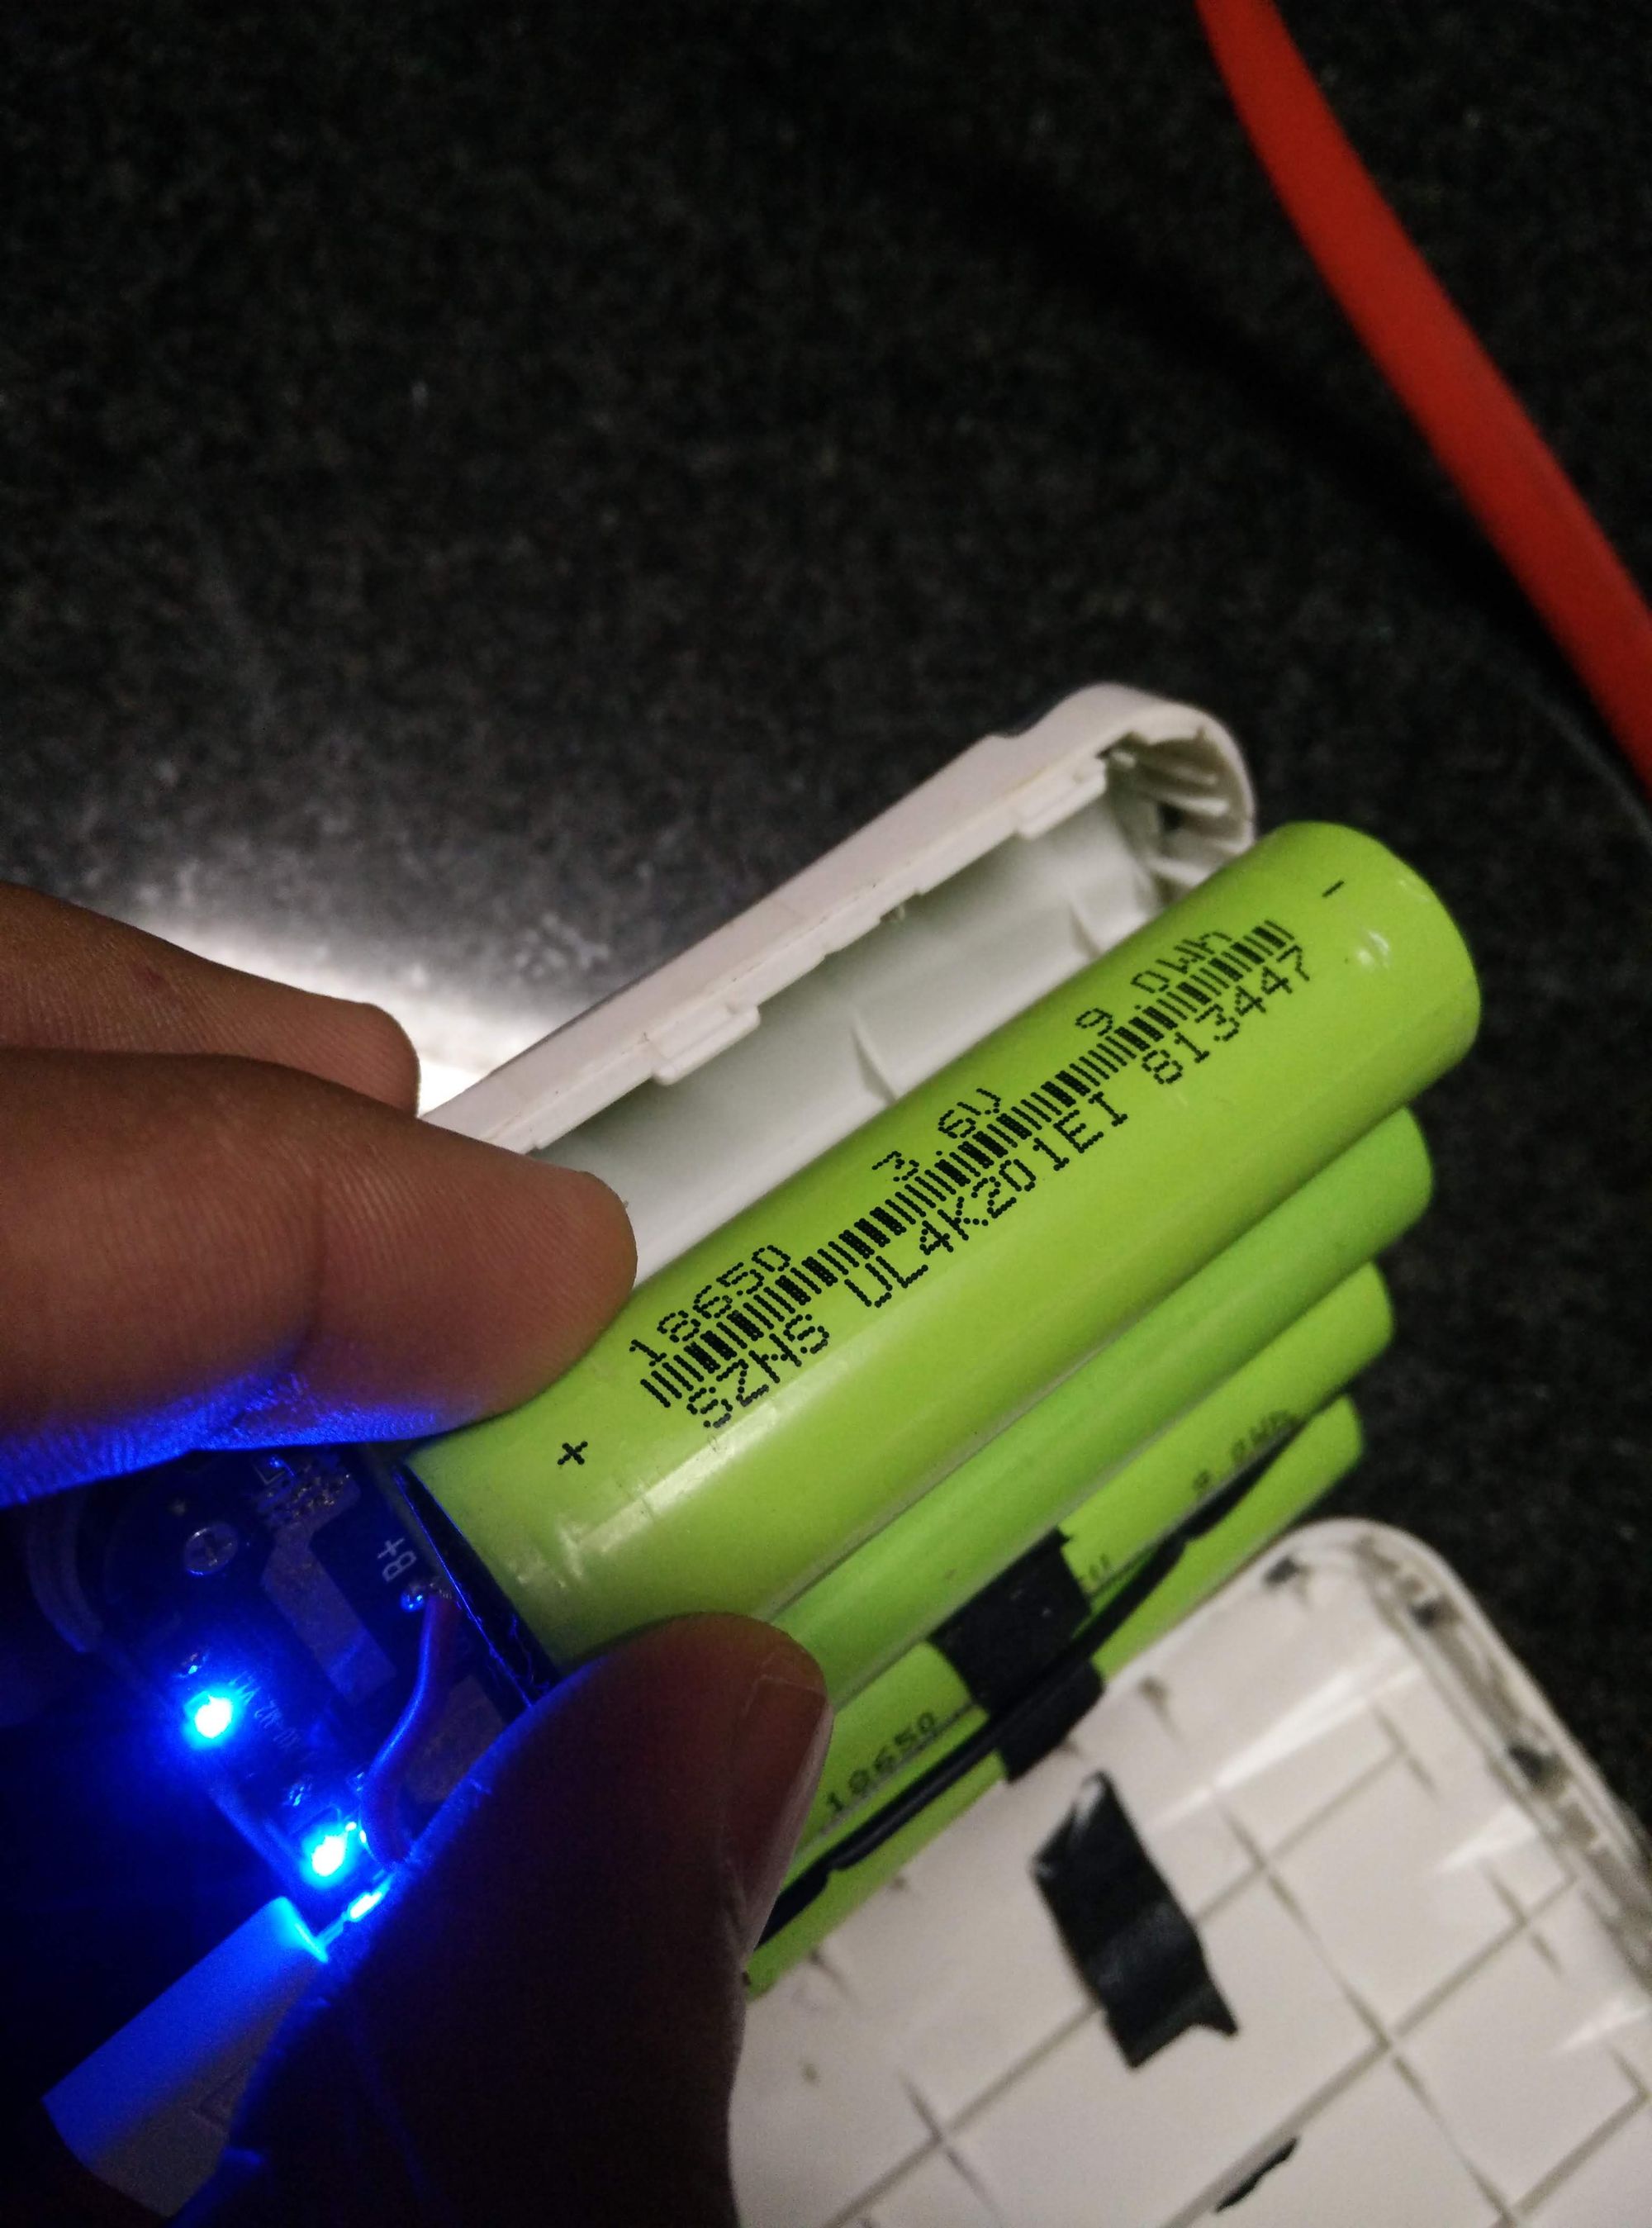
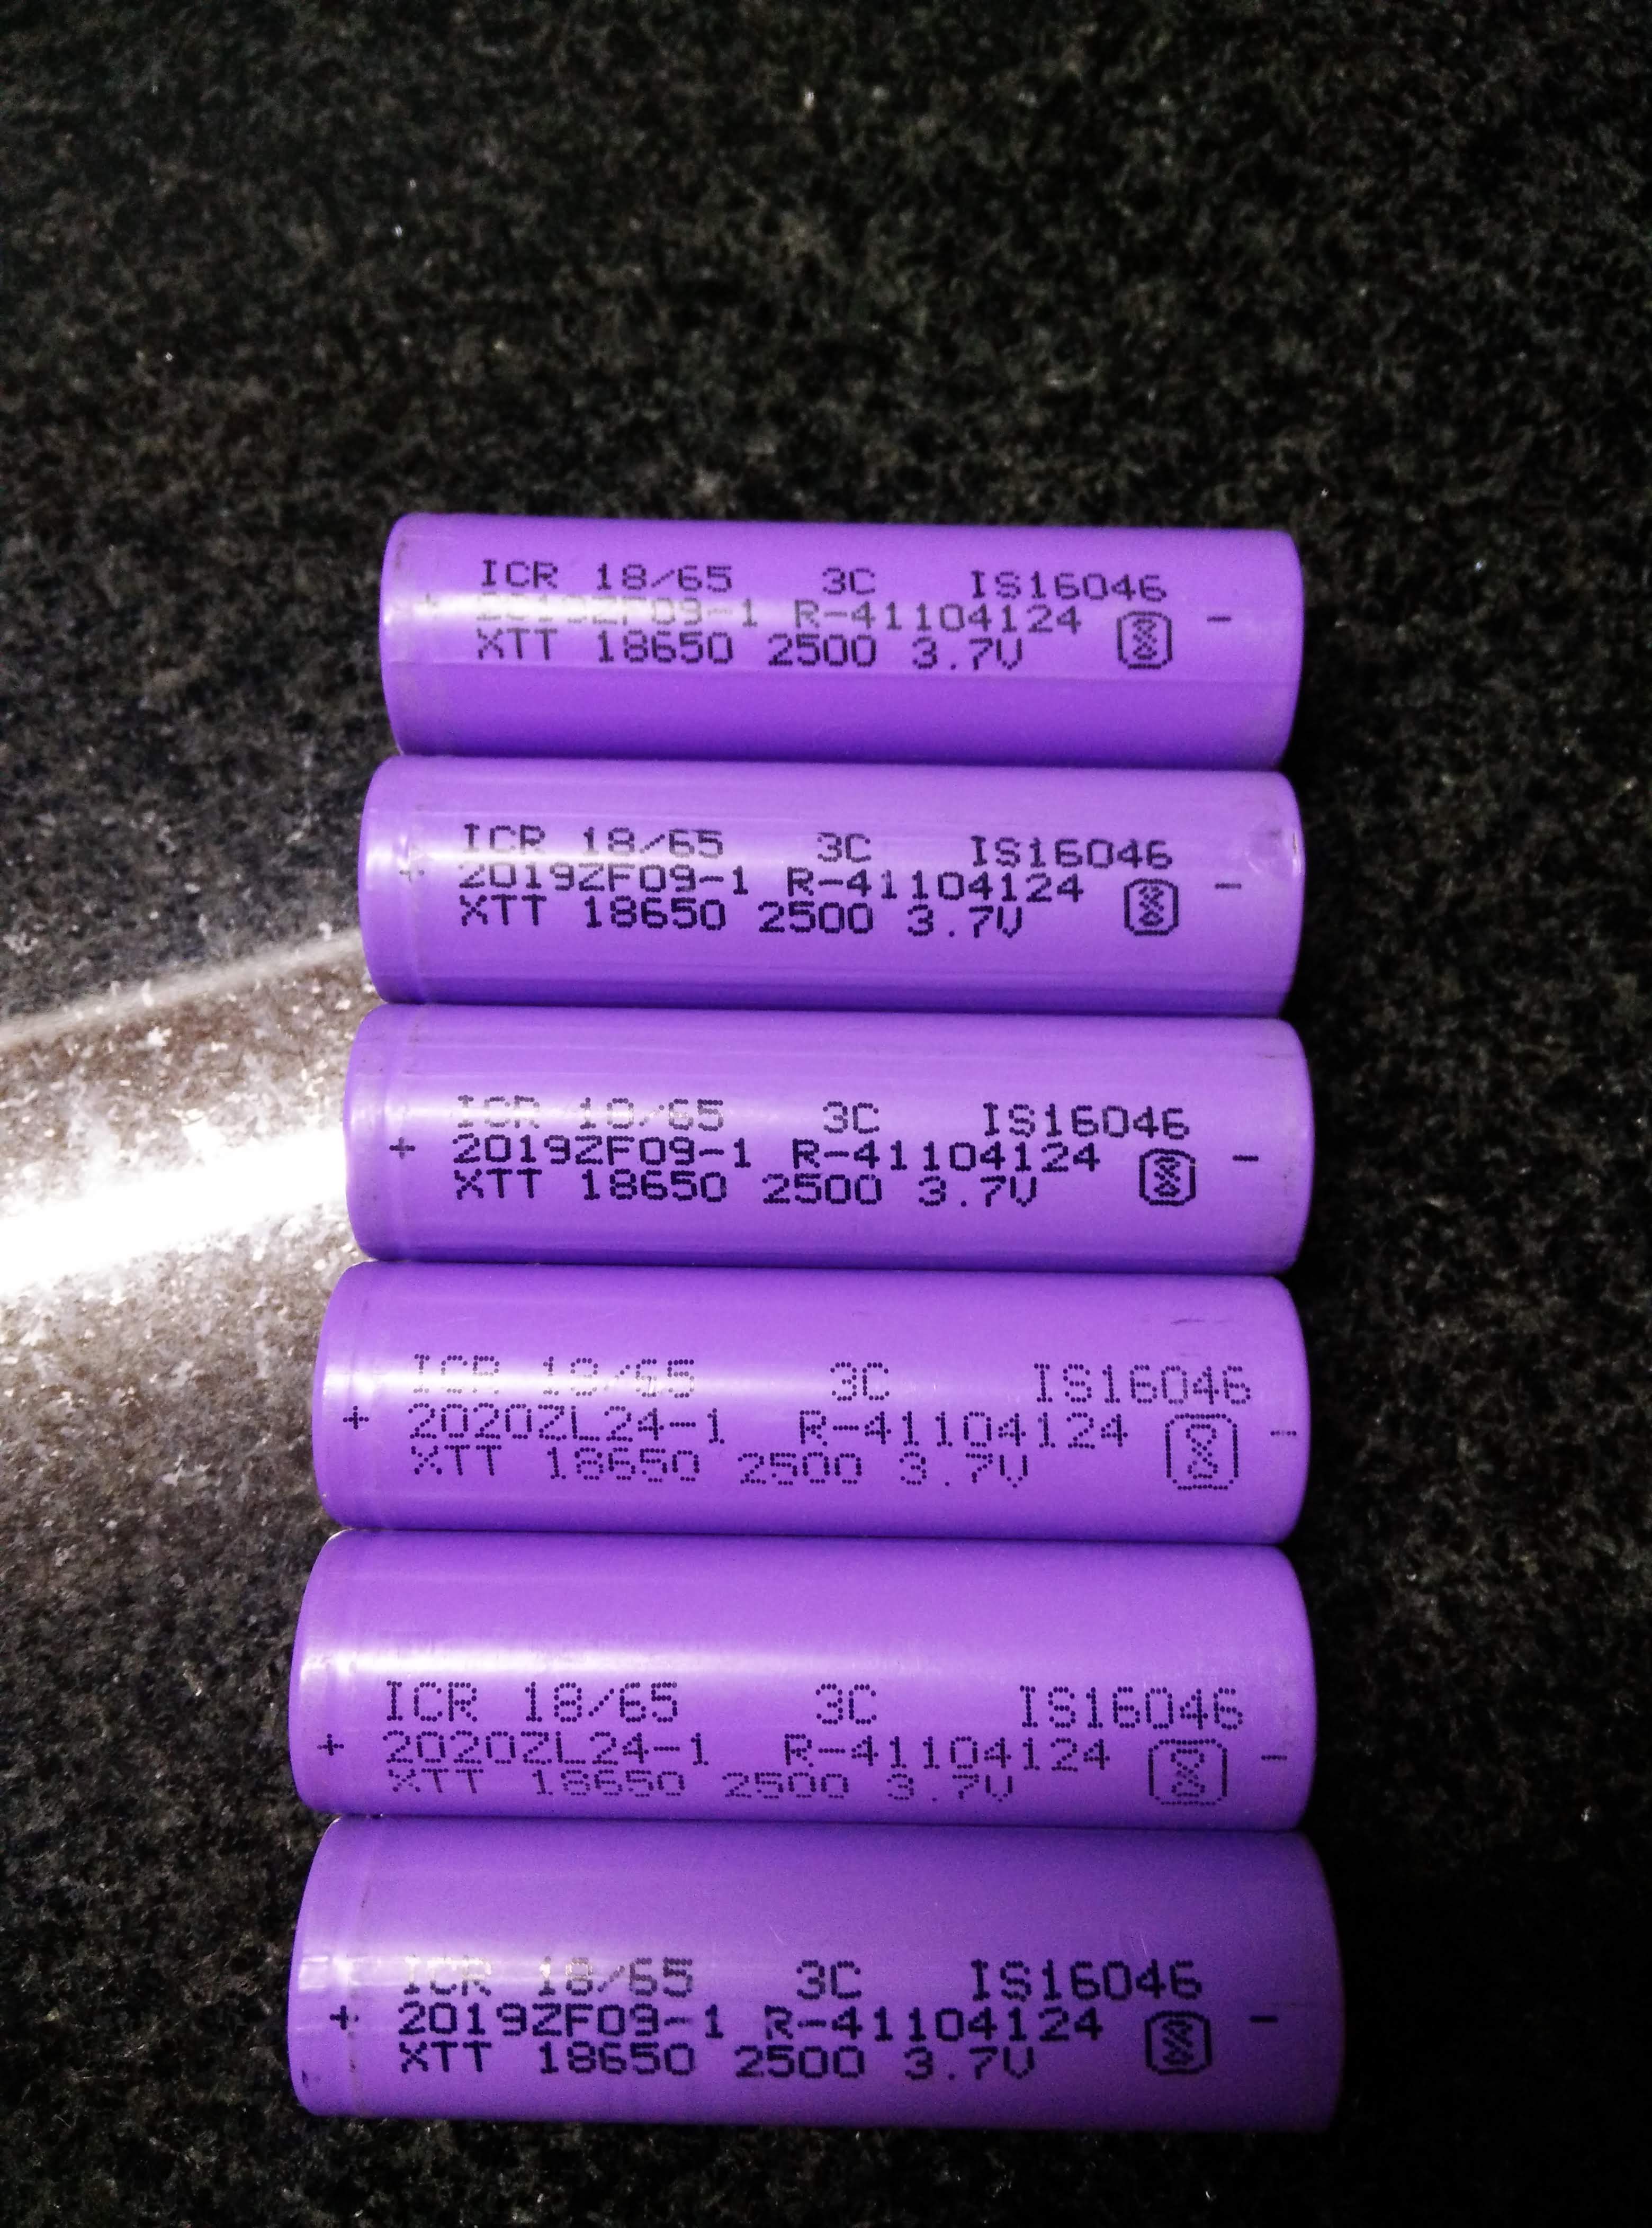
For its replacement, I picked 18650 Li-ion cells. This came with its own set of challenges. The nominal voltage of a Lithium cell doesn't match that of a Nickel cell, and Li-ion cells require a battery management system (BMS) when used. The operating voltage of Li-ion and Li-Po cells were 3.7V to 4.2V (based on state of charge). Another candidate for consideration were LiFePO4 cells that have a steady operating voltage of 3.2V. However, LiFePO4 cells and its BMS boards are not widely available right now.
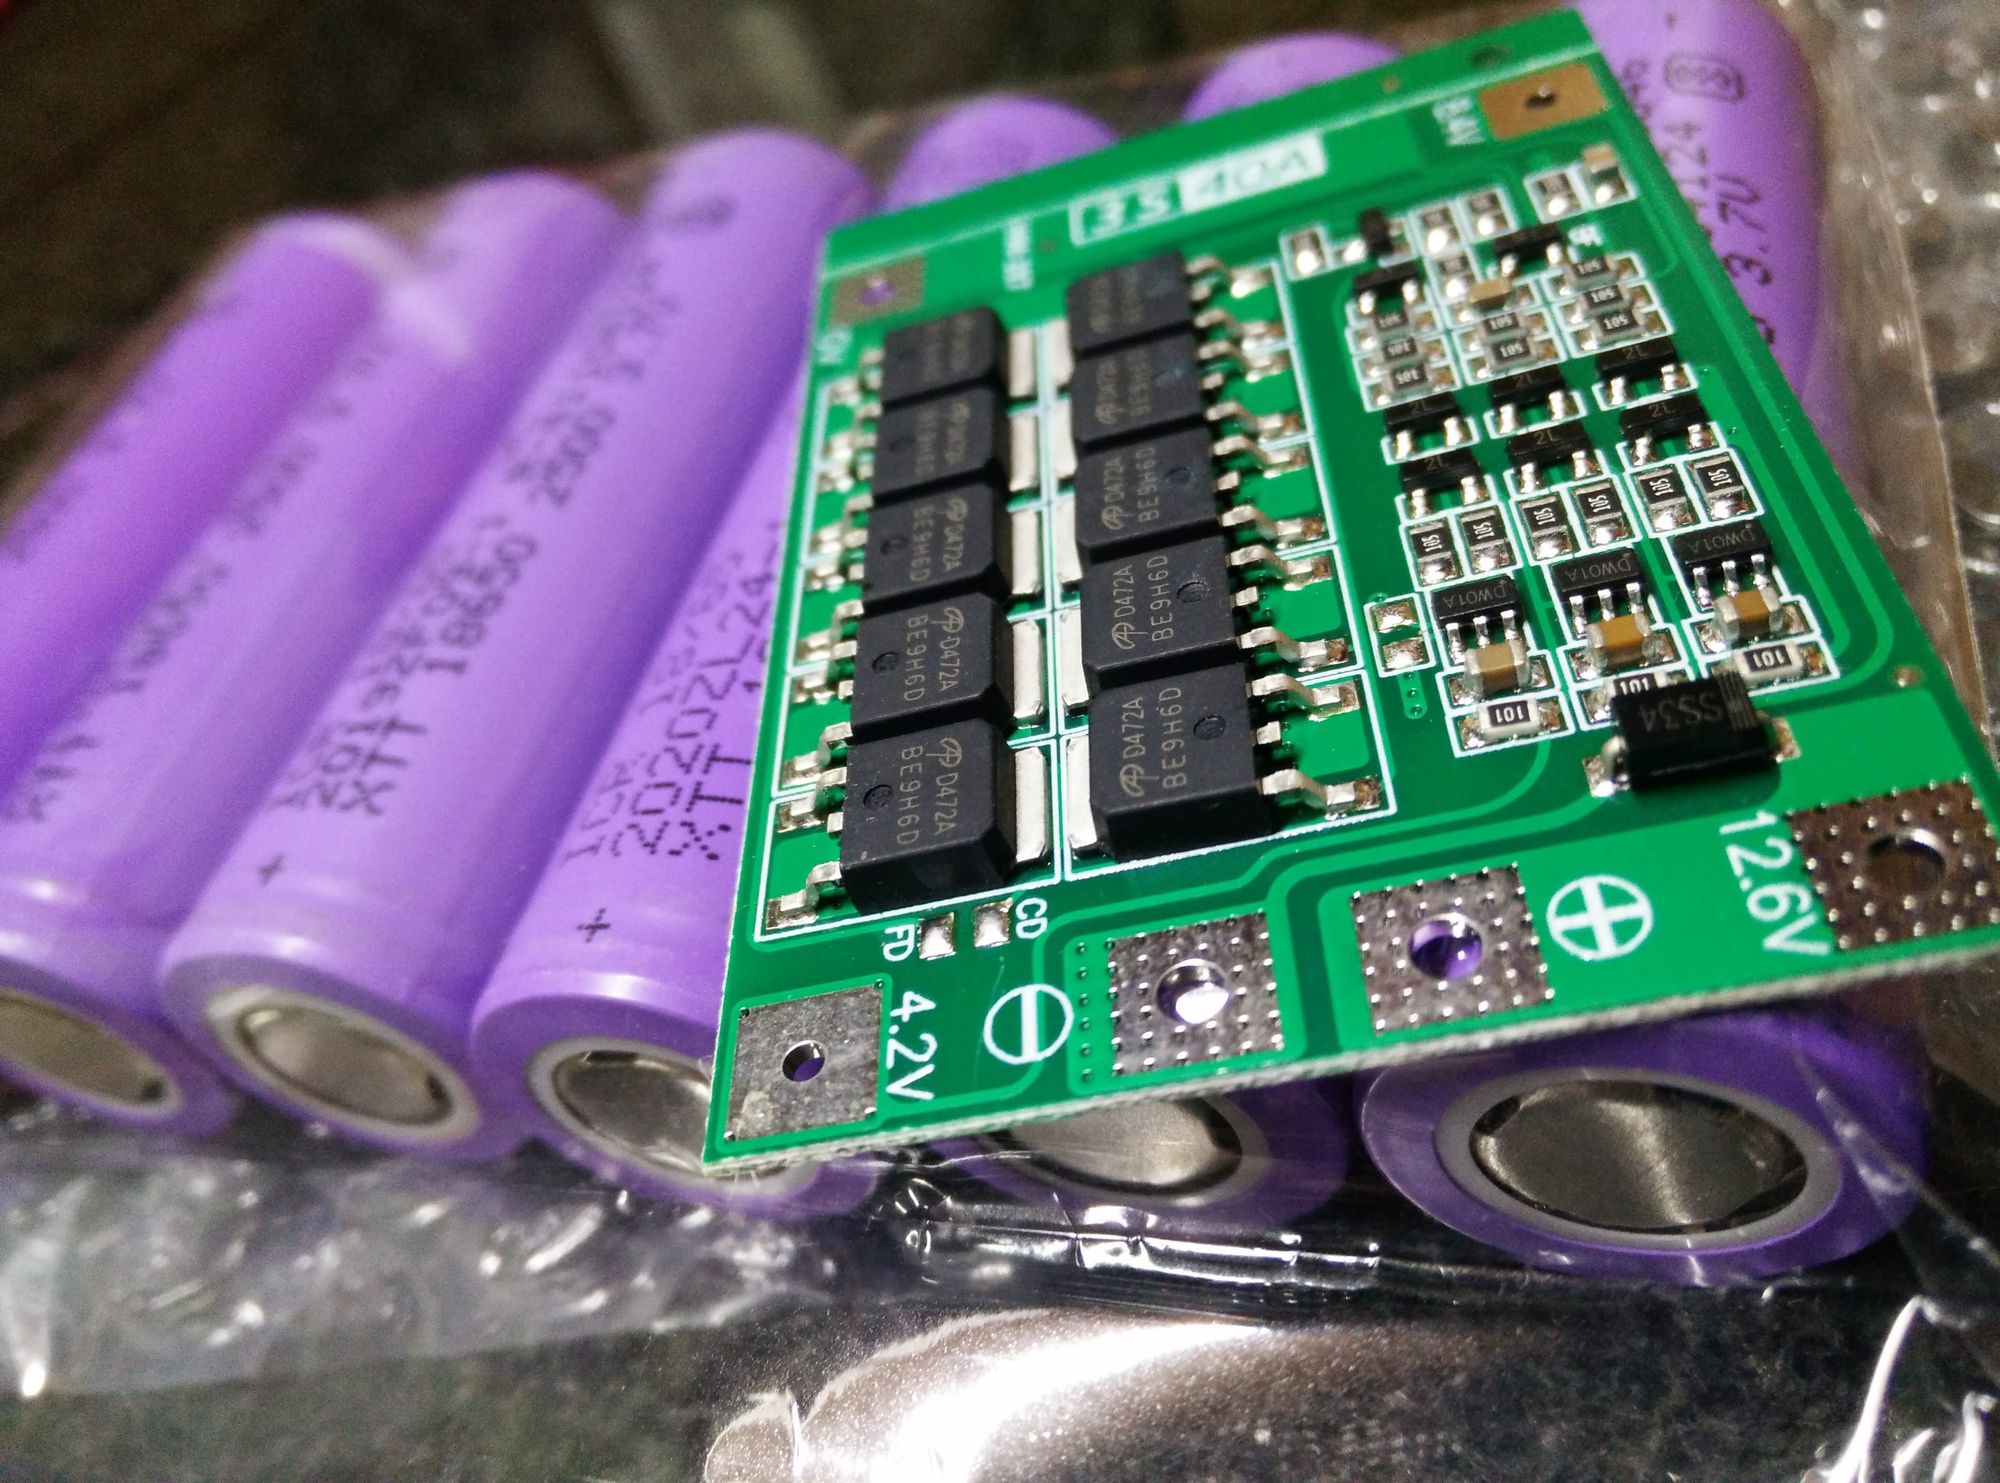
Therefore, Li-ion cells were my pick. As a proof of concept, I used some old cells from a power bank I had in combination with a 40A BMS board bought online in a 3s1p configuration to check if this project was even viable. 3s1p stands for 3 in series and 1 parallel set.
This meant my operating voltage for the pack shifted from 12.0V steady with Ni-Cd to a range between 11.1V and 12.6V with Li-ion.
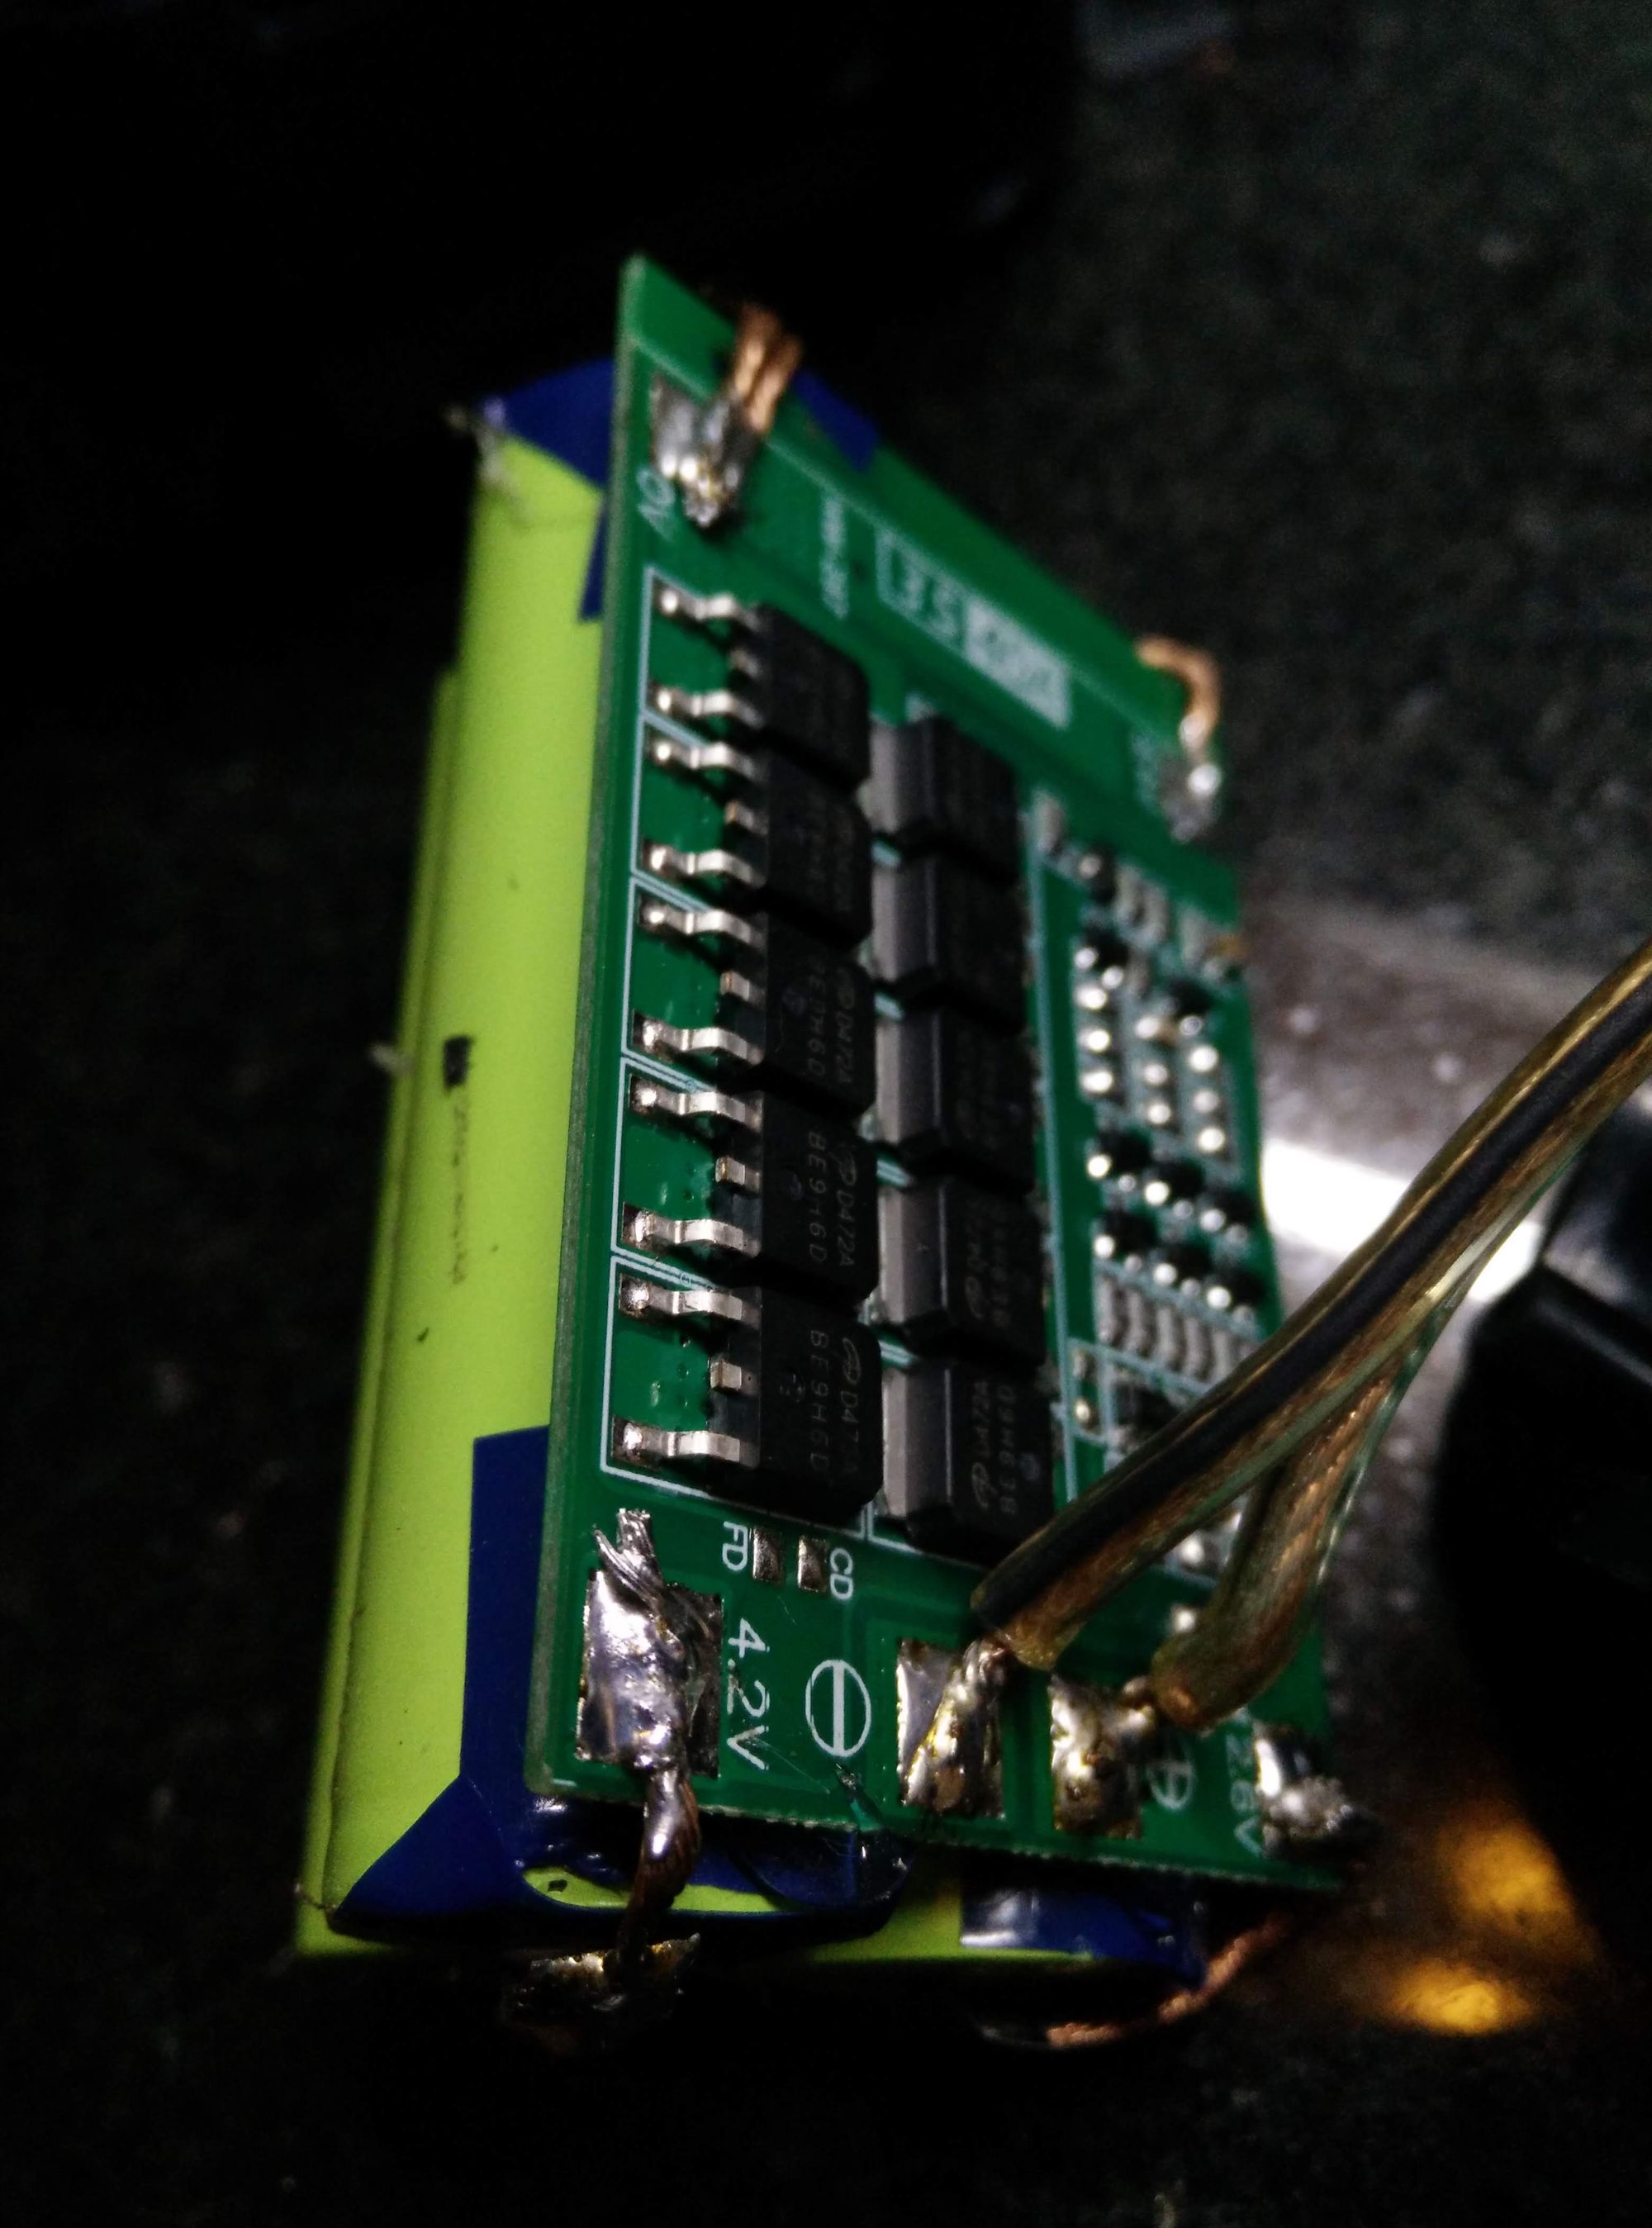
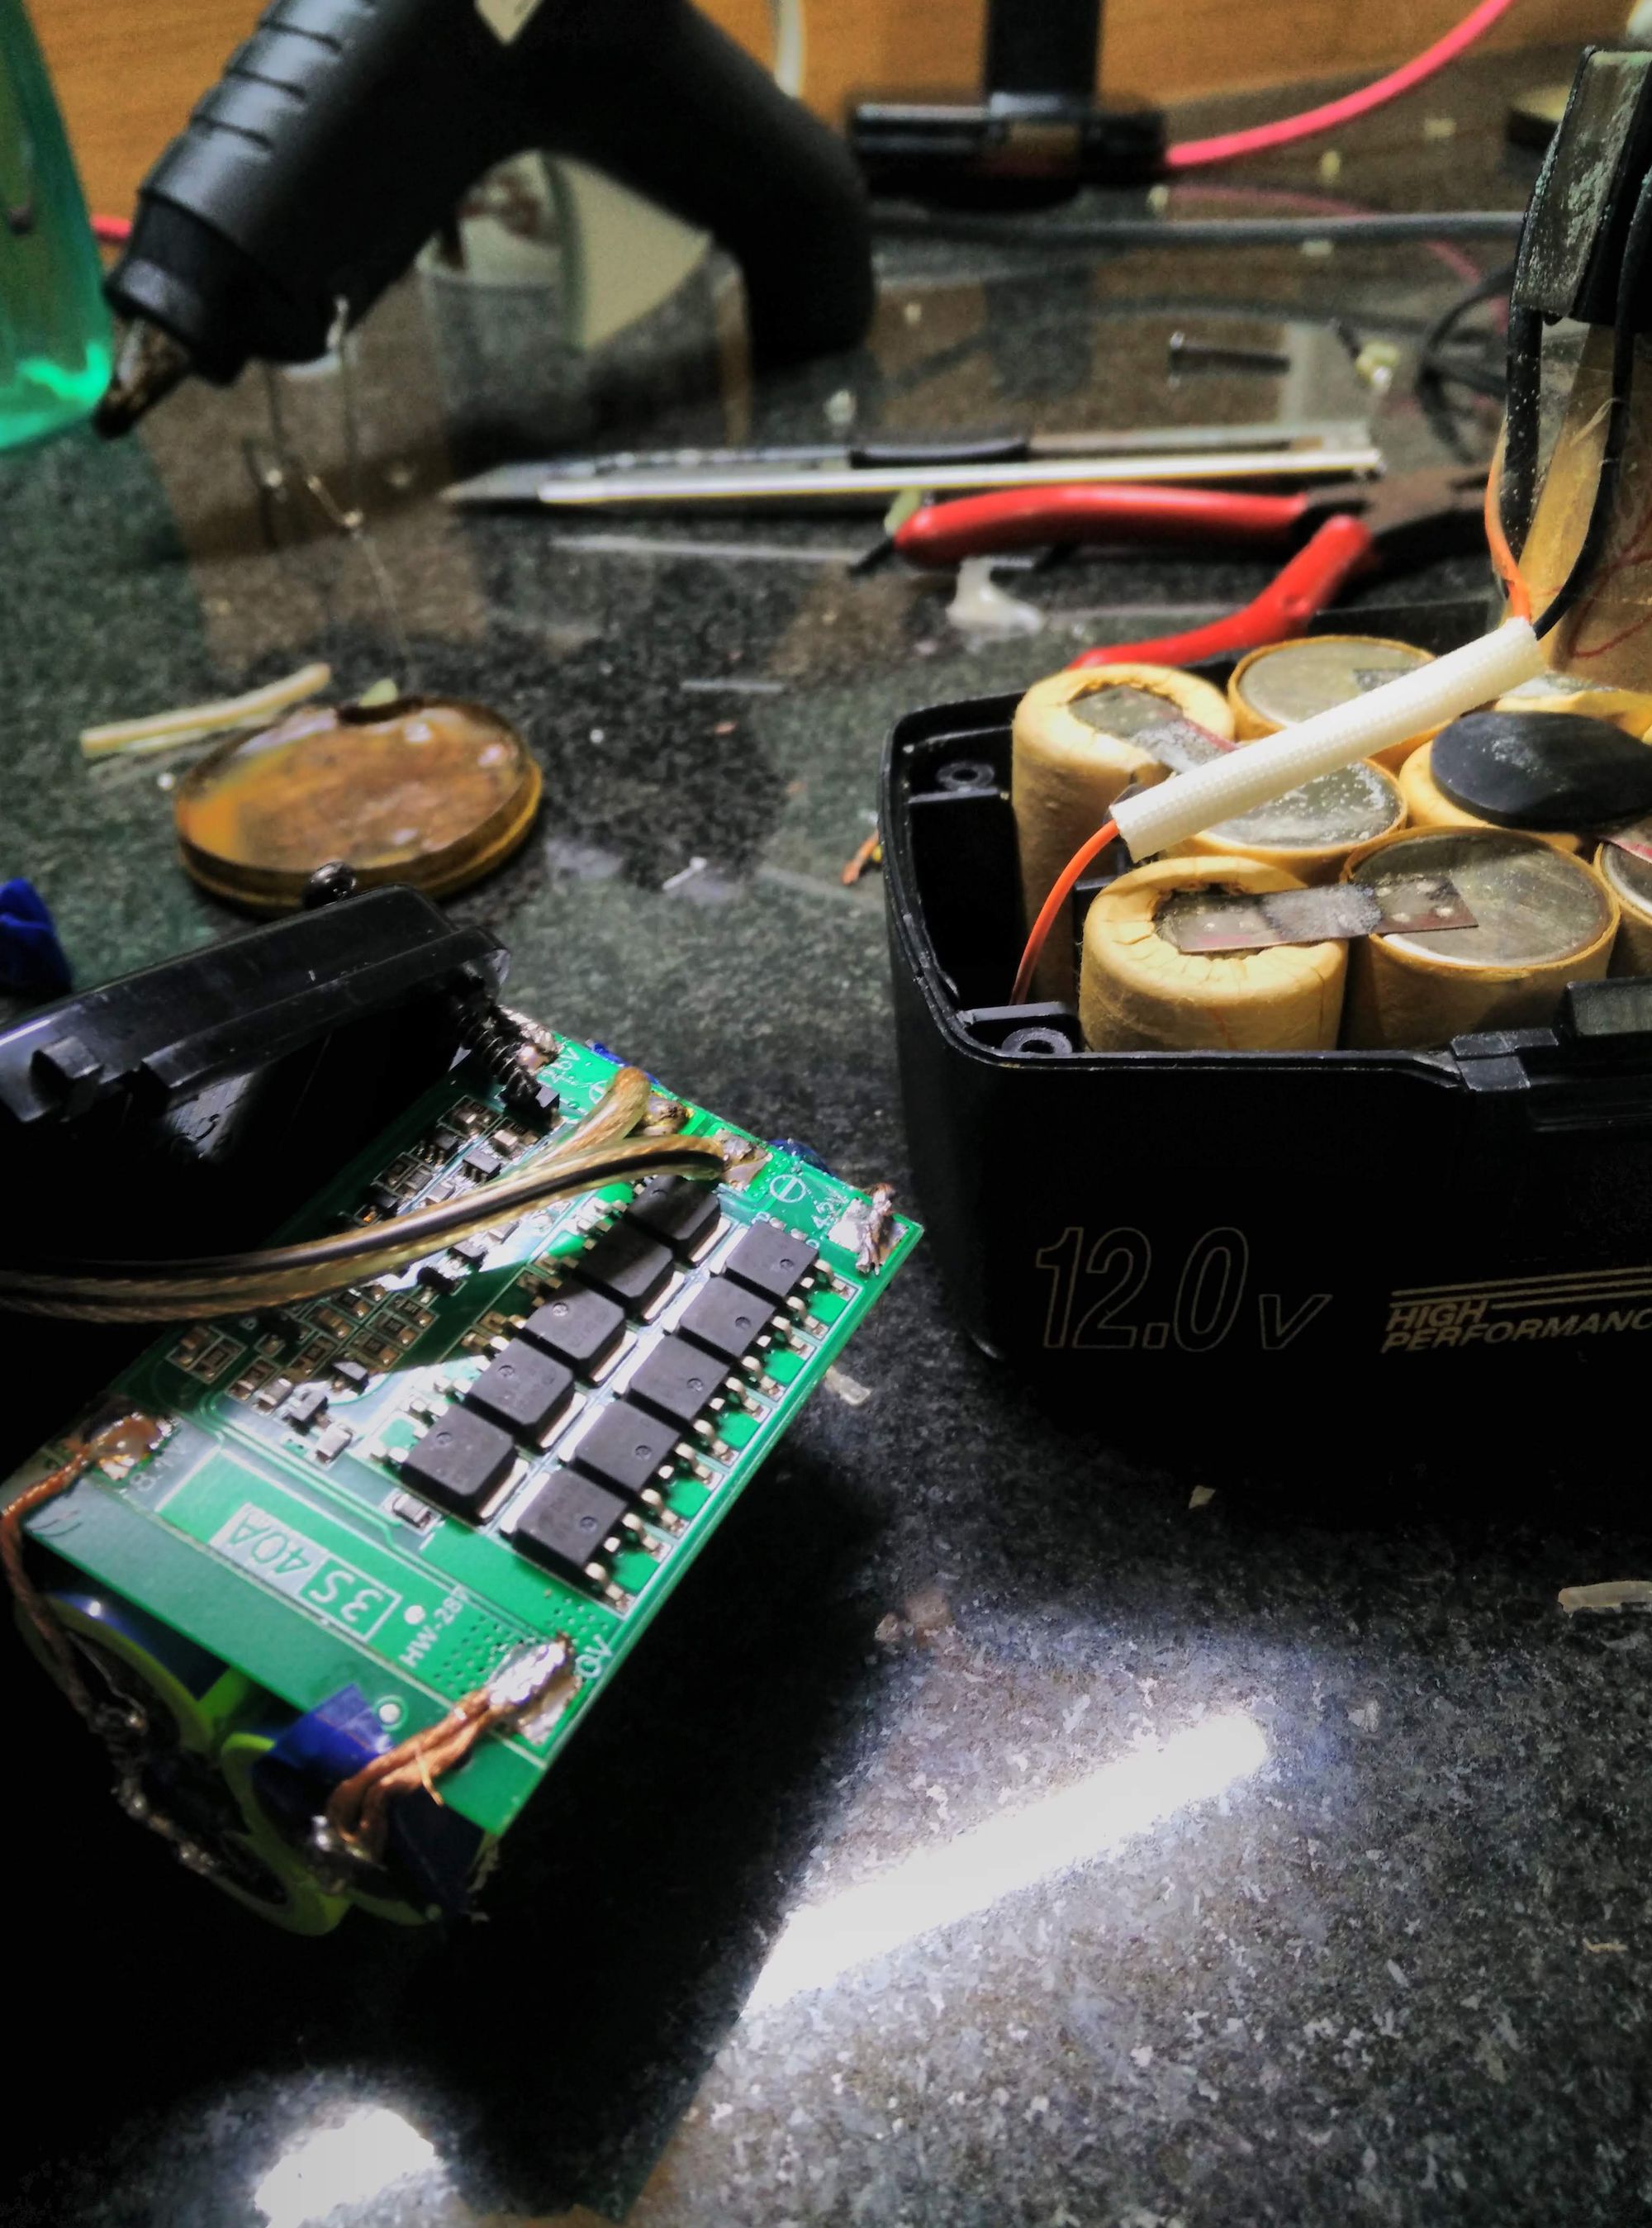
After I was satisfied with the results, I bought a fresh set of Li-ion batteries to support the 40 amperes that the BMS board could allow for. The current 3s1p configuration would cut off power to save the batteries under higher load. I doubled the capacity, which resulted in a 3s2p configuration. The BMS would now be able to allow for higher currents and not cut off power.
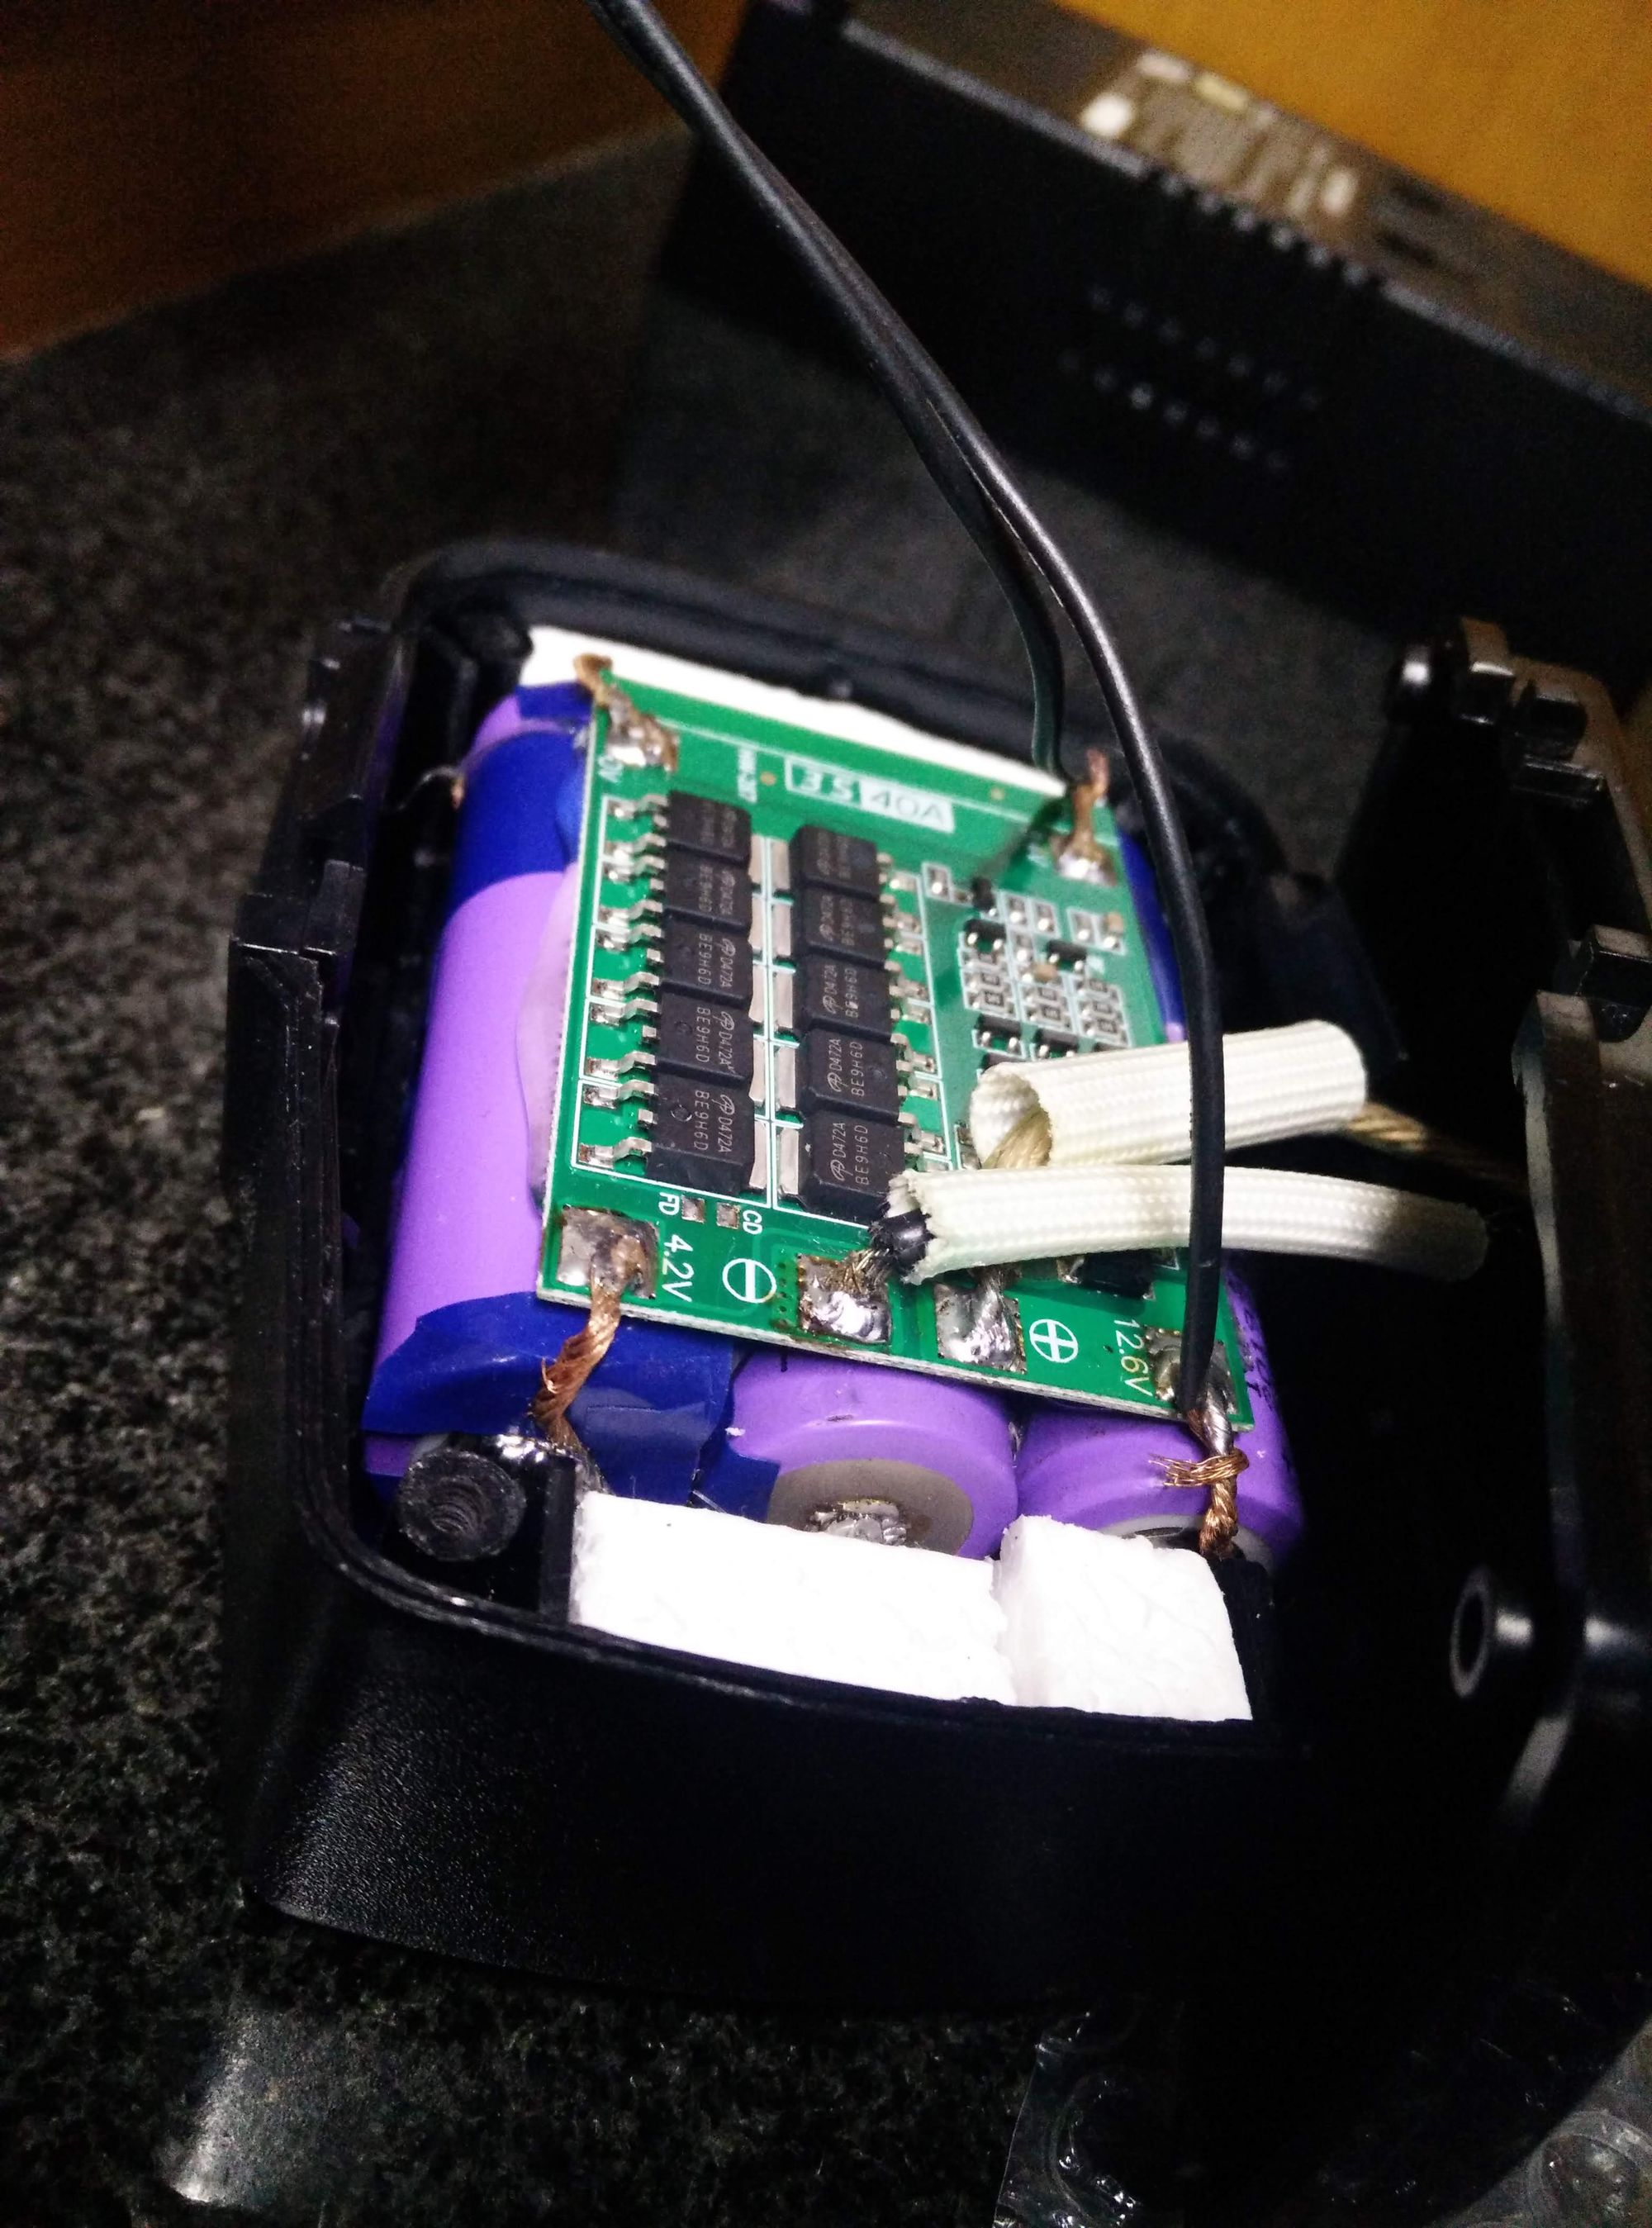
To accommodate the Li-ion cells in the old battery housing, some modifications had to be made using a Dremel. Certain plastic spacer where getting in the way of the cells. Overall, it was a snug fit after adding some Styrofoam spacers to absorb shock.
I should mention that using insulation tape to isolate electrodes and hold cells together is not the best idea. Kapton tape, a yellow translucent polyamide film is recommended. Nickel strips with spot welding is to be used for connecting cells. As spot welders are quite an investment for a one time project, I used thick gauge copper wire as a substitute. Roughed up the surface of the cell, and applied heat using a soldering iron for the shorted period of time possible.
Another solution would have been to use an old desktop power supply to turn this into a corded power tool via the 12vDC power rail.
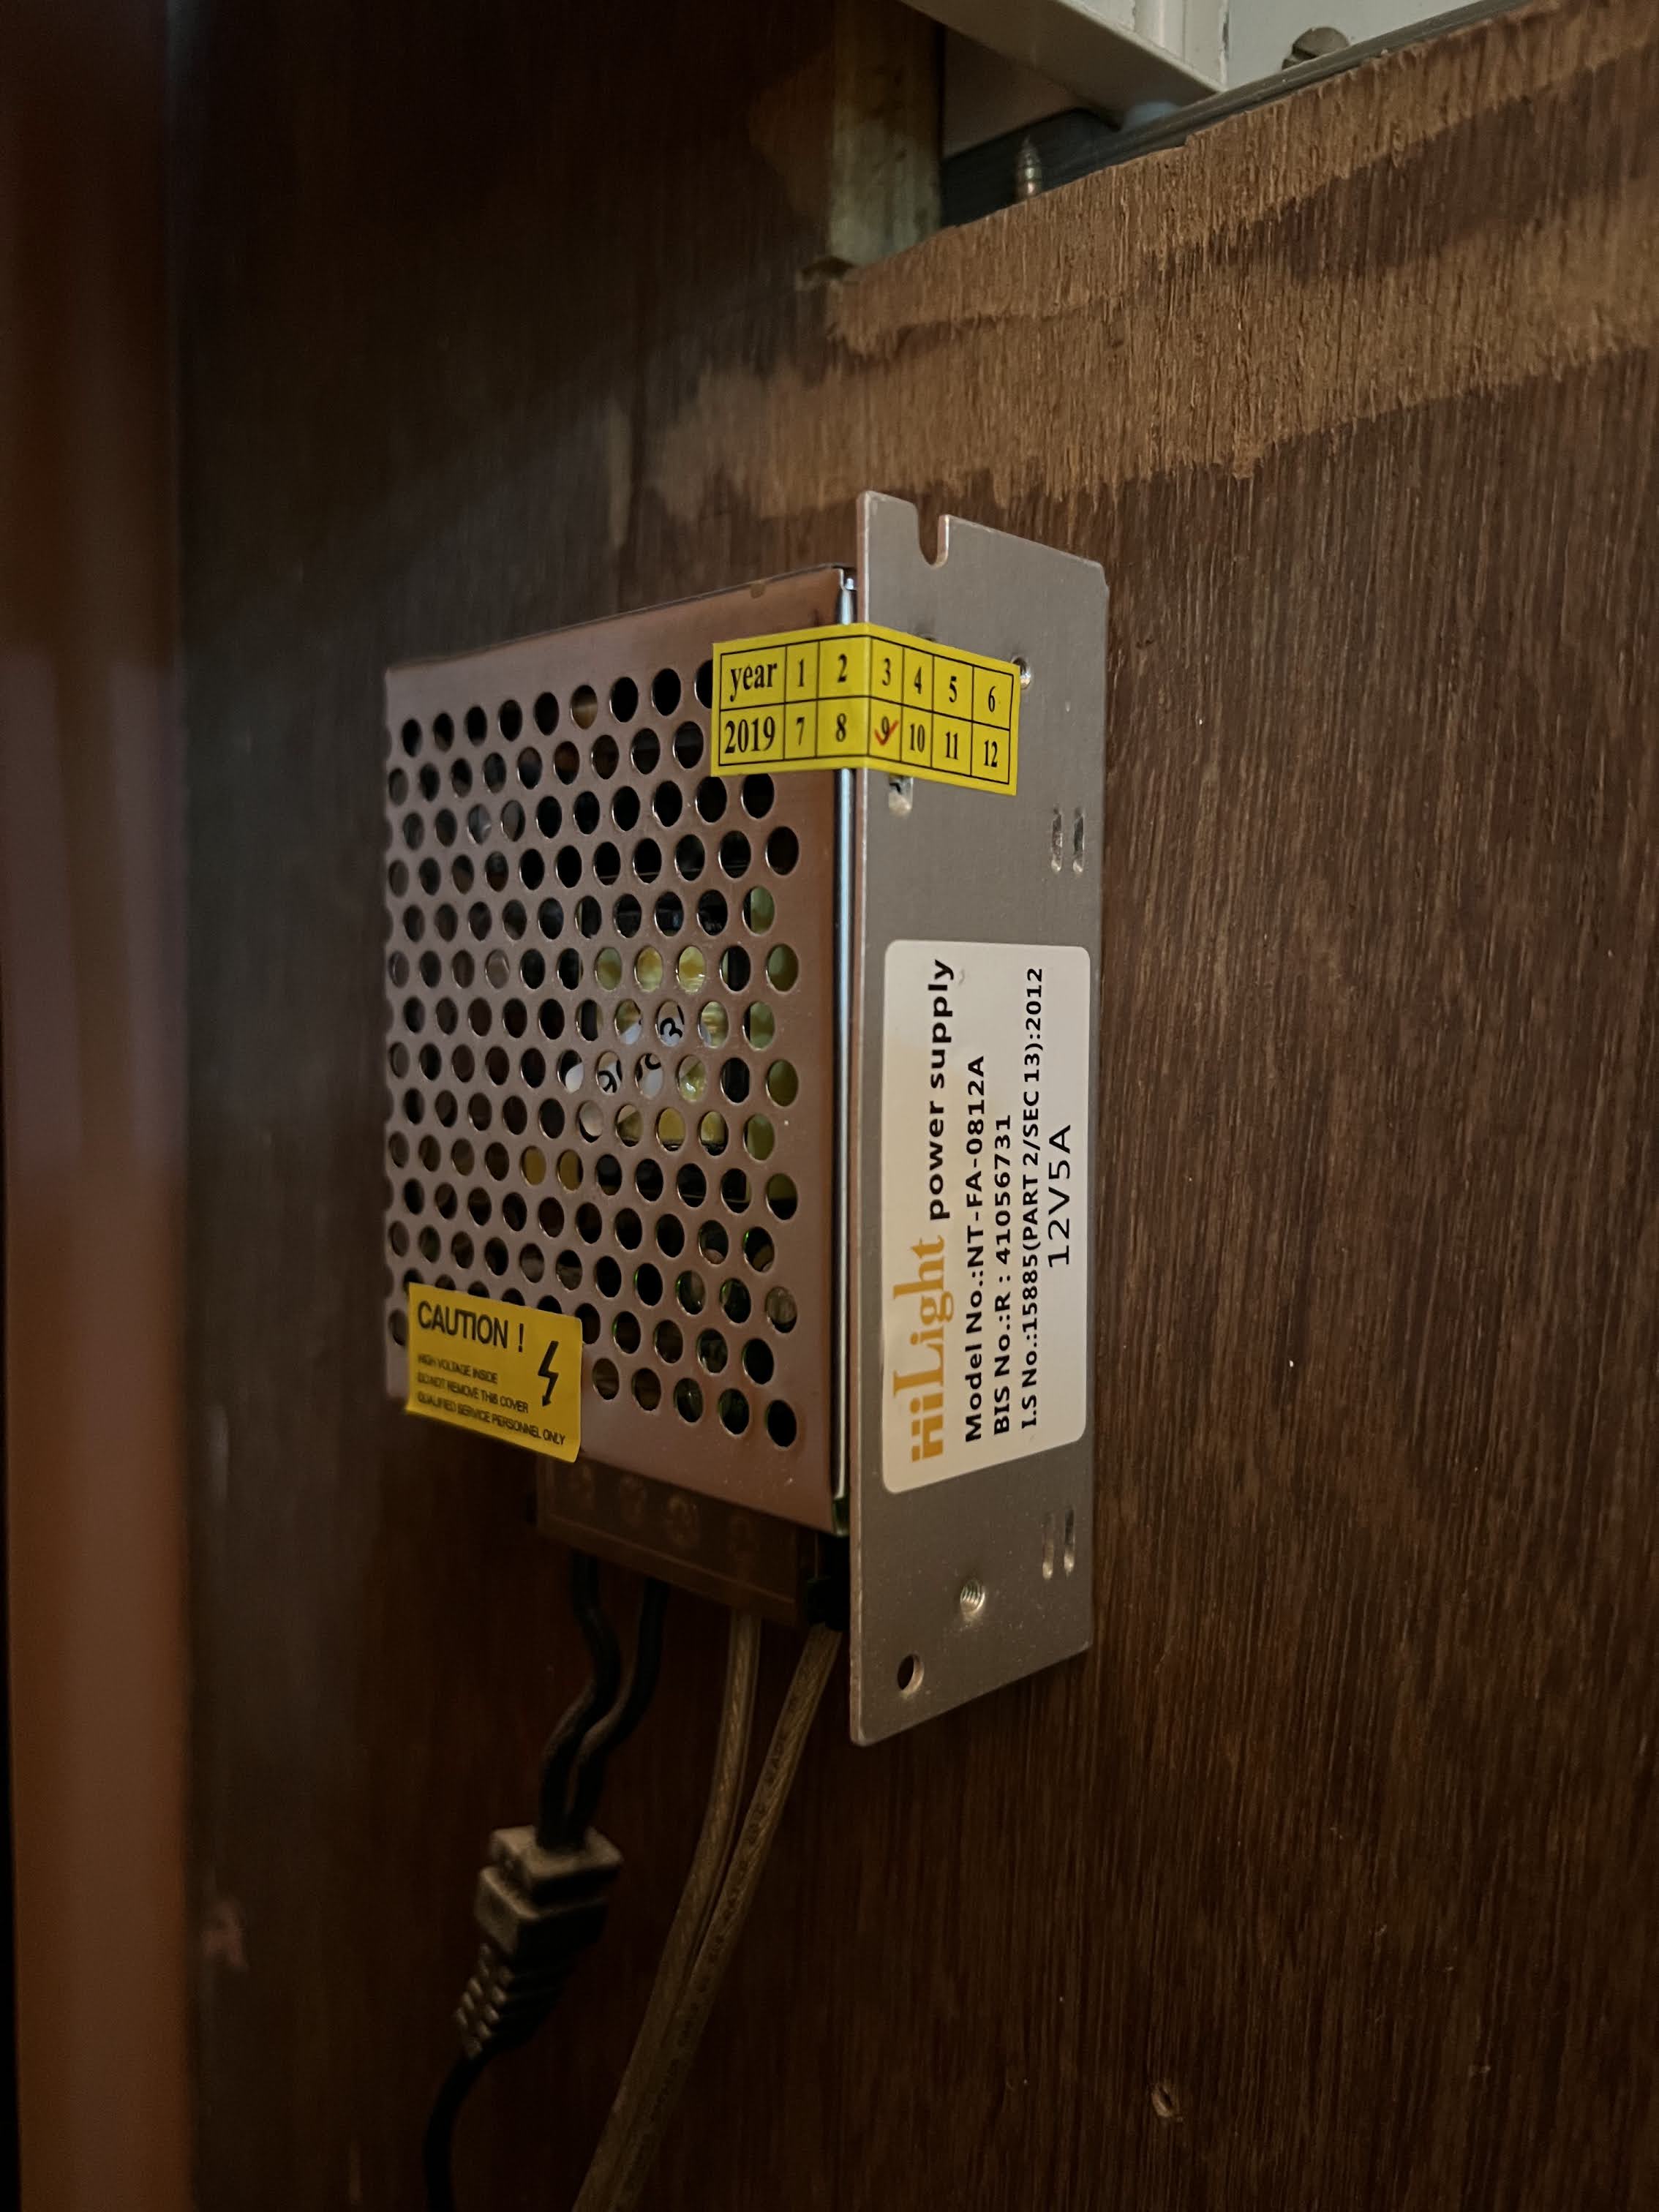
The BMS supports charging the battery with a constant voltage of 12.6V. Using an old LED driver power supply to replace the insides of the Ni-Cd charger, I set the voltage to 12.45V (+/- 0.05V) as output. This was done to prolong the number of charge cycles the pack an sustain with a slower degradation rate of the cells.
End Result
The beginning of a new chapter in the life of a tool
All of this was possible with a little bit of research and the will to bring something into existence. This project gave me the confidence to continue building and prototyping solutions.