Building a HomeLab v1.0
Upgrading my current homelab setup after learning a tat bit of widely used industry standards.


After picking up a few skills at my workplace, it was time for me to upgrade my setup at home. My old setup included gigabit networking with a 24 port switch, some dated yet functional access points and a Raspberry Pi 4 running my local NAS for storing media and files. This post is more of a personal blog than a step by step setup tour, so get cracking on and drop a comment!
I've always loved the idea of having access to my data and memories wherever I am, on demand. Being a data accumulator is easy said, to bring this idea to reality there were some hurdles to cross with the vast set of requirements put up for myself.
I wanted the following pieces:
Network attached storage with cloud capabilities.
Self Hosted, run all services from one system.
Home Assistant to control devices with Siri.
Local DNS server with ad and tracker blocking.
TimeSeriesDB to store solar energy readings.
Monitoring and management of services.
Website.
Single Wi-Fi SSID with 802.11 k/v/r roaming.
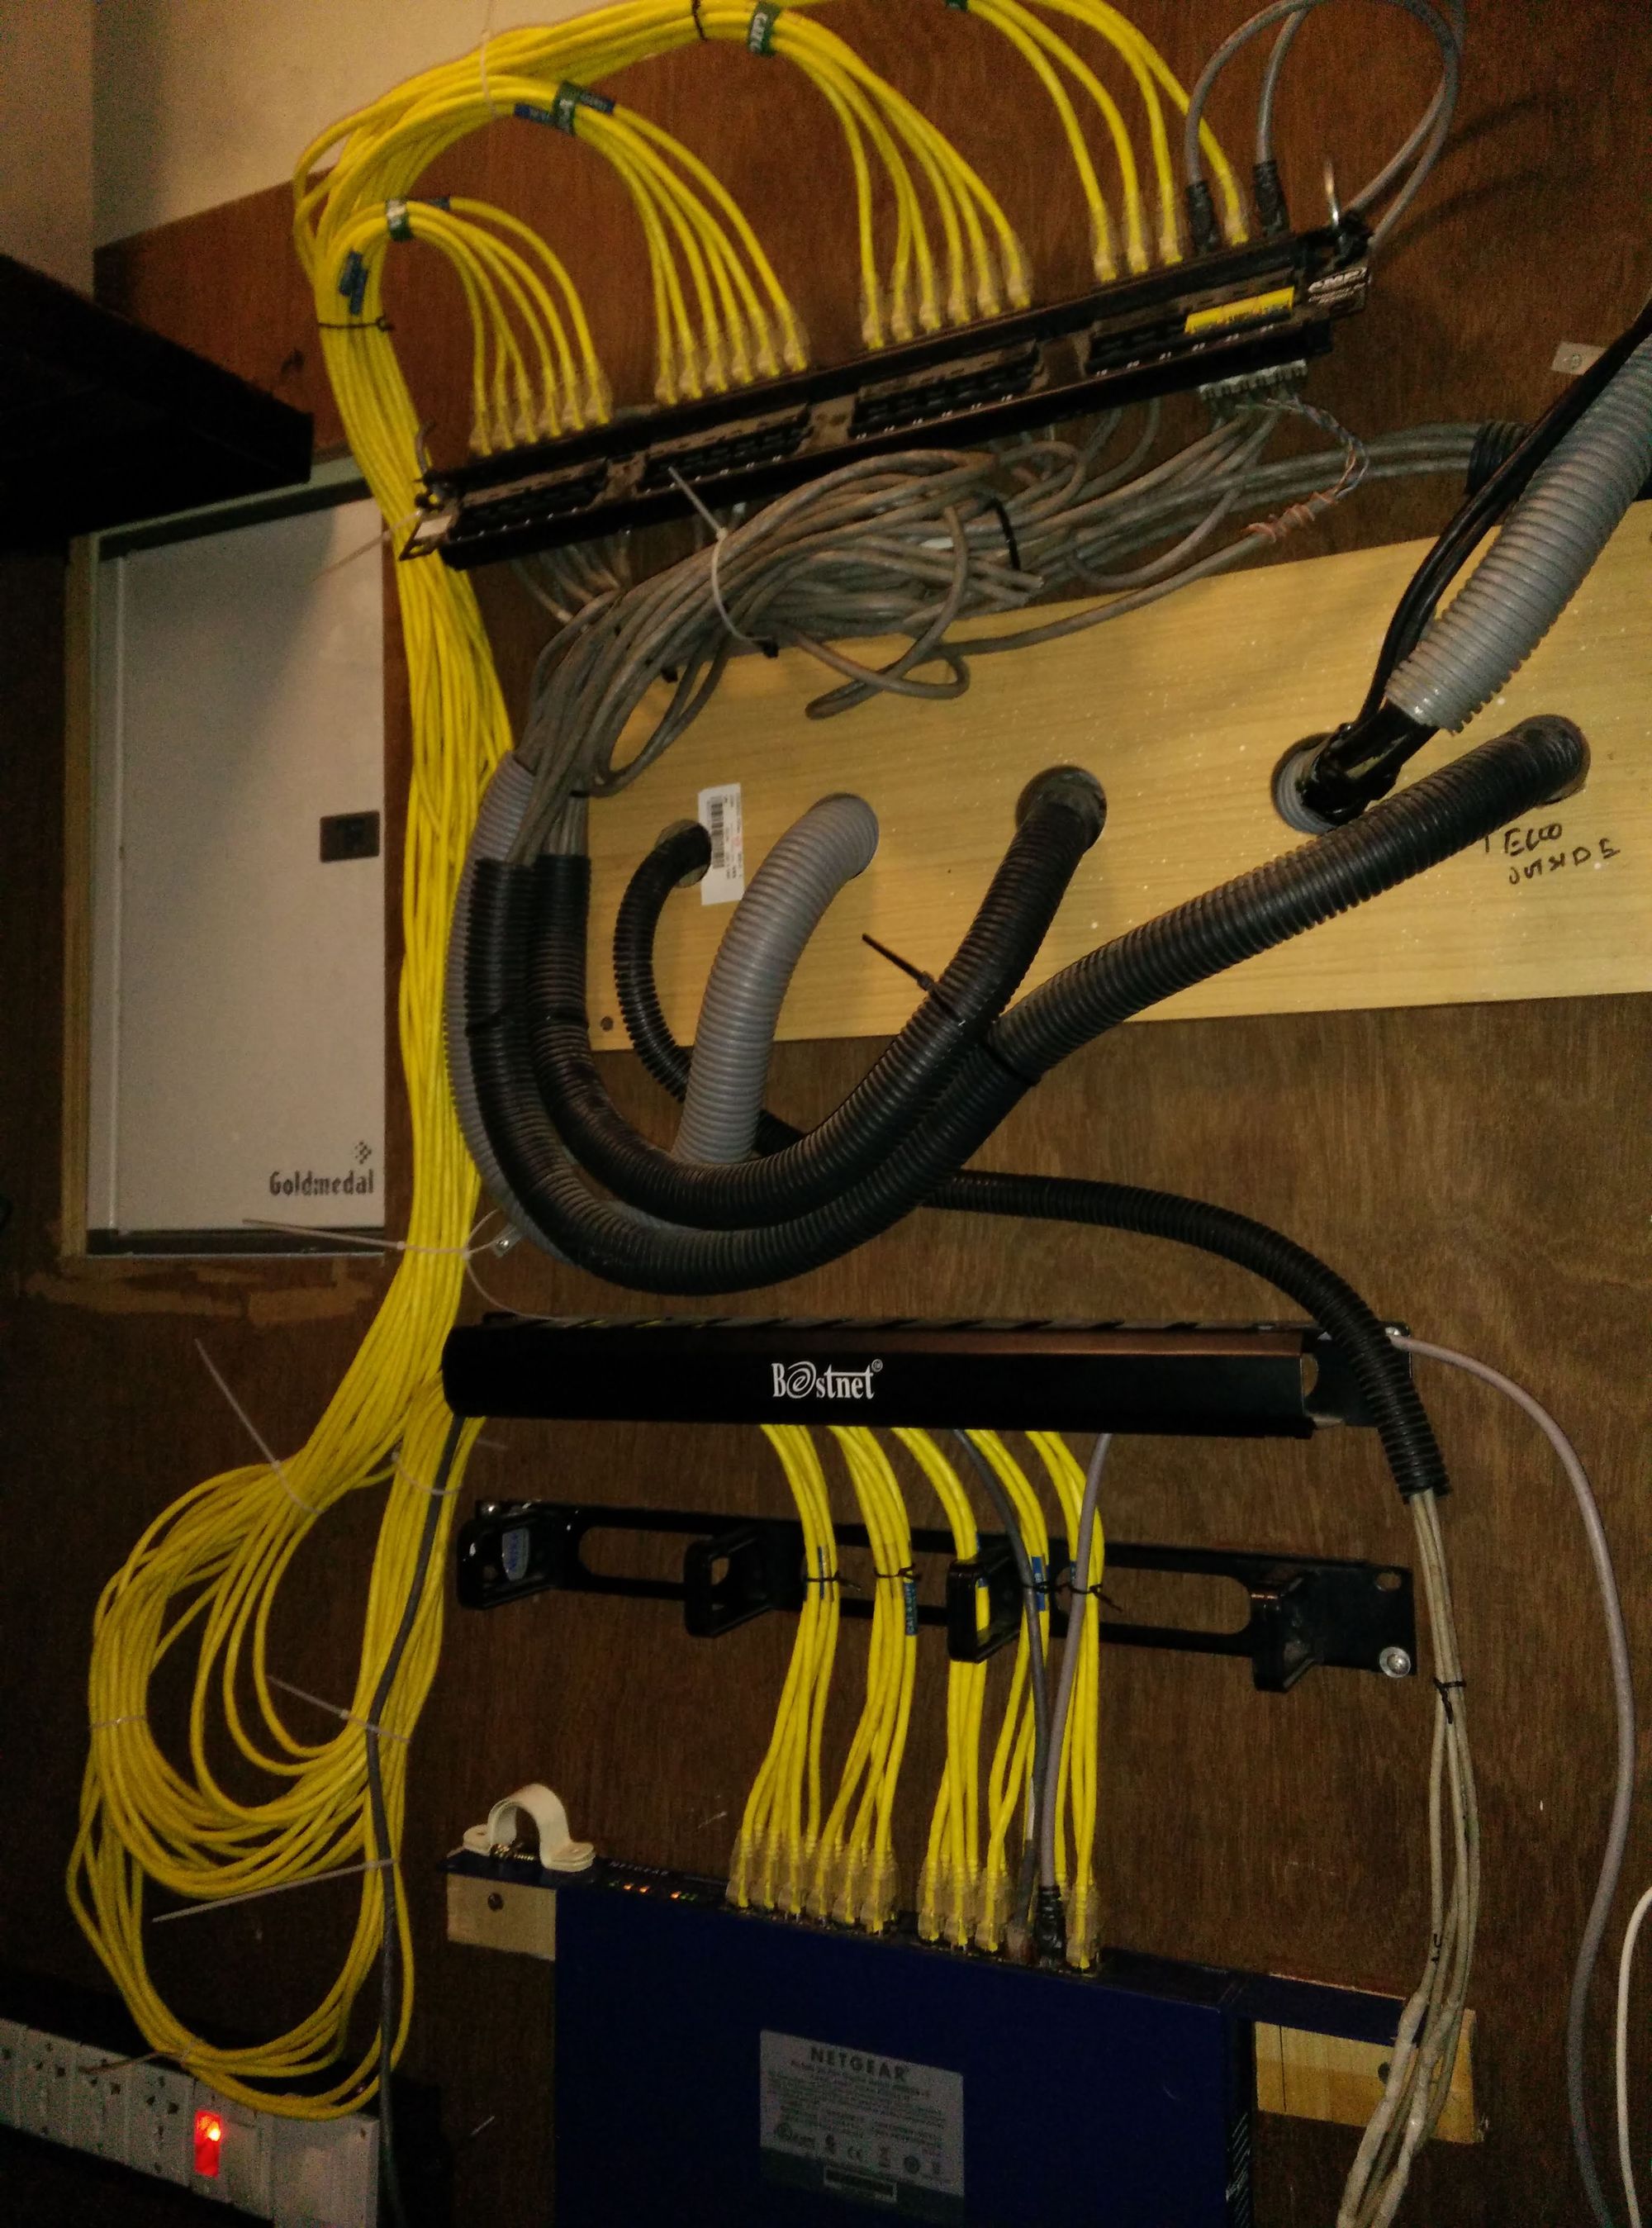
Network Attached Storage
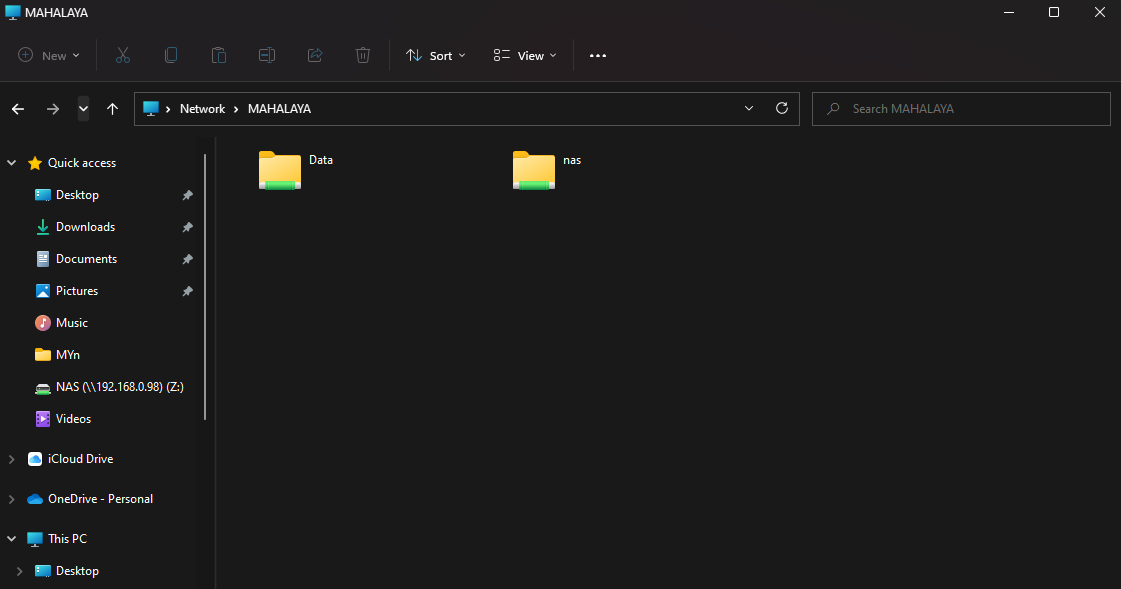
Accessing your data from any device on the network
I needed a resilient self hosted cloud that was affordable and did not take much of my time to maintain. Several opensource and paid offering were considered like UnRAID, TrueNAS, OpenMediaVault and NextCloud.
After learning about the release of OMV 6 and having used the previous version, I was inclined to use OMV. My system of choice was a trusty Raspberry Pi 4 which was lying around and used solely for its gigabit ethernet and USB3 ports. This makes setting a NAS viable with acceptable speeds.
Although RAID is not recommended or supported to be used on USB, one could setup software RAID over USB if its absolutely necessary. The lack of SATA ports on the Pi 4B could have been overcome by using a Pi compute module, in addition to a SATA controller connected to the PCIe slot on an expansion board. For this step, any ARM or x86-64 PC could have be used.
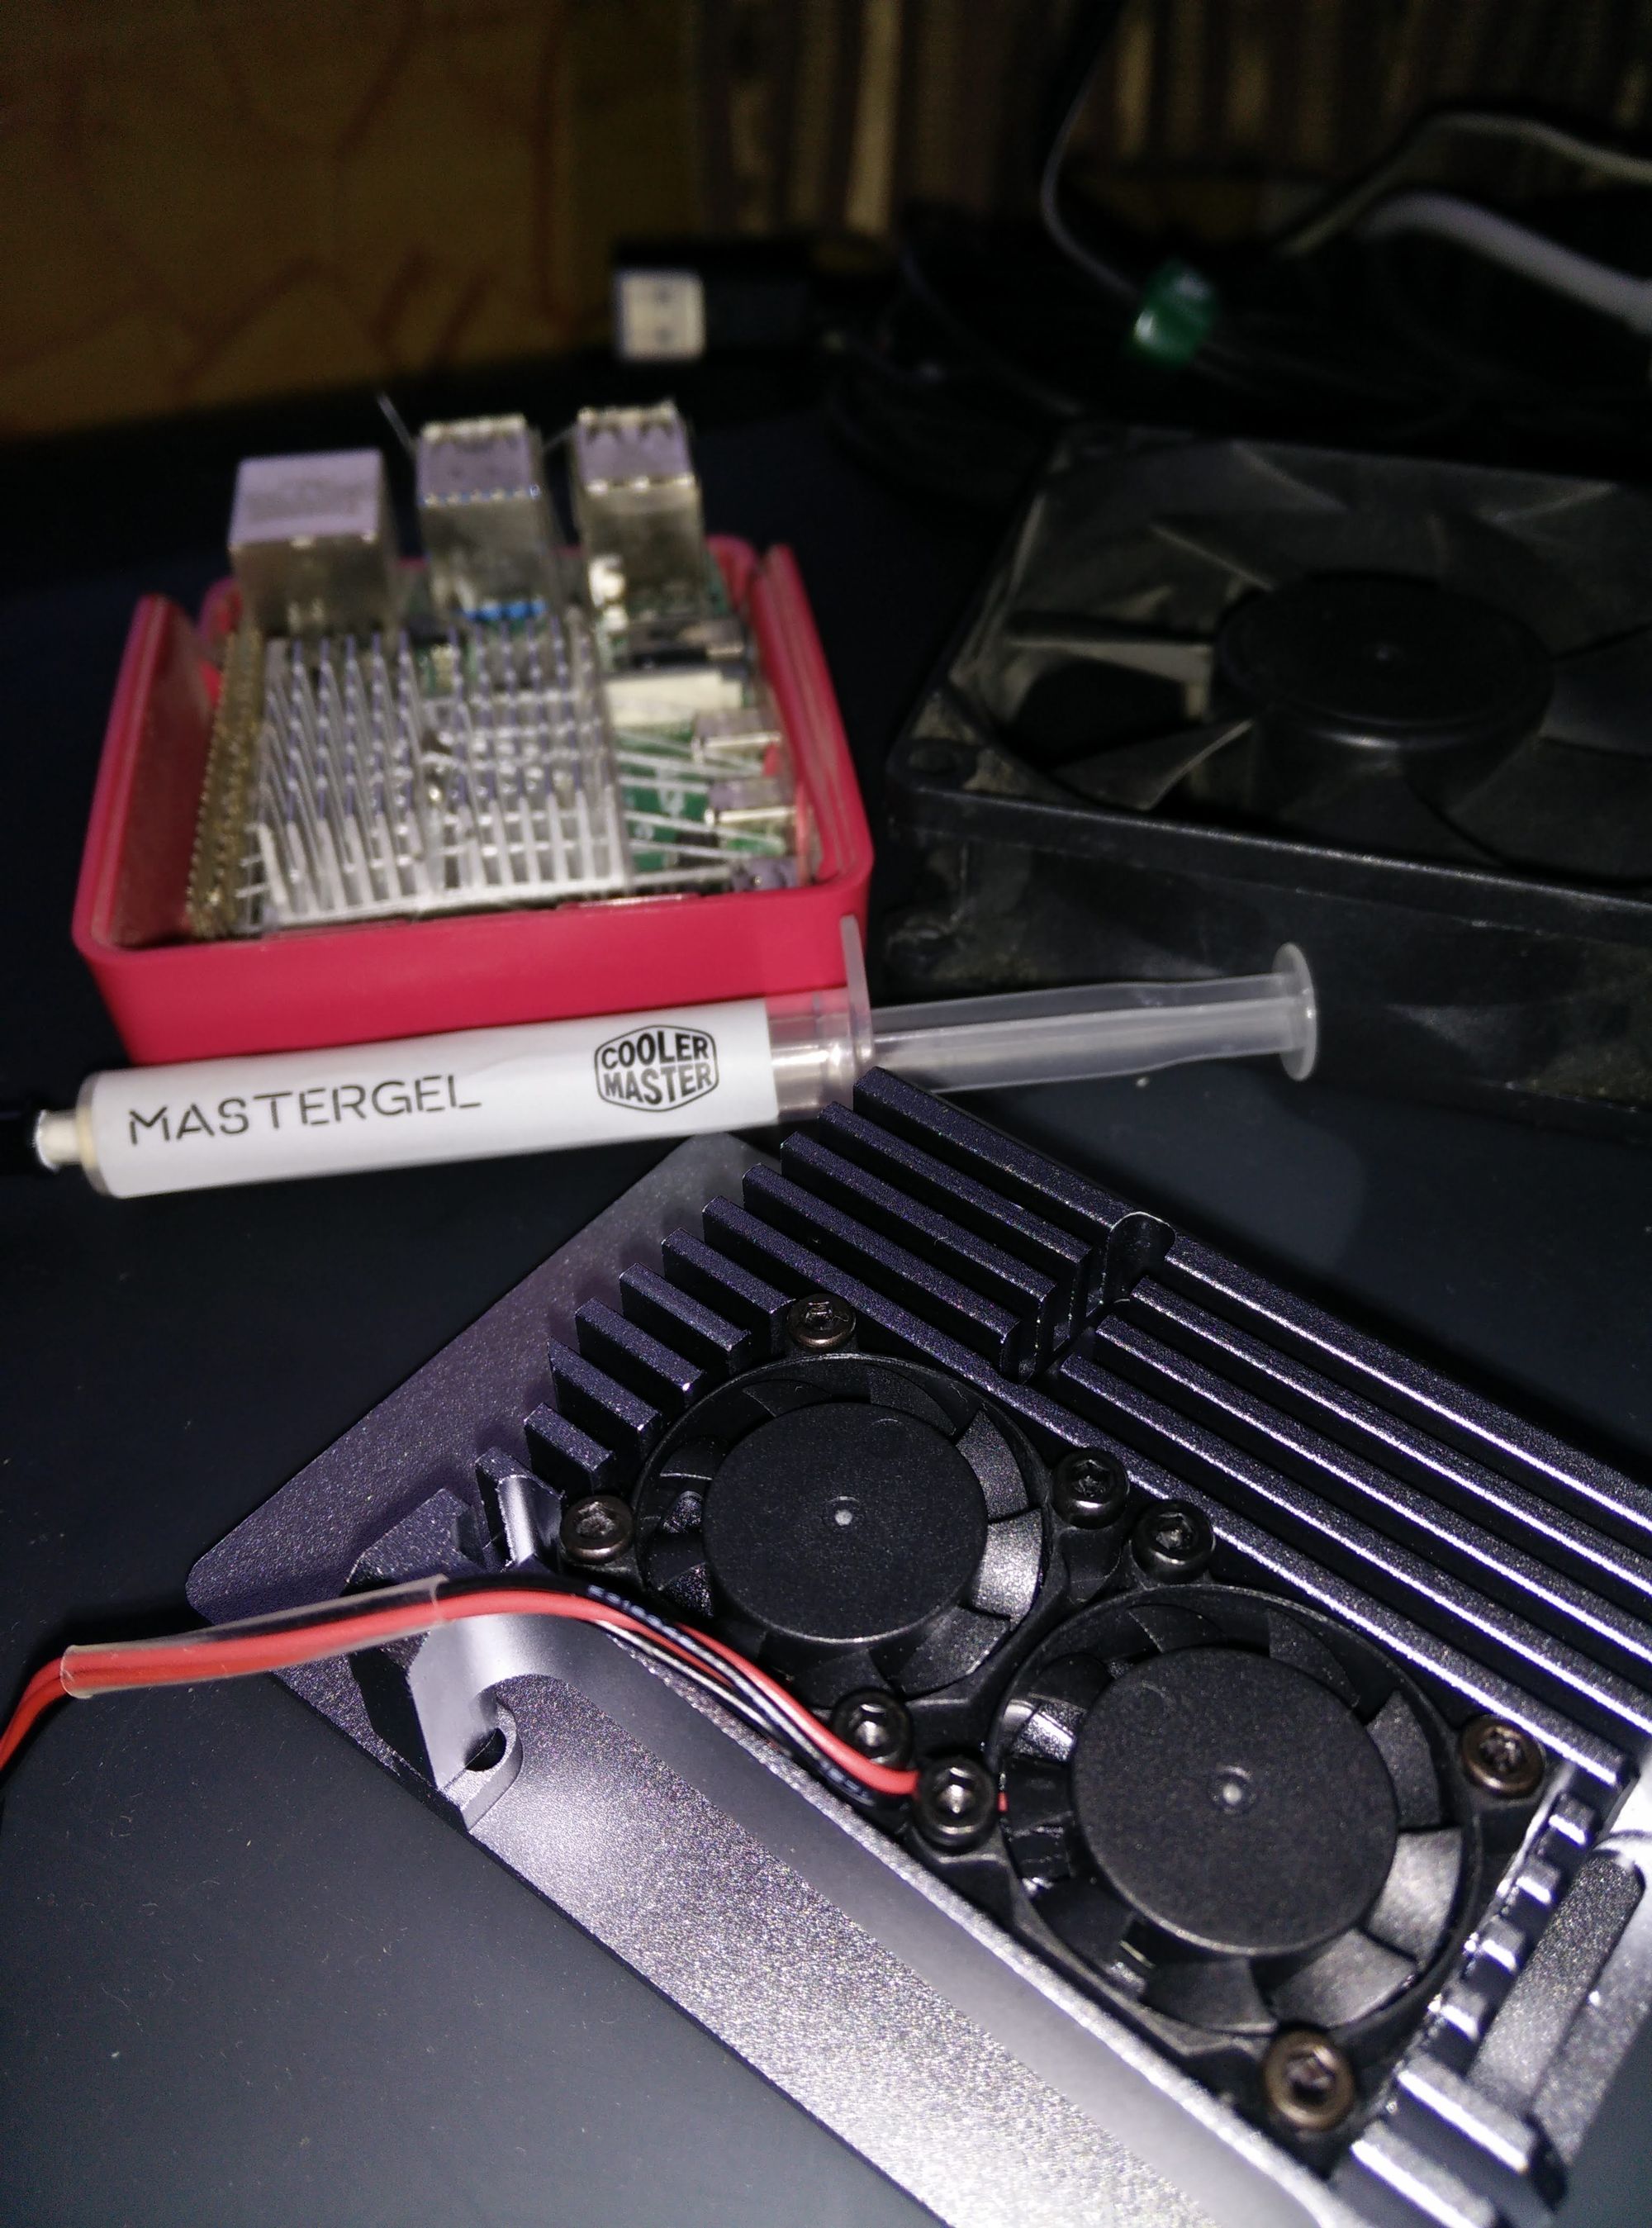
Following the basic recipe, I had the mise-en-place:
System: Raspberry Pi 4B (Overclocked to 2.1 GHz)
Storage: 2TB HDD and a 500GB SSD
OMV 6 setup with access control lists
FTP, Samba/CIFS, and NFS services enabled.
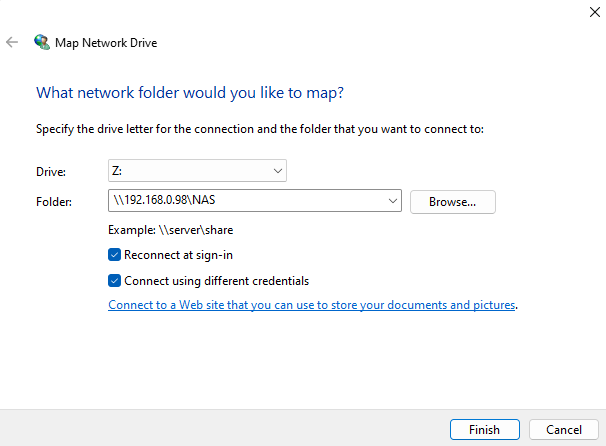
This allows for all systems on the network that are wired or wireless to access the storage device through Network Auto-Discover or by means of IP address. My IP camera can use this storage medium as a backup to dump all recording.
Now that native access to my NAS was secured, it was time to look for a web application to conveniently manage my files. It was looking bright for NextCloud until I found another freemium tool called FileRun, it looks like a clone of Google Drive. There's a readily available docker compose file which was used to get this up and about.
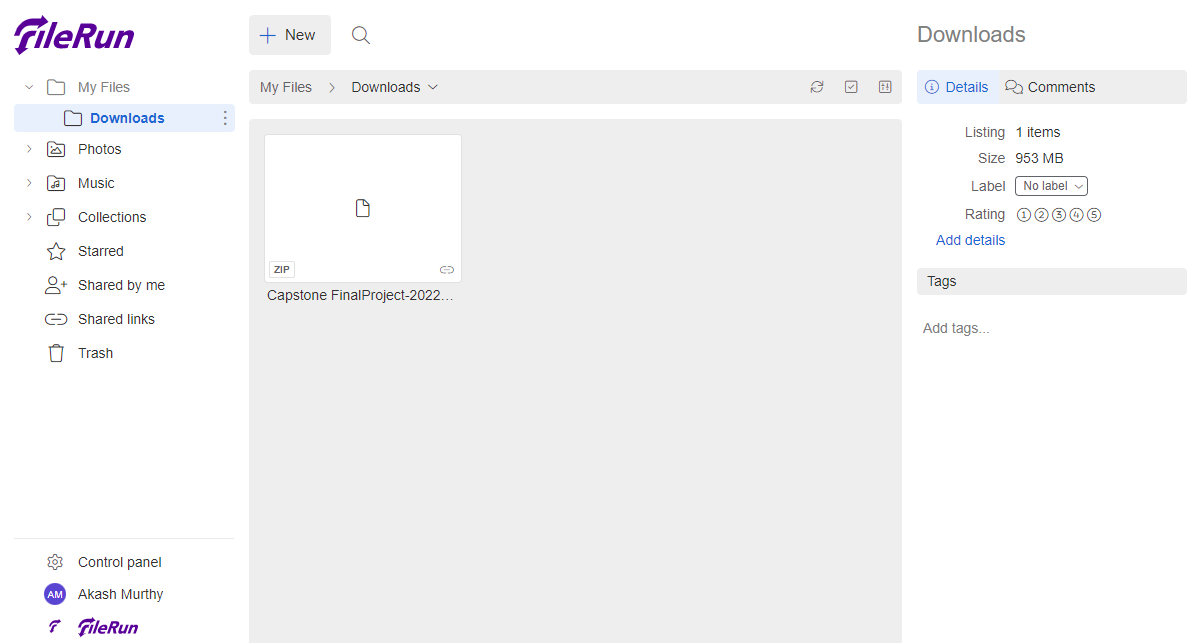
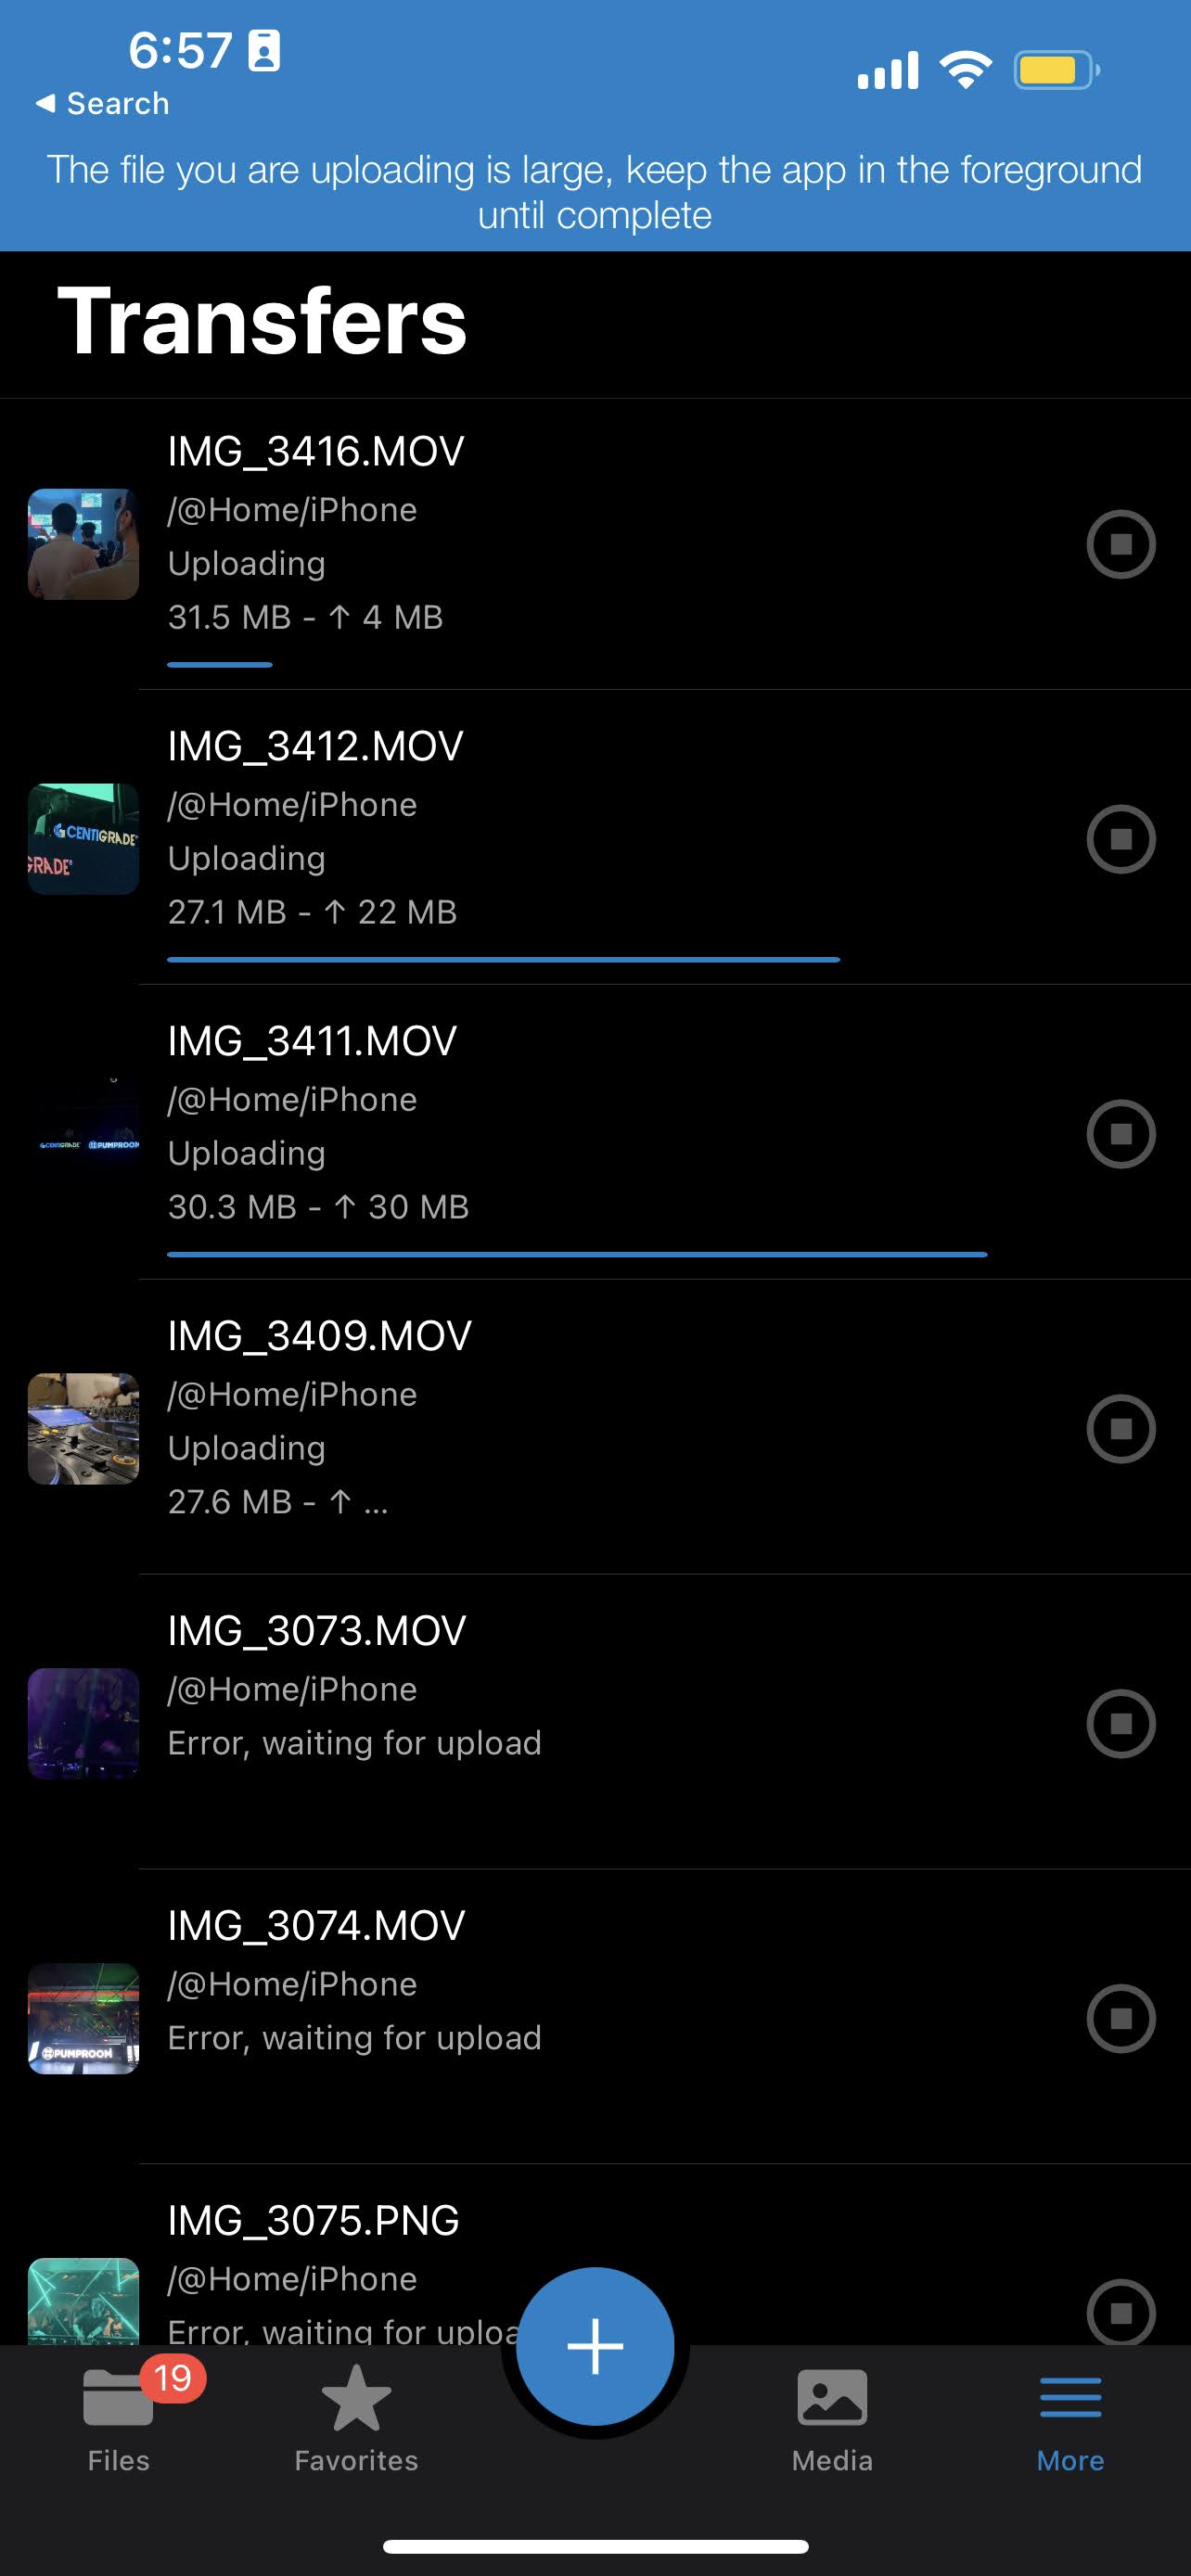
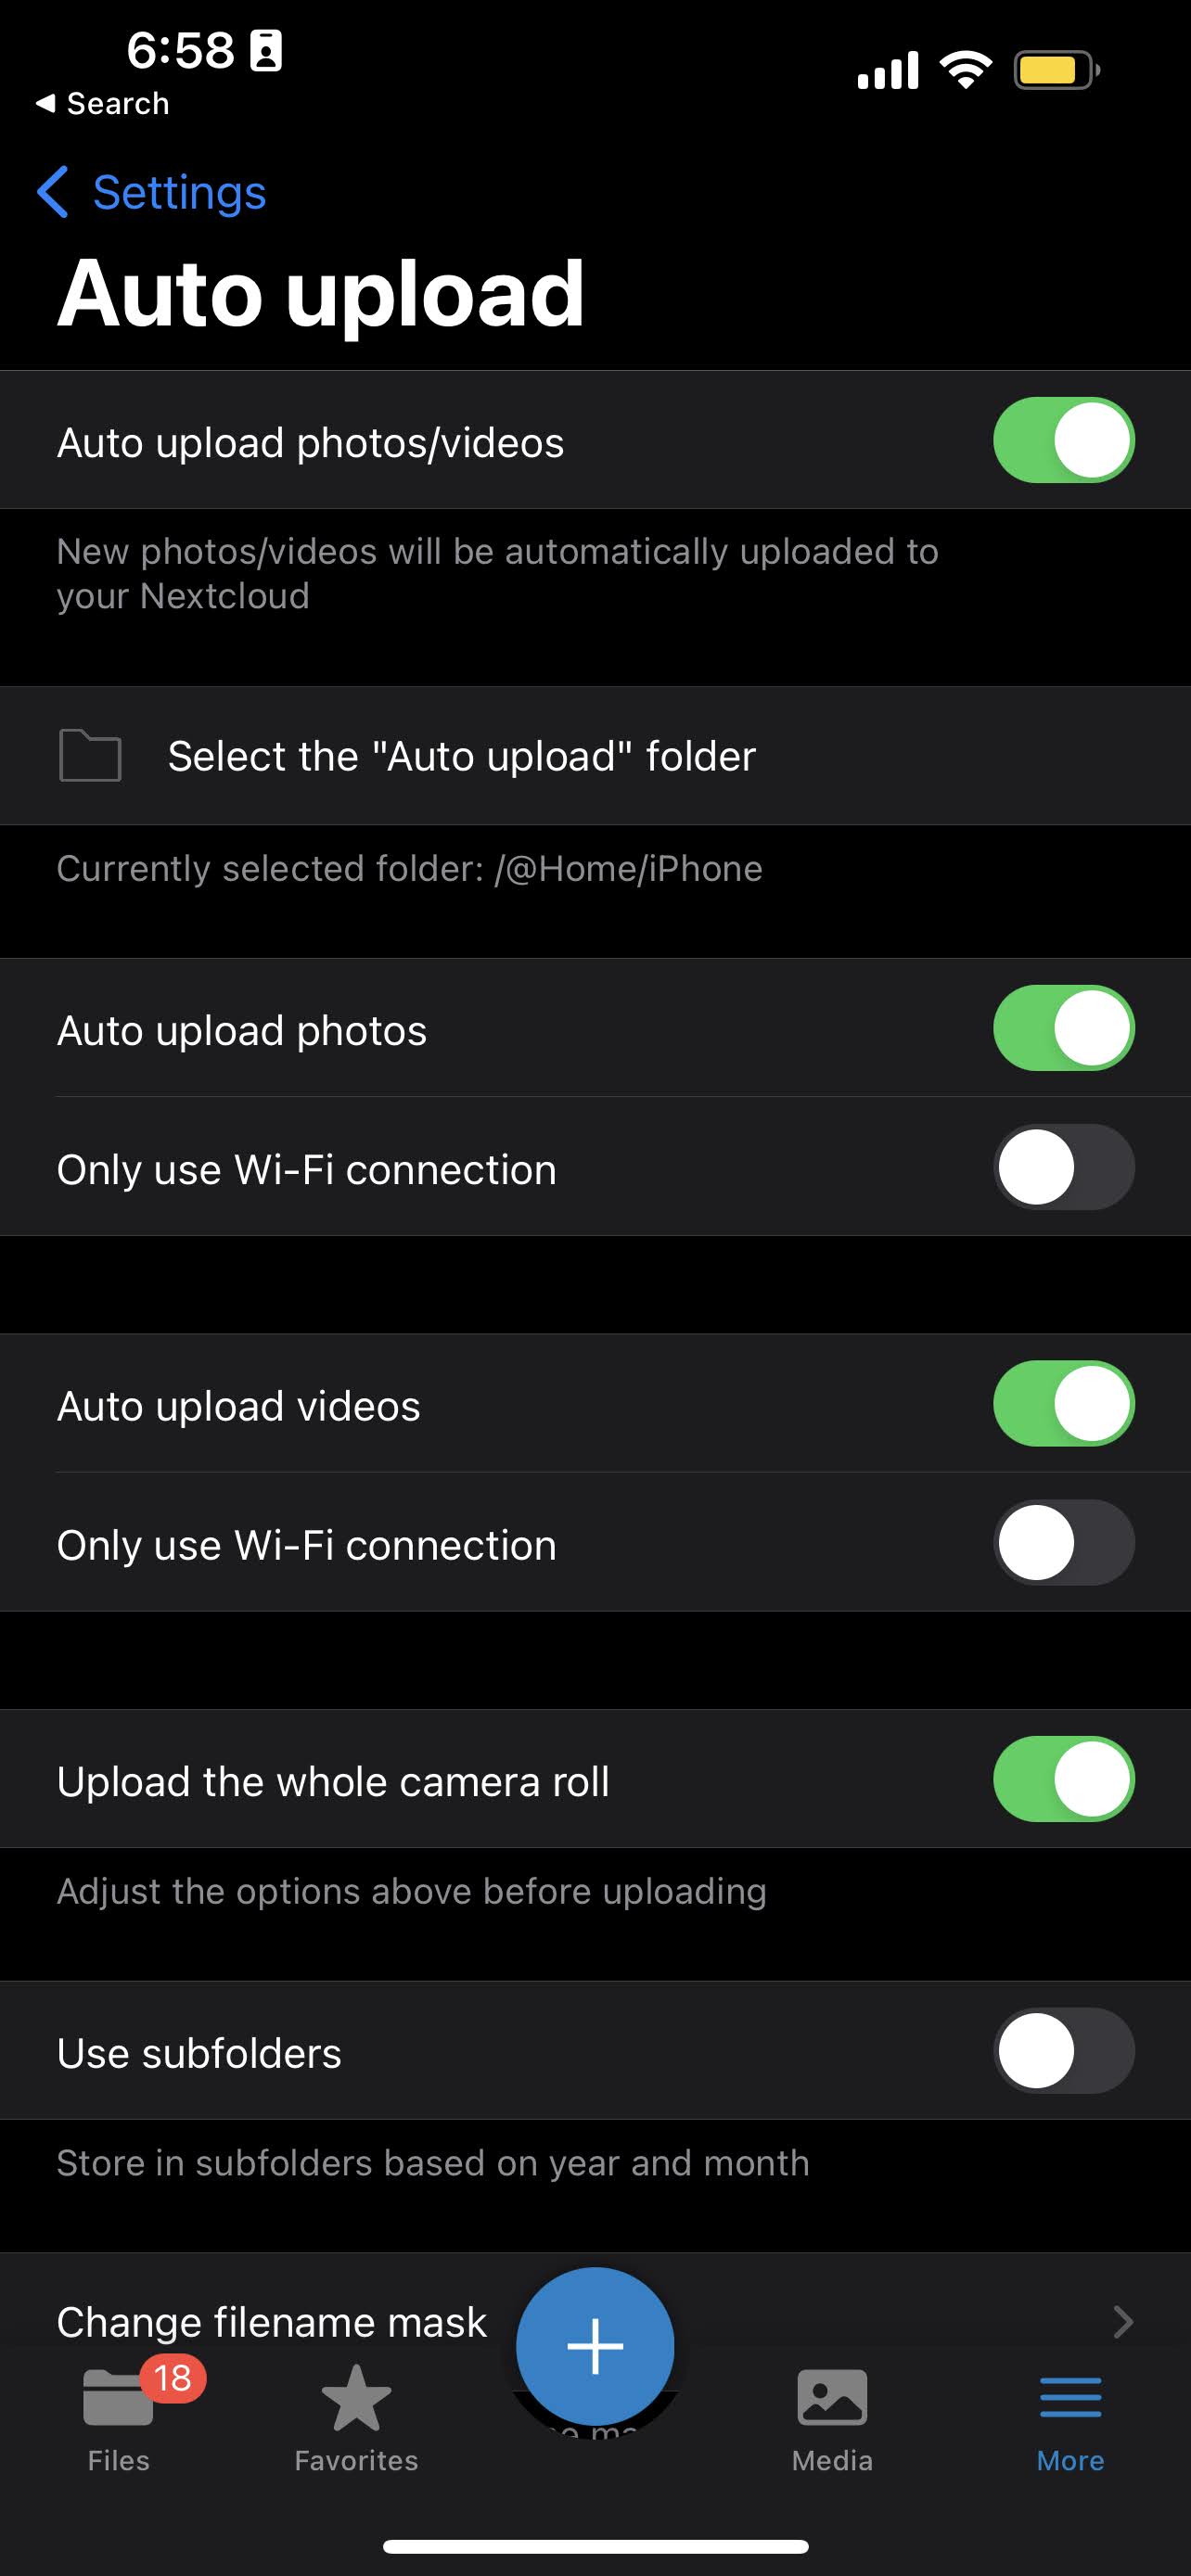
Using the NextCloud App on mobile, I could auto upload my complete media library (All photos and videos with EXIF metadata) on demand. This is particularly useful as I do not have to use other platforms like Google Photos and iCloud to share and sync my memories. Sharing uncompressed files with my friends using android devices is easier and free!
Cloud
External Access
To truly be able to access my files from anywhere, I require a means to connect to my system over the internet. This is usually achieved by setting up dynamic DNS or purchasing a public-static IP from your ISP.
Before all this, you would need to pick up a domain to resolve from a registrar. I bought a domain ending with dev. Seemed like a short form for developer and is part of the HTTP Strict-Transport-Security (HSTS) list. This mean it defaults to HTTPS on most browsers.
My nameservers were set up with Cloudflare on a free plan which includes CDN proxy and most security features like DNSSEC that was enabled. This plan includes Argo Tunnel and E-mail routing. Now Argo tunnels allow you to forward traffic from a host like my Raspberry Pi and sent to CloudFlare servers, so clients can be served with this data from your host. This saves time and resources as it negates the need for a public IP and SSL certificates (I know Let's Encrypt is a free option, but still!). E-mail routing was set up to forward all mails to a personal email ID.

Having all my subdomains point to different ports on my host system was a breeze. I also setup SSH browser rendering to quickly be able to execute commands when I need to. More about this later down.
Home Assistant
One stop for all smart home devices
With the sole intent of being able to control all my smart home devices using Siri, I looked for tools that would act as a bridge between Apple and third party smart home devices. Turns out there's a big community supporting a software known as Home assistant with custom integrations and add-ons.
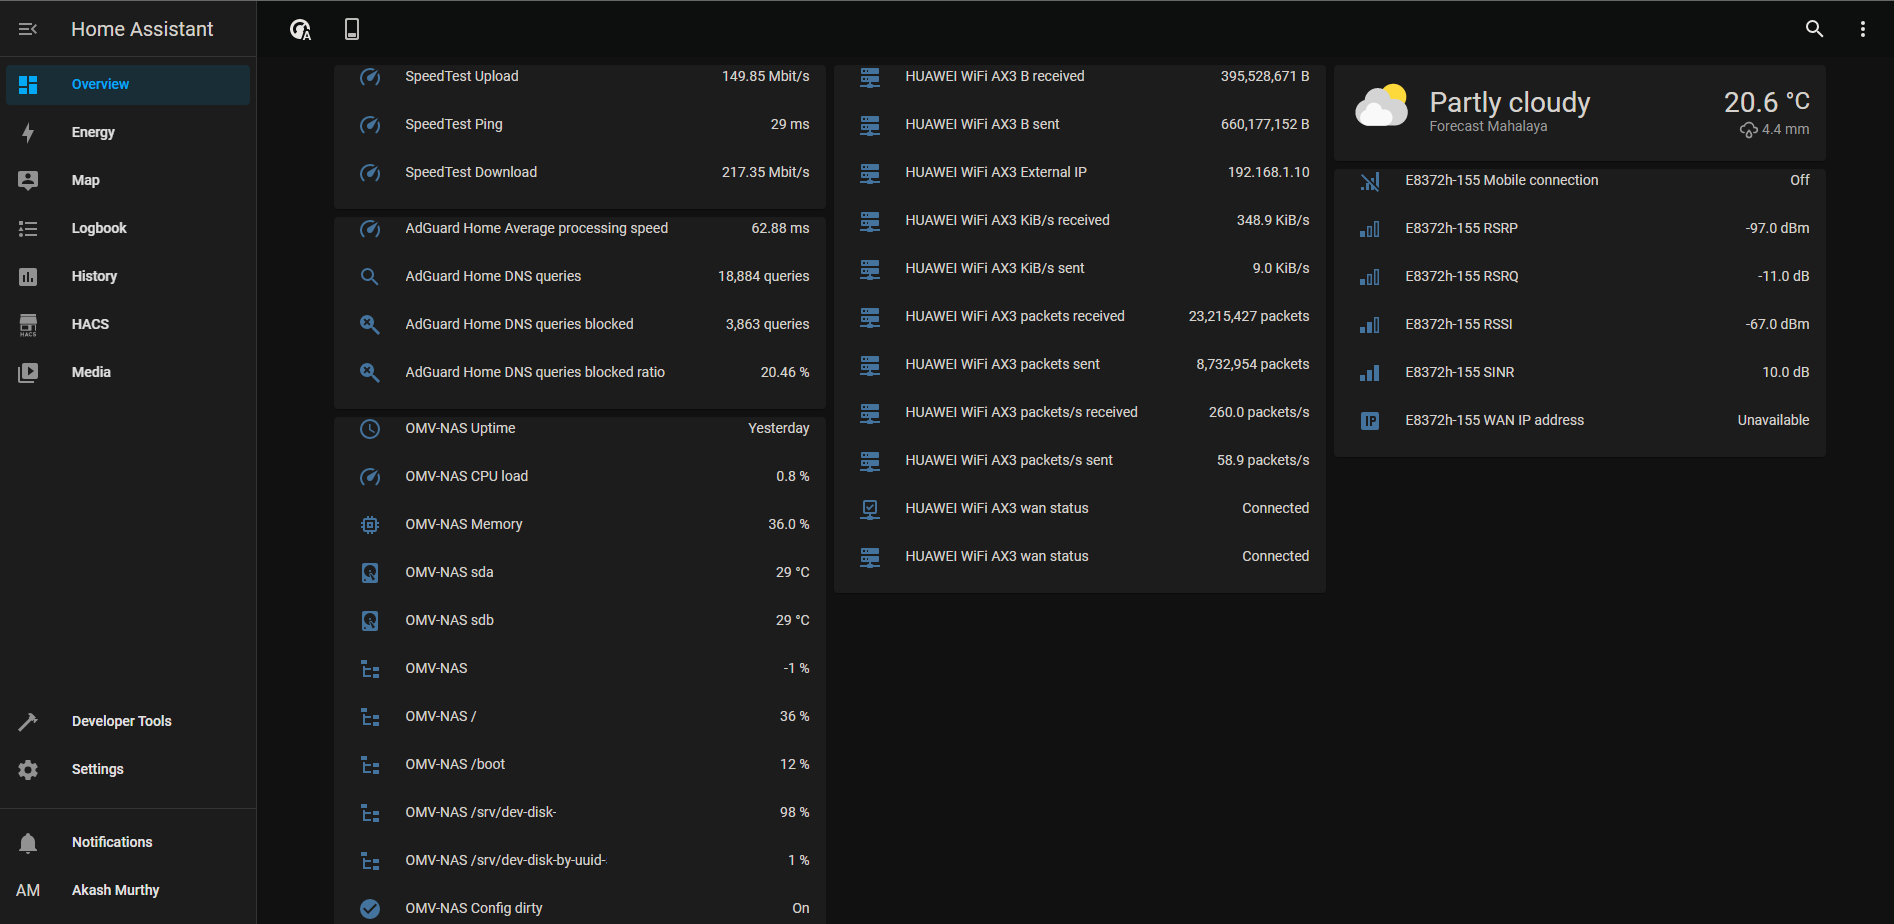
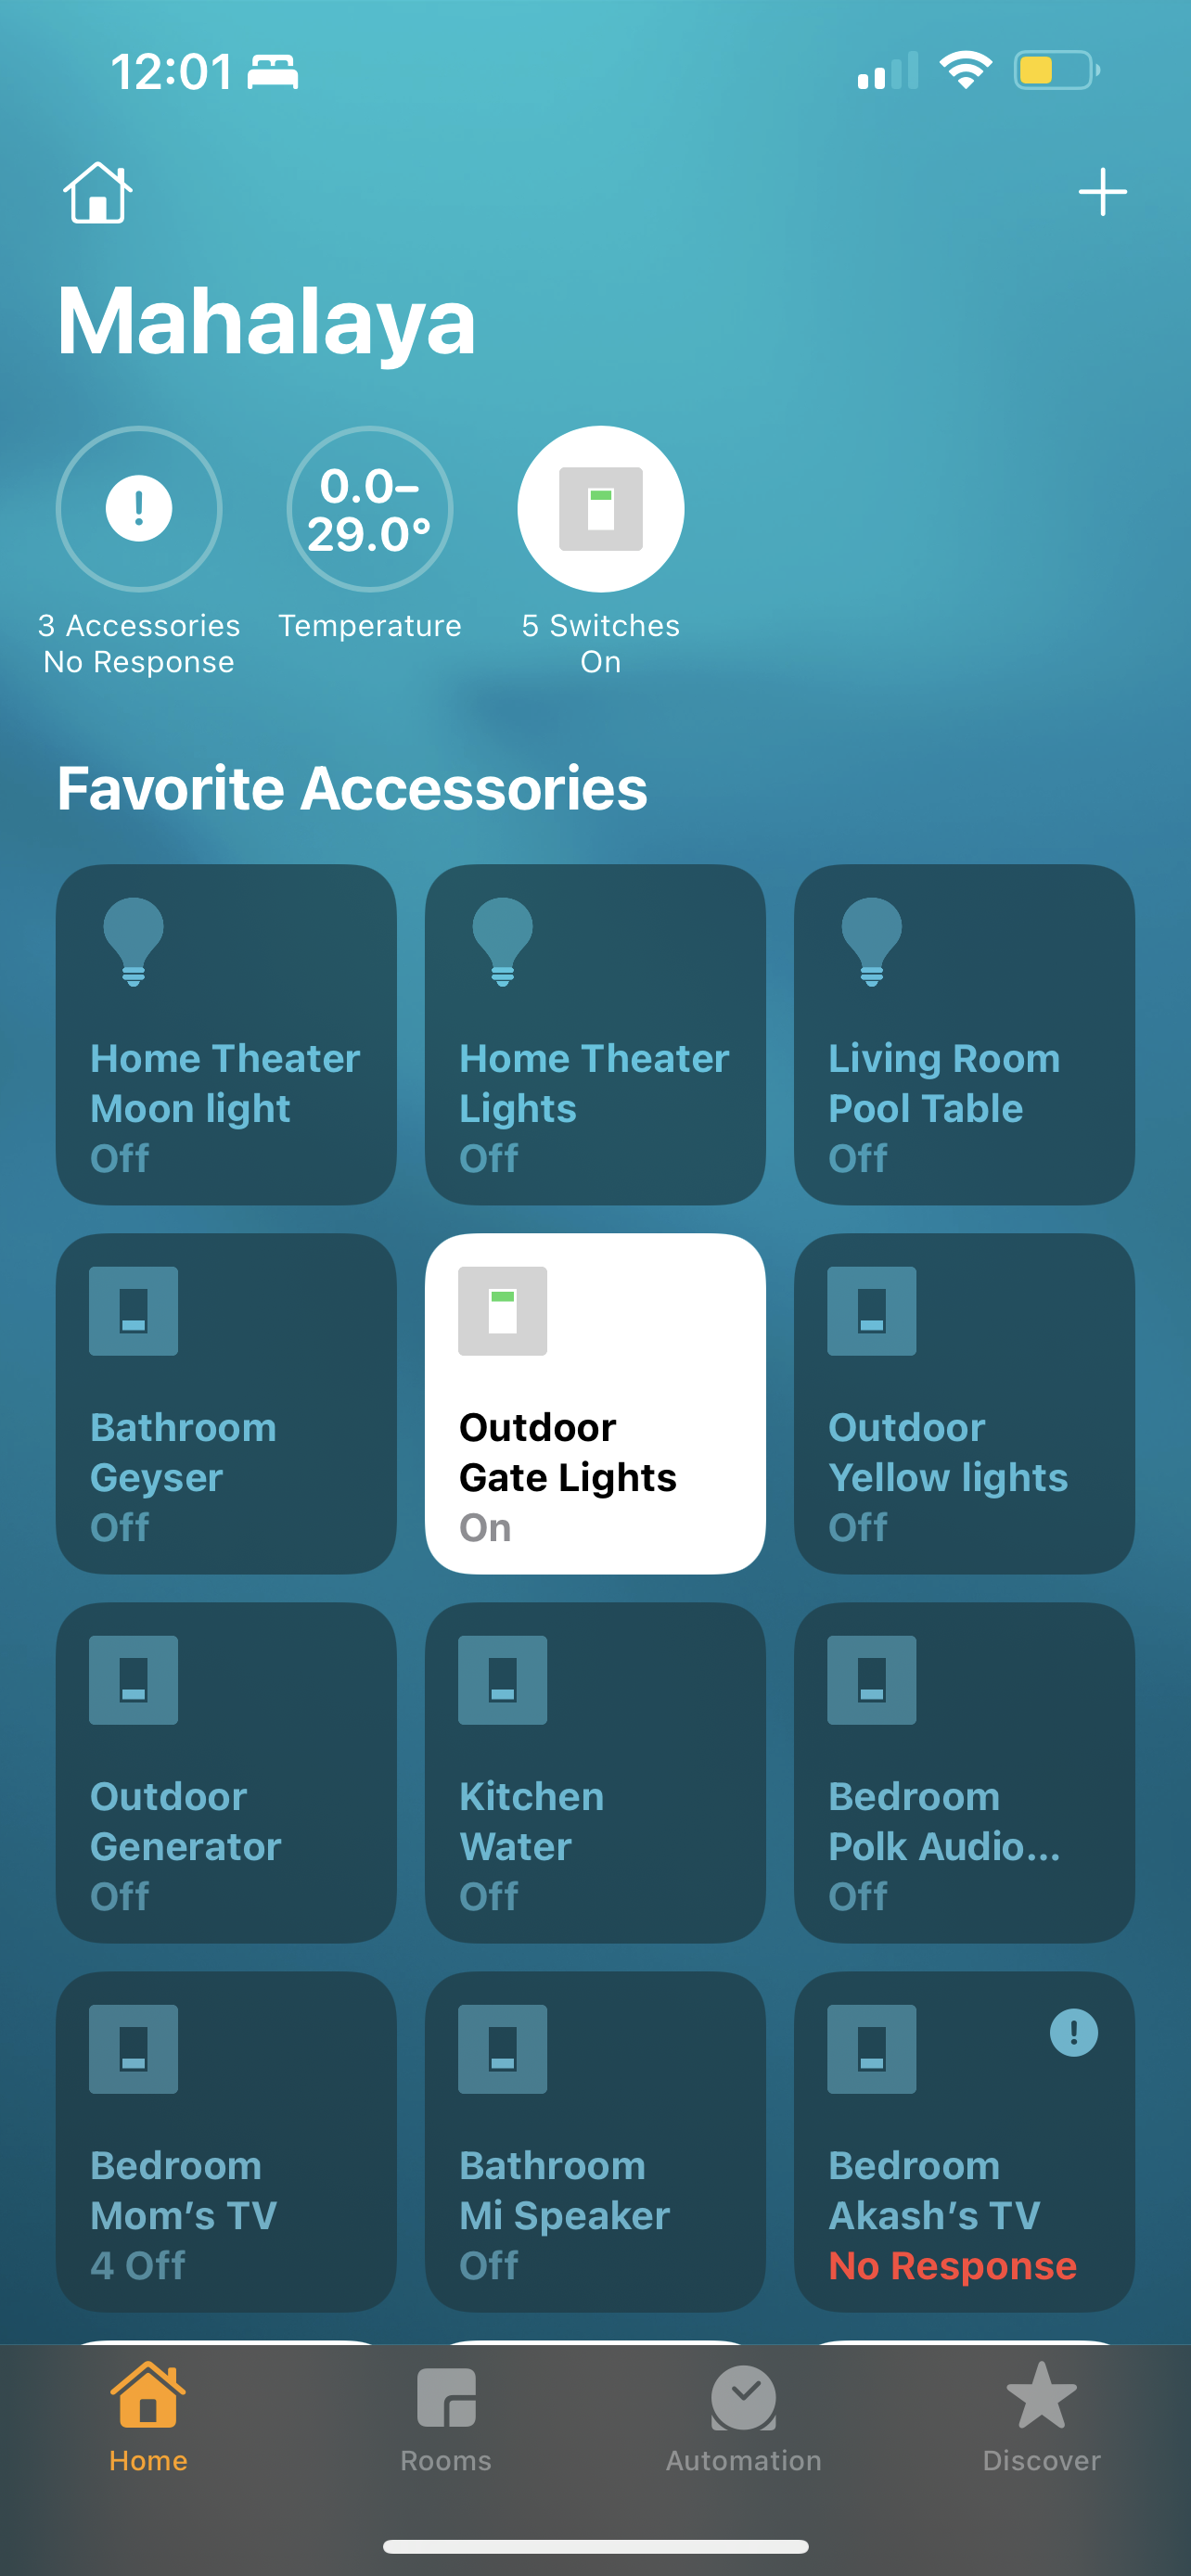
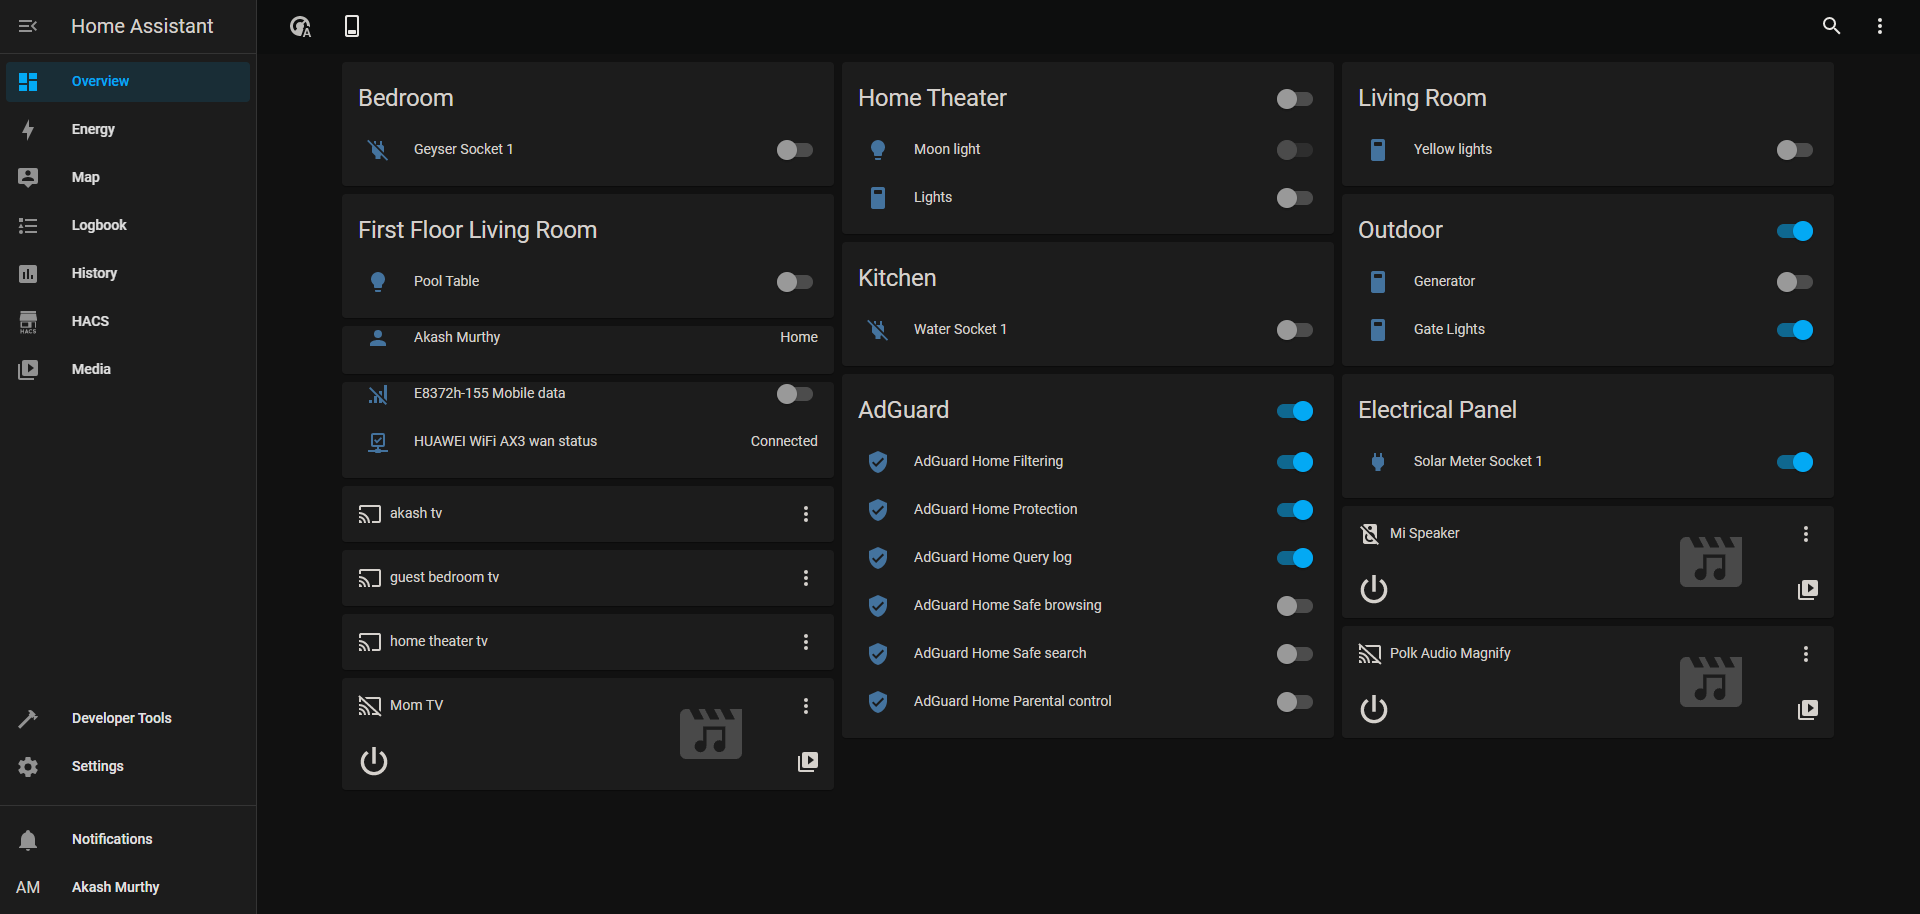
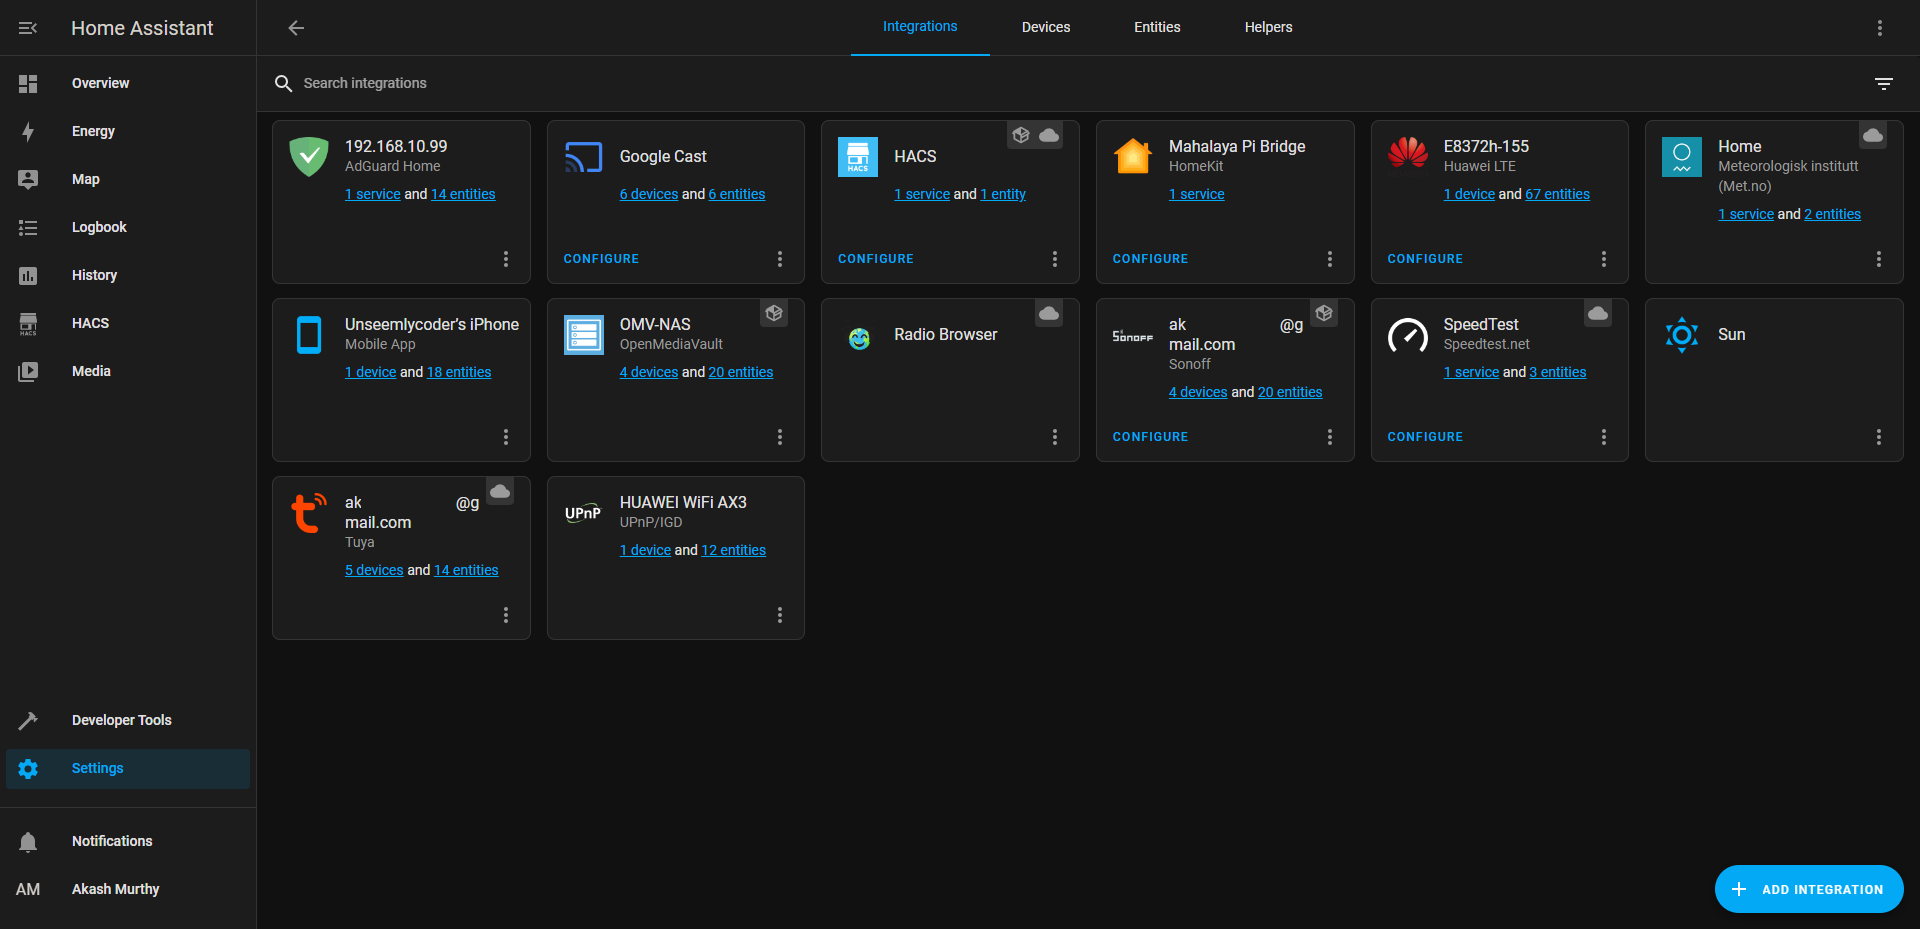
Each vendor has their own add-ons and integrations that are mostly well documented. Every OEM has different ways of connecting to their API Endpoint and several access and secret keys to keep track of. I went with the container approach for Home Assistant using docker. This meant I did not have supervisor on Home Assistant, and used HACS - Home Assistant Community Store as a work around for many off the shelf integration.
All switches, televisions, binary and temperature sensors showed up perfectly, apart from the unsupported accessory warning on initial setup. Now, I can issue commands to Siri from any Apple device. If I add a new accessory, it automatically gets updated and shows up on the list.
Automation of WAN failover in case the fiber line to my house breaks, was easy to set up. Upon offline WAN status being signaled from my router, a backup LTE modem is turned on to maintain connectivity at home to the internet.
DNS Server
Giving you turn by turn navigation recursively
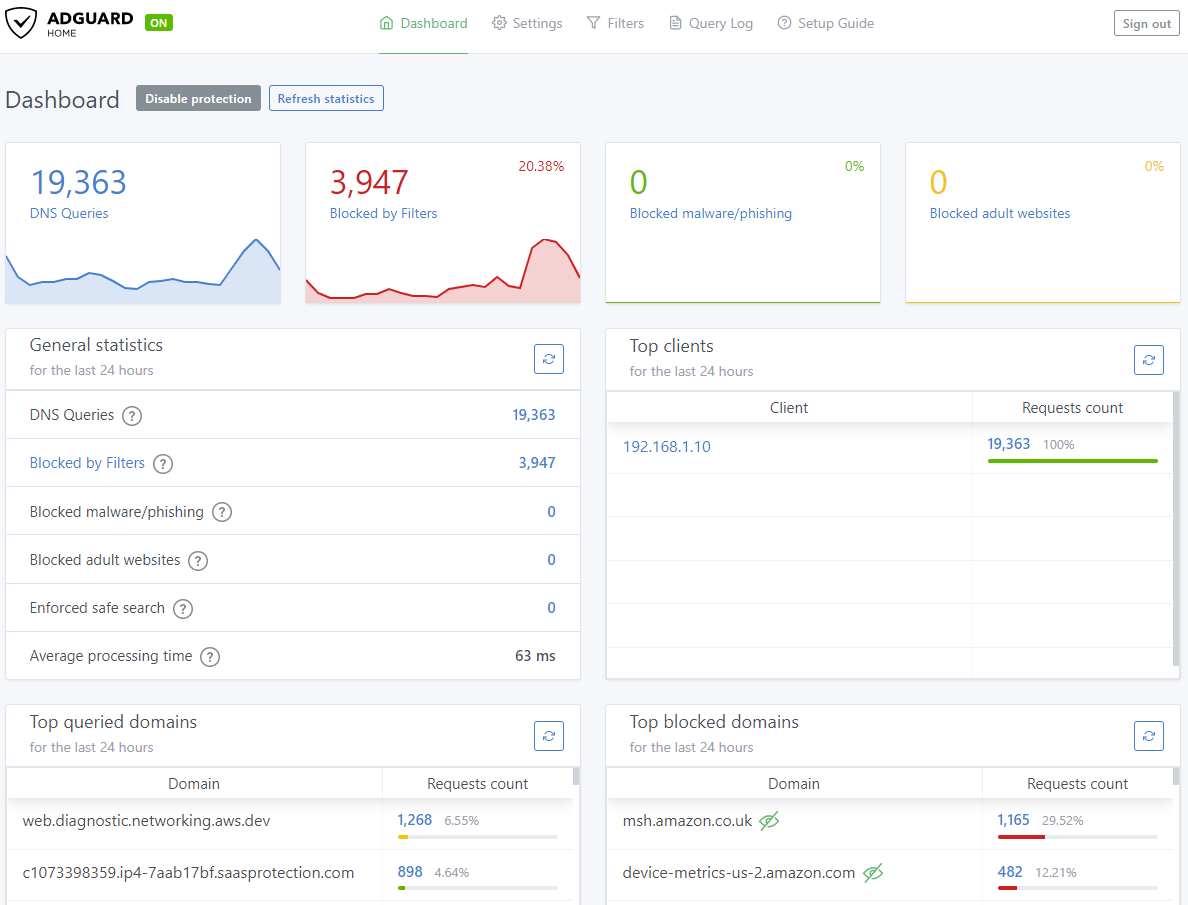
With all these services running, its easy to lose track of the IP addresses and port numbers. A local DNS server will only help with the former. AdGuard and PiHole are the two services that are highly popular in the HomeLab community. You can set custom domain names for several local IP addresses and the services will answer DNS queries with the local IP address of the Host.
The main highlight of these services is blocking trackers and ads. They work by comparing a DNS query to a list of known trackers and ad sites and responding with an unreachable IP address. This is known as DNS sink holing.
The docker container running this service was assigned a virtual mac address and an IP address on the host segment. This allows the main router to get DNS responses for every device on the network, from the DNS server.
I setup my main router running a DHCP server to redirect all DNS queries to the Pi. In this fashion, every device on the network will get the same answers!
Databases
Did you cover all the bases?
The backend system in place for this website and FileRun is an RDBMS - MySQL. To store the readings of my solar power generation plant, a timeseries database was needed. InfluxDB and Prometheus are two popular options. I prefer InfluxDB due its push based approach, compared to Prometheus' pull based approach.
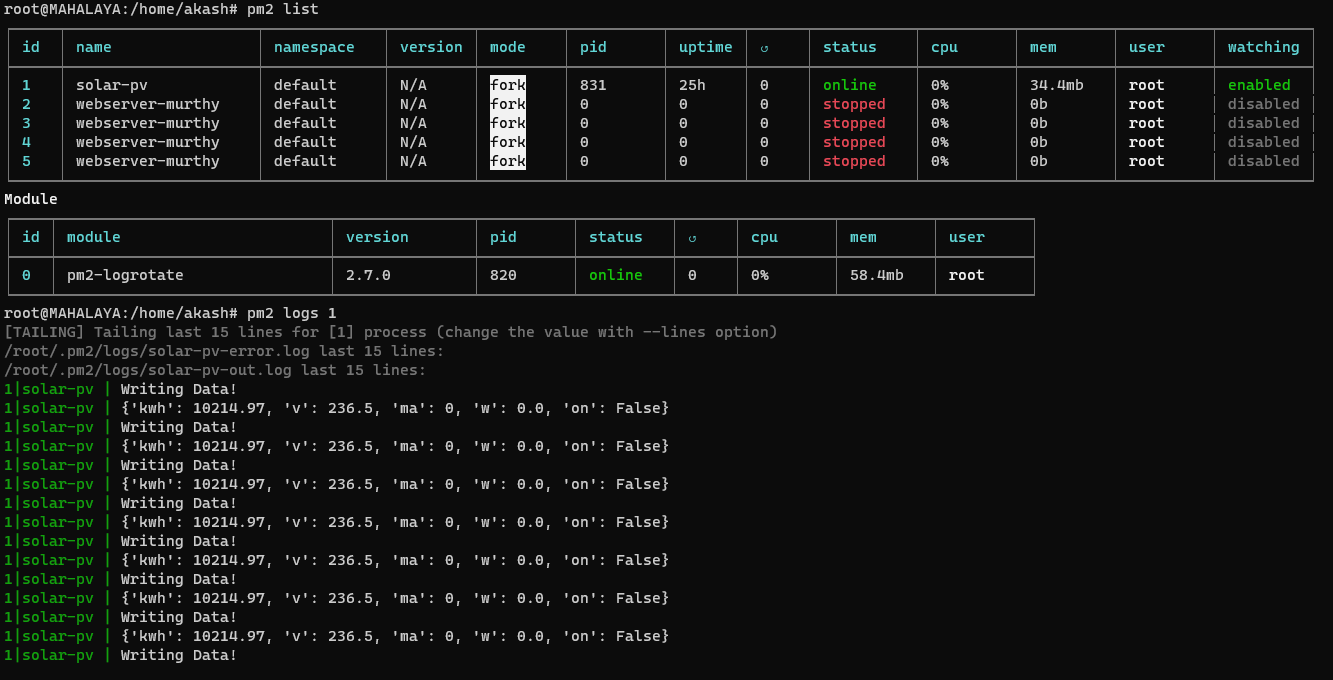
The in-built Query editor and playground, dashboards and click to generate scripts for various programing languages was a boon. I was able to run a quick python script to poll the readings from the sensor and write into InfluxDB every second.
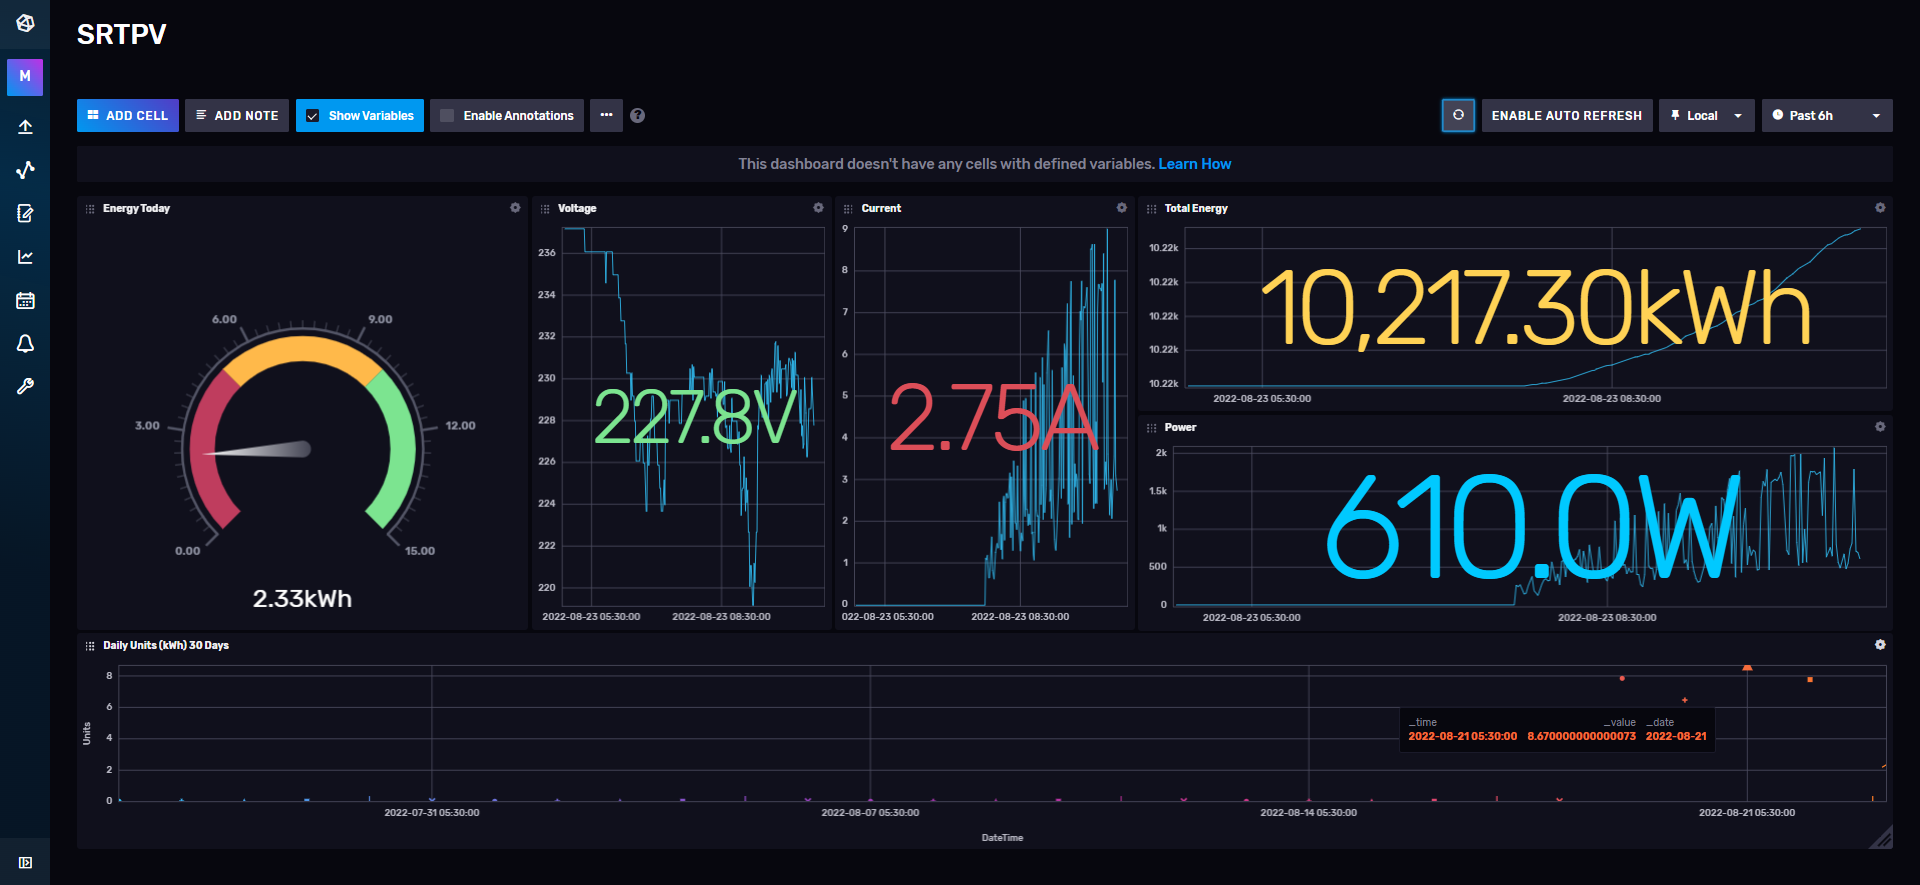

InfluxDB, being a timeseries databases is optimized for consistent data flow in per unit time. PM2 was used to monitor and run the python code.
Monitoring
What's the Uptime!?!

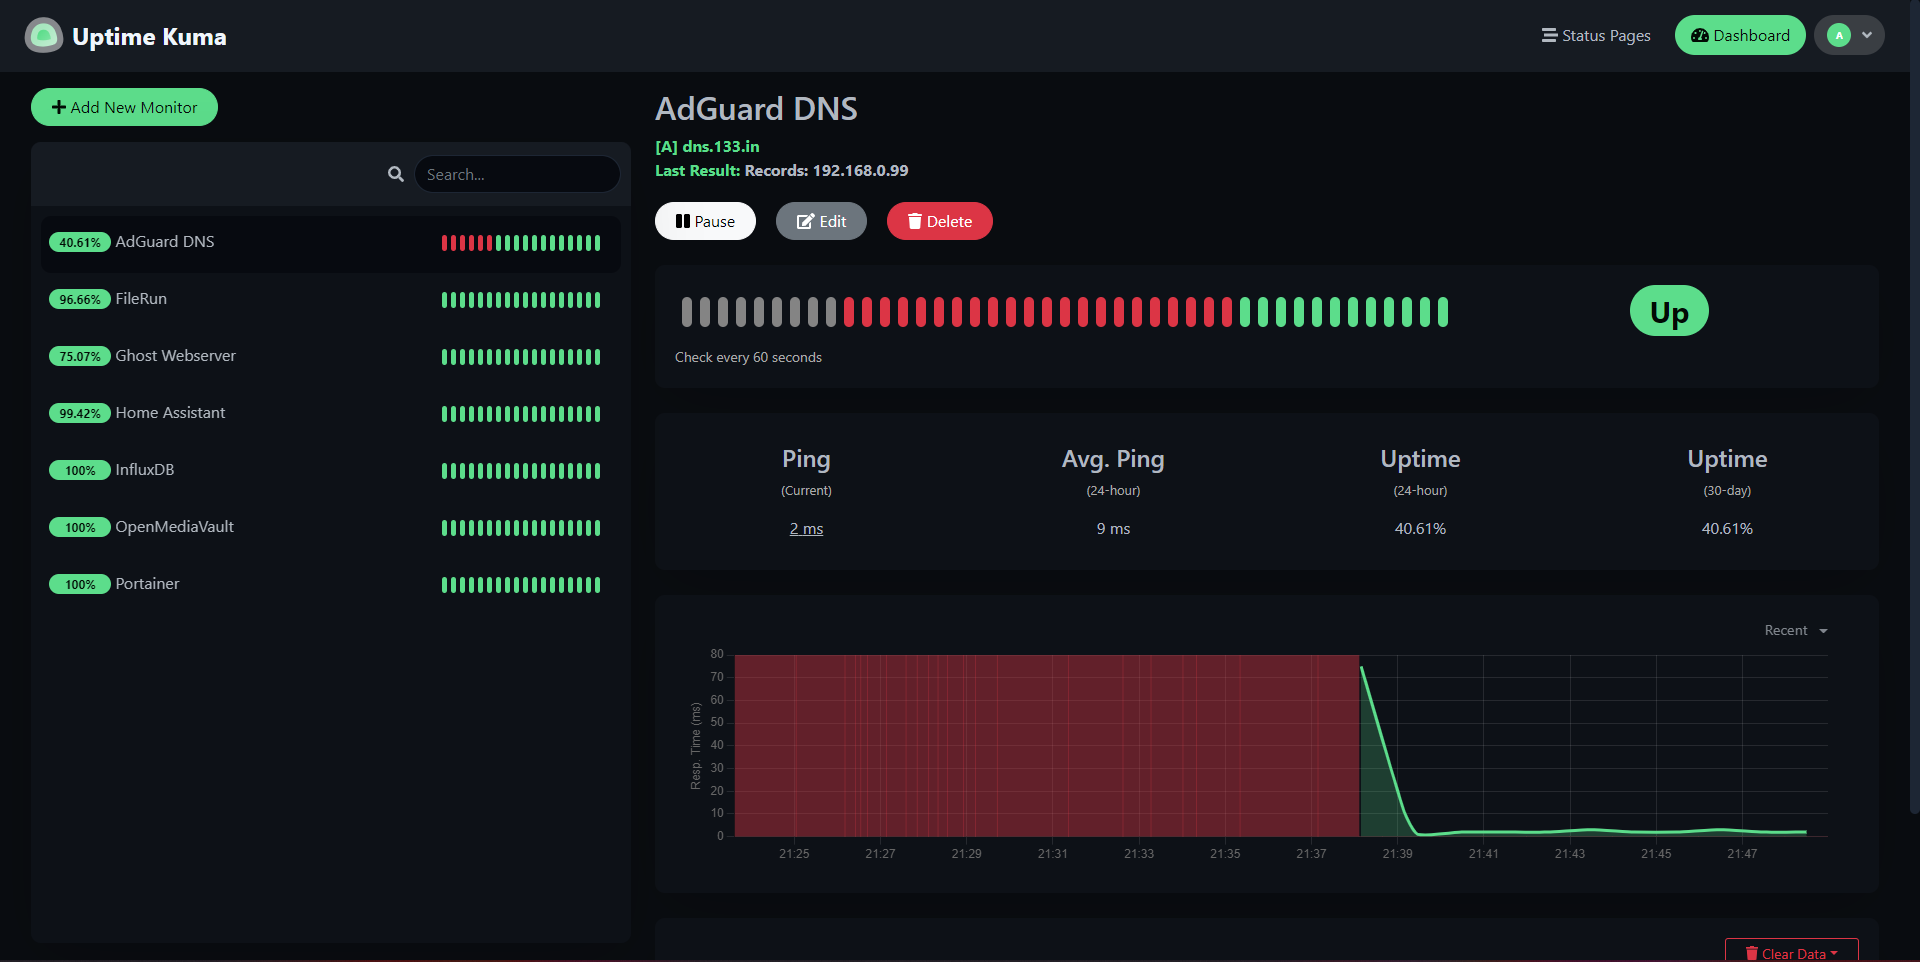
Most enterprises maintain failovers and load balance all their services. At home, I'm fine with just knowing what's up and what's down. An open source project by the name Uptime Kuma was just the right pick.
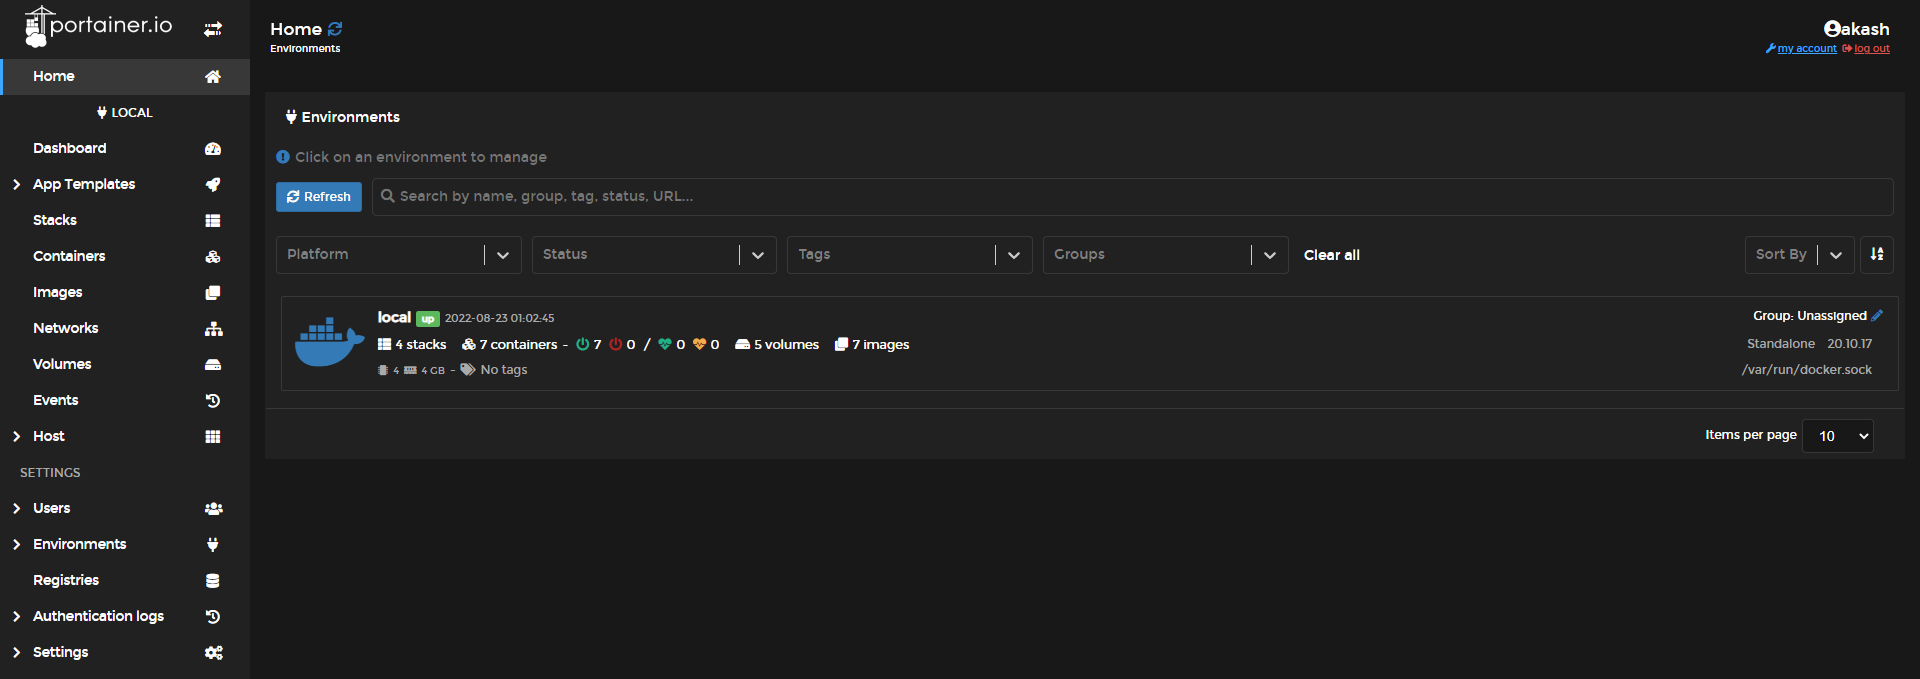
I also use Portainer to maintain and deploy docker containers.
Website
A space to express myself
I tried going full stack, setting up mongoDB and next.js, only to realize it was not easy to maintain a bunch of pages and links manually. So I pivoted to static site generators like Astro, Hugo and 11ty. Although writing in markdown was better than the above approach, it still requires effort from a management perspective.
I was against using Wordpress, having a bad experience from past projects. When I started looking into alternative CMS', I found ghost. Ghost has the option to work as a headless CMS and is lightweight. I went ahead and deployed it as a container. Updating it was as easy as changing the image.
Wi-Fi 6
802.11AX is here!
Staying in a house with multiple concrete walls, Wi-Fi tends to lose signal strength as you move away from the router. Which is why we has multiple access point with different SSIDs like bedroom_wifi, staircase_wifi, kitchen_wifi, etc.
Looking at new standards and technologies, it was clear that Wi-Fi roaming was the way to go with multiple access points. And that's exactly what I did, replacing my wireless infrastructure with a new mesh networked infrastructure that uses an ethernet backhaul.
So many new tech standards like BSS coloring, OFMDA, Target Wake Time, etc.
There were a lot of options to choose from. My main criteria was price. TP-Link's Deco range was the at the top of my list, but this proved expensive. My home required at least 4 access points, and my requirement of 802.11AX and Wi-Fi Roaming was bumping up the cost.
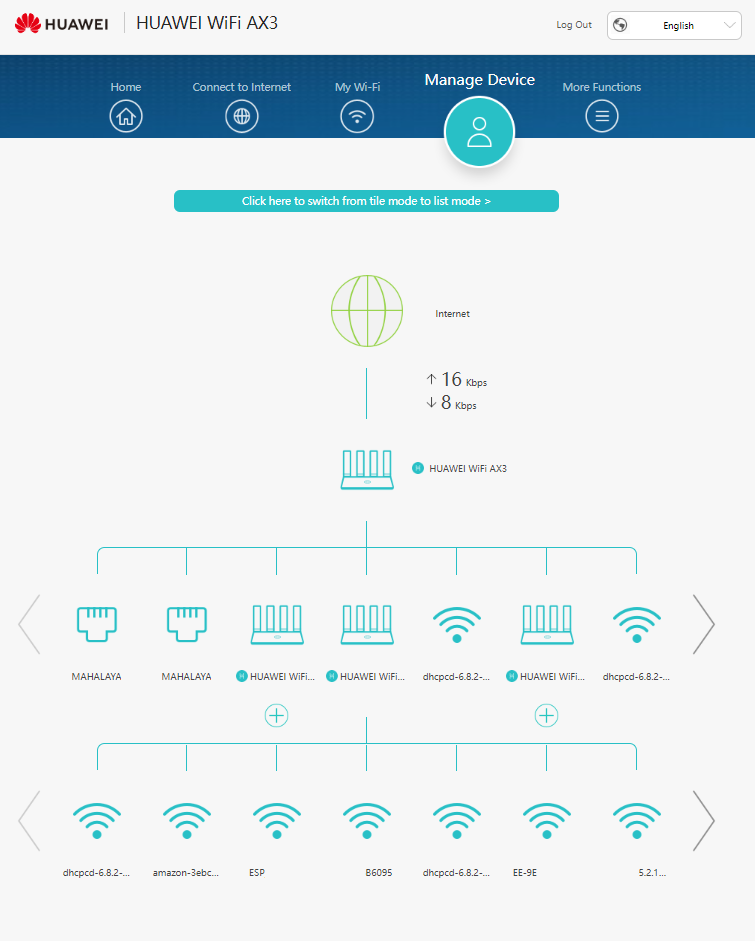
Huawei's AX3 had just entered the market and it was on sale. So I picked up one to test the range and speed. As a single router, it has horrible range but amazing speeds. The return policy of 10 days gave me some confidence, and I ordered three more routers to use in access point mode for roaming. This proved to be a good gamble, as it worked amazing in a mesh configuration.
Extras
The aftermath...
CasaOS
A low code open source software that spins up your favourite services with a click of a button as docker containers. Having deployed my services with other tools, this is something I plan on trying sometime in the future. I would have to rebase my setup with CasaOS, its hardwork alright...
Update (7 July 2023):
